background image

2901190 and 2901200 User’s Manual 


Page 16 

1.1 2901190/2901200 Flat Panel PC Overview 

The 2901190/2901200 flat panel PC is a flexible, multi-functional flat panel PC that can be 

applied in diverse operational environments and implemented in multi-faceted applications. 

The 2901190/2901200 comes fully kitted with a high-performance motherboard and a host of 

other peripheral interface connectors. The 2901190/2901200 is designed for ease of use and 

easy installation.   

1.1.1 Model Variation 

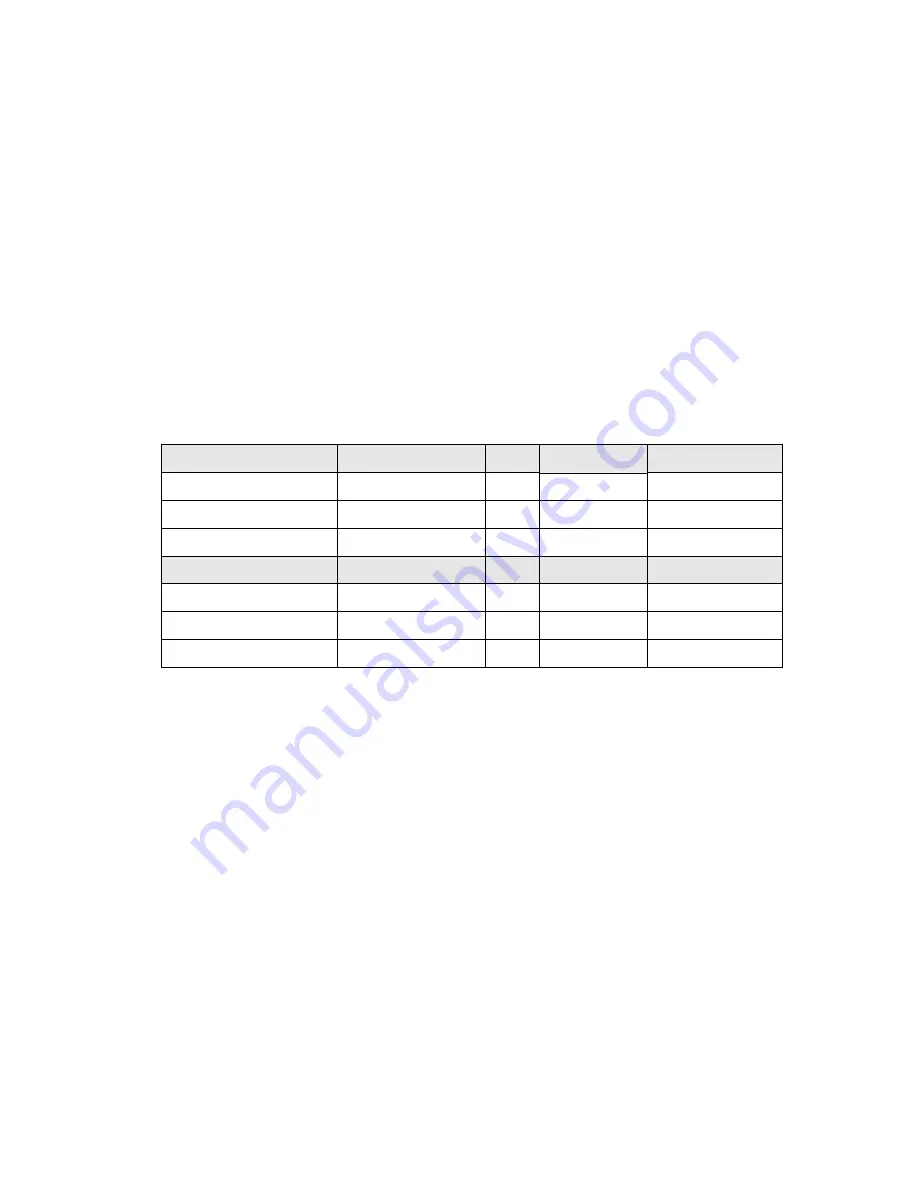
Six 2901190/2901200 models are available. The models are listed in Table 1-1. 

2901190 

CPU 

LCD 

Touch screen 

Wireless Module 

2901190A 

AMD® Geode LX 800 

10.4” 

No 

No 

2901190B 

AMD® Geode LX 800 

10.4” 

Yes 

No 

2901190C 

AMD® Geode LX 800 

10.4” 

Yes 

Yes 

2901200 

CPU 

LCD 

Touch screen 

Touch screen 

2901200A 

AMD® Geode LX 800 

12.1” 

No 

No 

2901200B 

AMD® Geode LX 800 

12.1” 

Yes 

No 

2901200C 

AMD® Geode LX 800 

12.1” 

Yes 

Yes 

Table 1-1: 2901190 and 2901200 Model Variations 

1.1.2 Applications 

The 2901190/2901200 flat panel PC is designed for rigorous industrial environments where it 

may be exposed to both heat and moisture. Its durability and strength also makes it an ideal 

choice for public access computers. Some possible applications include: 

„


Automated manufacturing processes 

„


Public information gathering point 

Summary of Contents for 2901190

Page 1: ...User s Manual 2901190 and 2901200 Version 1 0 July 2007 ...

Page 2: ...f the possibility of such damages The manufacturer keeps the rights in the subject to change the contents of this manual without prior notices in order to improve the function design performance quality and reliability The author assumes no responsibility for any errors or omissions which may appear in this manual nor does it make a commitment to update the information contained herein Trademarks ...

Page 3: ...2901190 and 2901200 User s Manual Page 3 This Page is Intentionally Left Blank ...

Page 4: ...2901190 and 2901200 User s Manual Page 4 This Page is Intentionally Left Blank ...

Page 5: ...190 2901200 flat panel PC 1 x Power cord 1 x 45W power adapter 1 x Screw kit 1 x Jumper pack 1 x PS 2 keyboard mouse Y cable 1 x User Manual and driver CD 1 x Panel mounting kit 1 x Wall mounting kit 1 x Rack mounting kit optional 1 x Arm mounting kit optional 1 x Stand mounting kit optional Images of the above items are shown in Chapter 3 ...

Page 6: ...nplug the power cord and contact the vendor 6 Explosions may occur with installations in environments where flammable gases are present 7 Fault tolerant and failsafe designs should be implemented with the use of the series models on transportation vehicles ships safety security devices or medical devices not related to life support functionalities Users integrators should take the responsibility f...

Page 7: ...d damage by transient over voltage 9 If any of the following situations arises get the equipment checked by service personnel 0 o The power cord or plug is damaged o Liquid has penetrated into the equipment o The equipment has been exposed to moisture o The equipment does not work properly or the user cannot get it to work according to the user manual o The equipment has been dropped and damaged o...

Page 8: ...ough many companies have created products to help improve the process of cleaning the computer and peripherals users can also use household items to clean their computers and peripherals Below is a list of items to use while cleaning the computer or computer peripherals Please keep in mind that some components in the computer may only be cleaned using a product designed for cleaning that component...

Page 9: ... Foam swabs Whenever possible it is better to use lint free swabs such as foam swabs ESD PRECAUTIONS Observe all conventional anti ESD methods while handling the components contained within the LCD should the need arise for adding a functionality The use of a grounded wrist strap and an anti static work pad is recommended Avoid dust and debris or other static accumulating materials in the work are...

Page 10: ...de Panel 20 1 3 INTERNAL OVERVIEW 20 1 4 SPECIFICATIONS 20 1 4 1 Preinstalled Hardware Components 20 1 4 2 System Specifications 21 1 4 3 Motherboard Specifications 22 1 4 4 Flat Panel Screen Specifications 23 1 5 DIMENSIONS 25 1 5 1 2901190 Dimensions 25 1 5 2 2901200 Dimensions 26 2 MOTHERBOARD 27 2 1 INTRODUCTION 28 2 2 CPU SUPPORT 28 2 2 1 AMD Geode LX 800 500MHz Specifications 28 2 2 2 AMD Ge...

Page 11: ...nal Items 39 3 5 COMPACTFLASH CARD INSTALLATION 40 3 6 REMOVE THE BACK COVER 40 3 7 JUMPER SETTINGS 41 3 7 1 JP3 COM3 Pin 9 Signal Select Jumper Settings 42 3 7 2 JP4 COM1 and COM2 Pin 9 Signal Select Jumper Settings 42 3 8 HDD INSTALLATION 43 3 9 MEMORY MODULE INSTALLATION 44 3 10 MOUNTING THE SYSTEM 46 3 10 1 Wall Mounting 46 3 10 2 Panel Mounting 49 3 10 3 Arm Mounting 51 3 10 4 Cabinet and Rac...

Page 12: ...igure 3 3 Jumper Locations 42 Figure 3 4 HDD Bracket Retention Screws 43 Figure 3 5 2901190 2901200 HDD Bracket Retention Screws 44 Figure 3 6 2901190 2901200 SO DIMM Socket Location 45 Figure 3 7 SO DIMM Module Installation 45 Figure 3 8 Wall mounting Bracket 47 Figure 3 9 Mount the Chassis 48 Figure 3 10 Secure the Chassis 49 Figure 3 11 2901190 Panel Opening 50 Figure 3 12 2901200 Panel Opening...

Page 13: ...erboard Specifications 23 Table 1 4 2901190 2901200 TFT LCD Monitor Specifications 24 Table 2 1 Geode LX Graphics Features 31 Table 3 1 Package List Contents 39 Table 3 2 Optional Items 39 Table 3 3 COM3 Pin 9 Signal Select Jumper Settings 42 Table 3 4 COM1 and COM2 Pin 9 Signal Select Jumper Settings 43 Table 5 1 BIOS Navigation Keys Error Bookmark not defined ...

Page 14: ...2901190 and 2901200 User s Manual Page 14 THIS PAGE IS INTENTIONALLY LEFT BLANK ...

Page 15: ...2901190 and 2901200 User s Manual Page 15 1 Introduction Chapter 1 ...

Page 16: ...odels are listed in Table 1 1 2901190 CPU LCD Touch screen Wireless Module 2901190A AMD Geode LX 800 10 4 No No 2901190B AMD Geode LX 800 10 4 Yes No 2901190C AMD Geode LX 800 10 4 Yes Yes 2901200 CPU LCD Touch screen Touch screen 2901200A AMD Geode LX 800 12 1 No No 2901200B AMD Geode LX 800 12 1 Yes No 2901200C AMD Geode LX 800 12 1 Yes Yes Table 1 1 2901190 and 2901200 Model Variations 1 1 2 Ap...

Page 17: ...ion process RoHS compliance 1 2 External Overview 1 2 1 General Description The 2901190 2901200 flat panel PC is a rectangular cubic structure that comprises of a screen rear panel top panel bottom panel and two side panels left and right An aluminum frame surrounds the front screen The rear panel provides screw holes for a wall mounting bracket The bottom panel provides access to external interfa...

Page 18: ... wall mounting Refer to Figure 1 2 Figure 1 2 2901190 Rear View 1 2 4 Top Panel The top panel of 2901190 2901200 provides access to three retention screws that support to secure the back cover to the chassis A connector reserved for wireless LAN antenna for 2901190C or 2901200C model is also located in the top panel The retention screws and antenna connector are circled in Figure 1 3 below ...

Page 19: ...90 2901200 has the following I O interfaces Figure 1 4 1 x PS 2 keyboard mouse connector 1 x Audio jack 1 x VGA connector 1 x AC power adapter connector 1 x Power switch 2 x Serial port COM connectors 2 x RJ 45 10 100Mbps Ethernet connectors 2 x USB 2 0 connectors 1 x Reset button Figure 1 4 2901190 2901200 Bottom View ...

Page 20: ...2901190 2901200 internal components are configured in a two level format The motherboard and 2 5 HDD are installed on a metal sheet that protects the rear of the TFT LCD screen Below the metal sheet is a circuit board that is connected to the screen and the motherboard 1 4 Specifications 1 4 1 Preinstalled Hardware Components The 2901190 2901200 flat panel PC has the following preinstalled compone...

Page 21: ...ion 800 x 600 SVGA 1024 x 768 XGA Brightness 230cd m2 450cd m2 Contrast Ratio 500 1 700 1 Viewing Angle H V 140 120 160 160 Backlight MTBF 30 000 hrs 30 000 hrs Touch Screen Optional 5 wire resistive type touch screen Drive Bay One 2 5 IDE HDD bay I O 2 x USB 2 0 ports 1 x keyboard mouse port 1 x VGA port 2 x LAN 2 x RS 232 1 x Audio jack 1 x IDE 2 x USB 2 0 ports 1 x keyboard mouse port 1 x VGA p...

Page 22: ... Shock 10G Acceleration peak to peak 11ms Dimension W x H x D 311 5mm x 242mm x 55mm 340mm x 260mm x 60 4mm Net Gross Weight 2 7kg 4 9kg 3 9kg 5 4kg Front Panel Protection IP 65 compliant Certificate Meets CE FCC Table 1 2 2901190 2901200 Specifications 1 4 3 Motherboard Specifications The 2901190 and 2901200 both come with an AMD Geode LX 800 motherboard The technical specifications of the mother...

Page 23: ...t controllers COM Two RS 232 serial port s IDE One 44 pin IDE connects to two IDE devices Touch Screen Controller DMC9000 Power Supply 12V ATX power support Dimensions 102mm x 186mm Table 1 3 Motherboard Specifications 1 4 4 Flat Panel Screen Specifications The 2901190 2901200 comes with a TFT LCD monitor at the front of the flat panel PC see Figure 1 1 The specifications for the LCD monitor are s...

Page 24: ...2K colors Native 262K colors View Angel H V 120 100 160 160 Brightness cd m2 230 450 Contrast Ratio 500 1 700 1 Response Time ms 35 at 25 C 6 Tr 17 Tf Power Consumption W 2 52 4 Supply Voltage V 3 3 3 3 Backlight 1 CCFL 2 CCFL Outline Dimensions mm 236 0 x 174 0 x 5 6 260 x 204 x 12 2 Backlight MTBF hrs 20000 50000 Table 1 4 2901190 2901200 TFT LCD Monitor Specifications ...

Page 25: ...2901190 and 2901200 User s Manual Page 25 1 5 Dimensions 1 5 1 2901190 Dimensions The dimensions of the 2901190 flat panel PC are shown in Figure 1 6 below Figure 1 6 2901190 Dimensions units in mm ...

Page 26: ...2901190 and 2901200 User s Manual Page 26 1 5 2 2901200 Dimensions The dimensions of the 2901200 flat panel PC are shown in Figure 1 7 below Figure 1 7 2901200 Dimensions units in mm ...

Page 27: ...2901190 and 2901200 User s Manual Page 27 2 Motherboard Chapter 2 ...

Page 28: ... CPU 2 2 1 AMD Geode LX 800 500MHz Specifications The specifications for the 500MHz AMD Geode LX 800 are listed below x86 x87 compatible core Processor frequency up to 500 MHZ 64K I 64K D L1 cache and 128K L2 cache Split I D cache TLB Translation Look Aside Buffer 64 bit DDR Memory interface up to 400MHz LX 800 up to 333MHz LX 700 Integrated FPU that supports the Intel MMX and AMD 3DNow Technology...

Page 29: ... Geode CS5536 system chipset The system chipset features are listed below GeodeLink Interface Unit o 64 bit 66MHz operation o PCI VSM Virtual System Module that makes the interface transparent to applications software and BIOS o Programmable routing descriptors use and activity monitors and SSMI Synchronous System Management Interrupt ATA 6 Controller o 100 MB second IDE Controller in UDMA mode pe...

Page 30: ...processor s Graphics Processor is a BitBLT vector engine that supports pattern generation source expansion pattern source transparency 256 ternary raster operations alpha blenders to support alpha BLTs incorporated BLT FIFOs a GeodeLink interface and the ability to throttle BLTs according to video timing New features added to the Graphics Processor include Command buffer interface Hardware acceler...

Page 31: ...xt No Pattern Size Mono 8x8 pixels Pattern Size Color 8x8 pixels Monochrome Pattern Yes with inversion Dithered Pattern 4 color No Color Pattern 8 16 32 bpp Transparent Pattern Monochrome Solid Fill Yes Pattern Fill Yes Transparent Source Monochrome Color Key Source Transparency Y with mask Variable Source Stride Yes Variable Destination Stride Yes Destination Write Bursting Yes Selectable BLT Dir...

Page 32: ...es Fast Ethernet MAC physical chip and transceiver onto a single chip 10Mbps and 100Mbps operation Supports 10Mbps and 100Mbps N way auto negotiation Supports 25MHz Crystal or 25MHz OSC as the internal clock source Complies with PC99 PC2001 standards Supports ACPI power management Provides PCI bus master data transfer Provides PCI memory space or I O space mapped data transfer Supports PCI clock s...

Page 33: ...ative 2 6 2 Internal Slots The slots listed below can all be found on the AMD Geode LX 800 motherboard 1 x 200 pin DDR SO DIMM socket 1 x CF Type II slot 1 x Mini PCI slot for wireless LAN module 2 6 3 Internal Peripheral Device Connectors The peripheral device connectors listed below are located on the AMD GEODE LX 800 motherboard Pinouts for these connectors can be found in Appendix A 1 x Audio ...

Page 34: ...ctor Overview 2 6 4 External Peripheral Device Connectors The peripheral device connectors listed below are located on the rear panel of the AMD Geode LX 800 motherboard 2 x Ethernet connectors 2 x USB connectors 2 x Serial port connectors 1 x Reset button 1 x Power connector ...

Page 35: ...2901190 and 2901200 User s Manual Page 35 3 Installation and Configuration Chapter 3 ...

Page 36: ...r arm please make sure that at least two people are assisting with the procedure Anti static Discharge If a user open the rear panel of the flat panel PC to configure the jumpers or plug in added peripheral devices ground themselves first and wear and anti static wristband 3 2 Preinstalled Components The following components are all preinstalled Motherboard TFT LCD screen Inverter Preinstalled OEM...

Page 37: ... screen Only remove the plastic cover after the flat panel PC has been properly installed This ensures the screen is protected during the installation process Step 1 Use box cutters a knife or a sharp pair of scissors that seals the top side of the external second box Step 2 Open the external second box Step 3 Use box cutters a knife or a sharp pair of scissors that seals the top side of the inter...

Page 38: ...2901200 is shipped with the following components Quantity Item and Part Number Image 1 2901190 2901200 flat panel PC 1 Power cord 1 45W power adapter 1 Screw kit 1 Jumper pack 1 PS 2 keyboard mouse Y cable 10 Panel mounting kit 1 Wall mounting kit 1 User manual and driver CD ...

Page 39: ...3 4 2 Optional Items The following optional items are available for the 2901190 2901200 Quantity Item and Part Number Image 1 Wireless LAN antenna 2901190C and 2901200C models only 1 LCD monitor arm kit 1 LCD monitor stand kit 1 Rack mounting kit Table 3 2 Optional Items 3 5 ...

Page 40: ... Figure 3 1 CF Card Installation Step 4 Replace the CF card slot cover Step 0 3 7 Remove the Back Cover Before the jumper settings can be configured and the HDD and DDR memory module can be installed the back cover of the flat panel PC must be removed To remove the back cover please follow the steps below The back cover is secured to the chassis with ten retention screws three on the top panel thr...

Page 41: ... metal pins and a small metal clip often protected by a plastic cover that slides over the pins to connect them To CLOSE SHORT a jumper means connecting the pins of the jumper with the plastic clip and to OPEN a jumper means removing the plastic clip from a jumper The AMD GEODE LX 800 comes with two jumpers They are listed below COM3 pin 9 signal select JP3 COM1 and COM2 pin 9 signal select JP4 Ju...

Page 42: ...gnal can be selected as 12V 5V or Ring JP3 Description Short 1 2 COM3 pin 9 is 12V output Short 3 4 COM3 pin 9 is RI input Default Short 5 6 COM3 pin 9 is 5V output Table 3 3 COM3 Pin 9 Signal Select Jumper Settings 3 8 2 JP4 COM1 and COM2 Pin 9 Signal Select Jumper Settings The COM1 and COM2 pin 9 signal can be selected as 12V 5V or Ring ...

Page 43: ... Table 3 4 COM1 and COM2 Pin 9 Signal Select Jumper Settings 3 9 HDD Installation To install the HDD into the 2901190 2901200 please follow the steps below Step 1 Remove the back cover See Section 3 7 above Step 2 The HDD bracket is attached to the platform by four retention screws Remove the four retention screws from the platform Figure 3 4 Figure 3 4 HDD Bracket Retention Screws Step 3 Attach t...

Page 44: ...D into the 2901190 2901200 by aligning the retention screw holes in the base of the HDD bracket with the retention screw holes on the platform Insert the four retention screws Step 0 3 10 Memory Module Installation The flat panel PC embedded motherboard has one 200 pin SO DIMM socket To install the SO DIMM module follow the instructions below Step 1 Remove the back cover See Section 3 7 above Step...

Page 45: ...IMM chip into the socket at an angle See Figure 3 7 Step 4 Gently pull the arms of the SO DIMM socket out and push the rear of the SO DIMM module down See Figure 3 7 Step 5 Release the arms on the SO DIMM socket They clip into place and secure the SO DIMM module in the socket Figure 3 7 SO DIMM Module Installation ...

Page 46: ...ting The four mounting methods are described below 3 11 1 Wall Mounting To mount the flat panel PC onto the wall please follow the steps below Step 1 Select the location on the wall for the wall mounting bracket Step 2 Carefully mark the locations of the four bracket screw holes on the wall Step 3 Drill four pilot holes at the marked locations on the wall for the bracket retention screws Step 4 Al...

Page 47: ...cured against the rear panel Figure 3 9 Step 6 Align the mounting screws on the monitor rear panel with the mounting holes on the bracket Step 7 Carefully insert the screws through the holes and gently pull the monitor downwards until the monitor rests securely in the slotted holes Figure 3 9 Ensure that all four of the mounting screws fit snuggly into their respective slotted holes NOTE In the di...

Page 48: ...the wall mounting kit on the top panel of the panel PC Carefully mark the location of the wall mounting kit screw holes on the wall Drill a pilot hole at the marked location on the wall Secure the wall mounting kit to the wall by inserting a retention screw into the pilot hole on the wall Figure 3 10 This step is to avoid the panel PC being pushed apart from the wall mounting bracket accidentally ...

Page 49: ...he position on the panel to mount the flat panel PC Step 2 Cut out a section from the panel that corresponds to the rear panel dimensions of the flat panel PC Take care that the panel section that is cut out is smaller than the overall size of the metal frame that surrounds the flat panel PC but just large enough for the rear panel of the flat panel PC to fit through Figure 3 11 and Figure 3 12 ...

Page 50: ... frame is flush against the panel Step 4 Insert the panel mounting clamps into the pre formed holes along the edges of the chassis behind the aluminum frame There are a total of 10 panel mounting clamps Step 5 Tighten the screws that pass through the panel mounting clamps until the plastic caps at the front of all the screws are firmly secured to the panel Figure 3 13 Step 0 ...

Page 51: ...ly mount the arm onto the surface it uses as a base To do this refer to the installation documentation that came with the mounting arm NOTE When purchasing the arm please ensure that it is VESA compliant and that the arm has a 100mm interface pad If the mounting arm is not VESA compliant it cannot be used to support the 2901190 2901200 flat panel PC Step 2 Once the mounting arm has been firmly att...

Page 52: ...he mounting arm interface pad and into the flat panel PC Step 0 3 11 4 Cabinet and Rack Installation The 2901190 2901200 flat panel PC can be installed into a cabinet or rack The installation procedures are similar to the panel mounting installation To do this please follow the steps below NOTE When purchasing the cabinet rack installation bracket make sure it is compatible with both the 2901190 2...

Page 53: ...de of the LCD screen frame is flush against the front of the bracket Step 3 Make sure the retention screw holes at the rear of the LCD screen are aligned with the retention screw holes in the rack cabinet bracket Step 4 Secure the rack cabinet bracket to the 2901190 2901200 flat panel PC by inserting the retention screws Figure 3 15 Figure 3 15 Secure the 2901190 2901200 Rack Cabinet Bracket Step ...

Page 54: ...inet bracket to the front of the rack or cabinet Figure 3 16 3 12 Rear Panel Connectors 3 12 1 LCD Panel Connection To connect the 2901190 2901200 flat panel PC to a second monitor a conventional CRT VGA monitor connector is located on the bottom panel This panel is a 15 pin female D SUB connector 3 12 2 Ethernet Connection The two rear panel RJ 45 connectors can be connected to an external LAN an...

Page 55: ...on of a mouse and a keyboard To connect either device plug the PS 2 connector at the end of the keyboard or mouse cable into the corresponding PS 2 connector on the external peripheral interface panel 3 13 System Maintenance If the components of the 2901190 2901200 fail they must be replaced Please contact the system reseller or vendor to purchase the replacement parts NOTE A user cannot replace a...

Page 56: ...2901190 and 2901200 User s Manual Page 56 4 Gasket Replacement Chapter 4 ...

Page 57: ...t remove it and place it on a flat level surface with the display screen facing down before changing the gasket Step 7 Remove the old gasket from the sides of the monitor Step 8 Attach the new gasket to the monitor Make sure the gasket fits precisely into the groove along the edges of the monitor s front panel Figure 4 1 Figure 4 1 Gasket Replacement NOTE Compliance with the IP 65 standard depends...

Page 58: ...ith please don t hesitate to contact with us We will do our best to support you for your products projects and business Global American Inc Address 17 Hampshire Drive Hudson NH 03051 TEL T oll Free U S Only 800 833 8999 603 886 3900 FAX 603 886 4545 Website http www globalamericaninc com E Mail salesinfo globalamericaninc com ...

Reviews: