User Manual
GLK FLEX GEAR
시스템
Version 3.0
No. OM-FC209-101
Model: “FLEX GEAR” GLX-FC209
글꼴
: Yoon
초록우산어린이
Page 1: ...User Manual GLK FLEX GEAR Version 3 0 No OM FC209 101 Model FLEX GEAR GLX FC209 Yoon...
Page 2: ...install Goldwing 1800 after 2018y Goldwing 1800 before 2017y Customer Service Manual Guide 4 Goldwing 1500 Harley Davidson BMW K1600 Indian Kawasaki VN1700 Voyager FLEX GEAR install Revision Warrenty...
Page 3: ...act our office number 031 999 6799 4 Please contact us by email flexgear flexgear co kr 5 Please read the product usage precautions and use it correctly 6 After installing FLEX GEAR for customer infor...
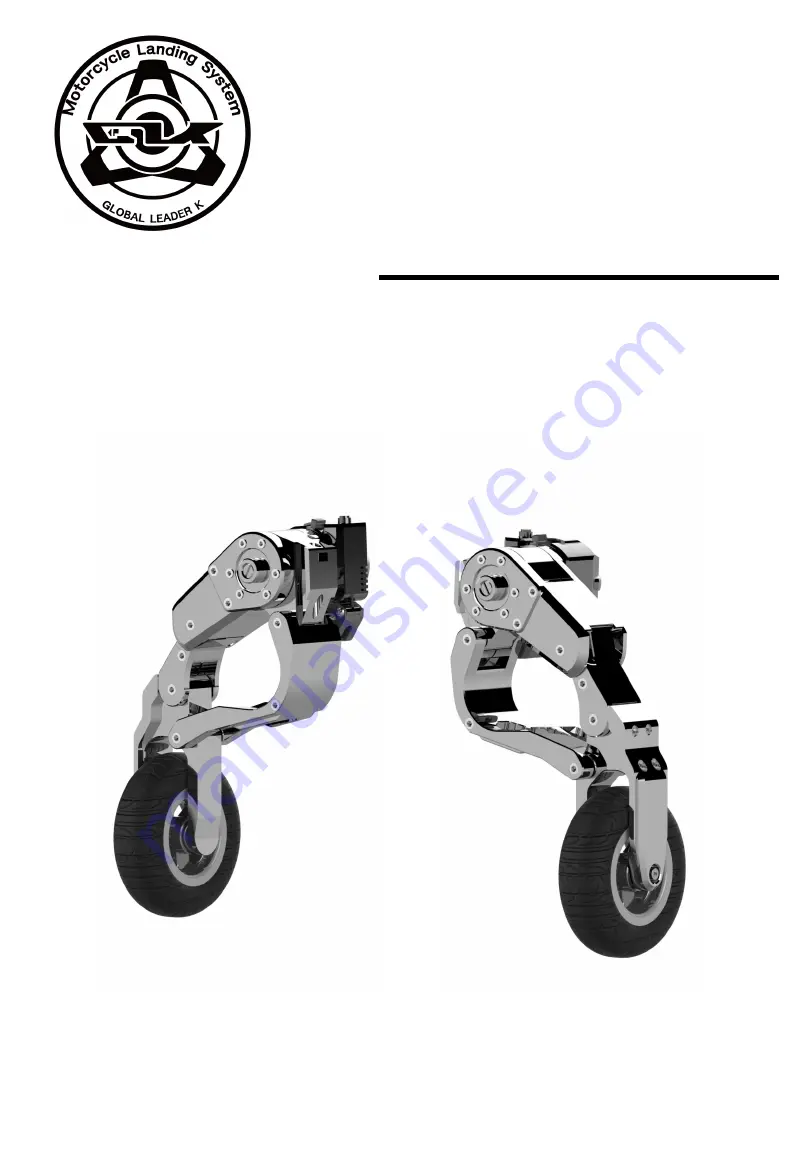
Page 4: ...ata for each part please refer to the Spec Data page Control Box Cable Switch Cable Battery Cable FLEX GEAR Cable x 2 ea FLEX GEAR Left Right 4 Bracket Sliding Bracket Middle Bracket Mount Bracket Bra...
Page 5: ...de your motorcycle In this case you will have to pull the motorcycle to get it out With the FLEX GEAR you can move heavy bikes comfortably reducing the risk of tripping and other accidents Helps preve...
Page 6: ...The FLEX GEAR takes about 2 seconds to complete 1 When the green button on the switch is pressed the FLEX GEAR goes up 2 If the button on the switch is not pressed the FLEX GEAR will not move 3 When t...
Page 7: ...sensor does not light check the connection status of each cable Left FLEX GEAR Lifting Left FLEX GEAR Completed Left FLEX GEAR Landing Left FLEX GEAR Completed Power Right FLEX GEAR Completed Right FL...
Page 8: ...l it outward the less it will unfold e more you push the lifting limit sensor into the motorcycle the more the FLEX GEAR folds and the mo you pull it outward the less it folds Auto fuse prevents motor...
Page 9: ...FLEX GEAR position goes down If the bolt is re tightened The FLEX GEAR position goes up After connecting the sliding bracket and the FLEX GEAR adjust the installation height through the tightening deg...
Page 10: ...ts of the motorcycle frame may be damaged in order to assemble the bracket but only for some models If the installation of the bracket is hindered by accessories other than the FLEX GEAR please remove...
Page 11: ...cket modeling is subject to change due to design modifica Bracket bolt dimensions are subject to change due to modelin modifications 1 2 4 3 8 7 Remove the motorcycle side cover and footrest cover Rem...
Page 12: ...g bracket to the middle bracket using bolt C Position the wrench bolt hole of the sliding bracket toward the front of the motorcycle Bolt A M8 40mm headless bolt M8 Nut Bolt B M8 30mm hex socket head...
Page 13: ...wire of the switch to ACC The switch is fixed to the handle grip Fix it to the left or right Fix the bracket as shown in the picture The bracket in the photo may differ from the actual bracket There i...
Page 14: ...olt Spring washer Bracket parts Sliding bracket 1 2 3 4 7 6 Remove the saddle bag side cover and seat from the motorcycle Loosen the frame fixing bolts of the motorcycle Connect Middle bracket and Mou...
Page 15: ...ircles on the motorcycle frame If you want to fix the FLEX GEAR bracket more firmly make a hole in the blue circle position on the motorcycle frame a install the bracket with 3 bolts Connect the Mount...
Page 16: ...R bracket use a drill and tap to drill additional holes in the yellow hole locations on the motorcycle frame Install the bracket with a total of 3 bolts Required Remove the motorcycle s bumper to in F...
Page 17: ...washer Bracket parts Mount bracket Middle bracket Sliding bracket 1 2 4 3 5 6 Fix the mount bracket using A and B bolts at the place where the footrest was removed It is recommended to work after remo...
Page 18: ...r into the hole of the sliding bracket and then use the M10 55mm bolt to connect the FLEX GEAR to the bracket After adjusting the height use the M10 10mm bolt to fix the installation position of the F...
Page 19: ...Please check the manufacturer s manual for details on the contents but Even with the same motorcycle model the manual may differ depending on the situation of the motorcycle you have Please check and...
Page 20: ...ve Cable connection to Battery 1 2 Connect the power cable to the control box Check the terminals of the power cable before connecting Connect the power cable to the battery inside the motorcycle The...
Page 21: ...ch according to the user s convenience Left Right Up Down 4 3 Tip First pass a thin wire through the inside of the motorcycle weave the switch cable to the wire in the handle part Connect the switch c...
Page 22: ...is the same for left an right Connect the FLEX GEAR cable to the bottom of the motor box of the FLEX GEAR Check the male female FLEX GEAR cable before connecting Tip Position the cable so that it does...
Page 23: ...your feet on the ground while the FLEX GEAR is down the center of gravity of the motorcycle will shift and there is a risk of an accident 8 Do not insert your fingers or foreign objects into the worki...
Page 24: ...ing safety equipment such as a helmet and protective equipment How to use Caution When starting out lower your legs to the ground and operate your FLEX GEAR Depart after confirming that the FLEX GEAR...
Page 25: ...he operation time is less than 2 seconds and the current is cut off during other times We have motorcycle models Can I mount the FLEX GEAR If your motorcycle is not on the list of installations please...
Page 26: ...YES no problem NO disconnection or missing Control box LED check Check if the LED of the control box is normally displayed according to the operation status of the FLEX GEAR Cross test Test the left...
Page 27: ...eck if the red LED of the control box is displayed when the motorcycle is turned on YES No problem NO Not confirmed Switch Check Press the switch button and check if the green or yellow LED on the con...
Page 28: ...Revision subject Date Version 1 0 Publish user manual 08 23 2019 Version 2 0 Renewal of bolt dimensions and brackets 02 03 2020 Version 3 0 Integration renewal of FLEX GEAR name and installation manu...
Page 29: ...n without prior knowledge of our authorized service d in the event of a defect or damage to the Product during transit beyond GLK s responsibility e the appearance of the product is damaged or scratch...