


Page
9
of
24
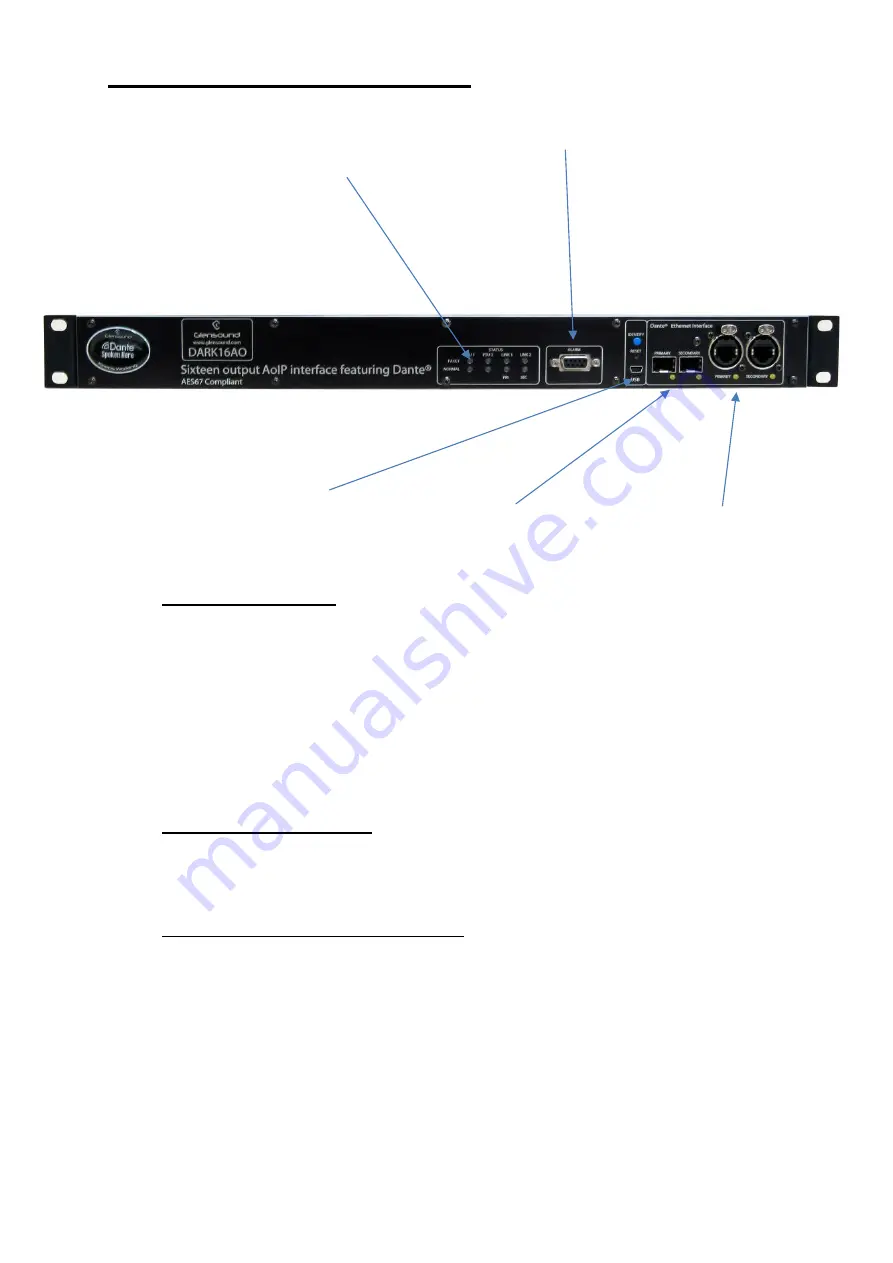
DARK16AO FRONT PANEL LAYOUT
1.
PSU and Link status
There are 4 red LEDs and 4 green LEDs that illuminate depending on the
status of the link. Red indicates no connection, green indicates a successful
connection.
For example, if you have connected the DARK16AO to two separate PSUs,
only one of which works then you
will have a red ‘Fault’ LED illuminate to
warn you that there is no power detected on the connection that is not
receiving mains power.
2.
Alarm status connection
This 8-way female D-type connector will report the failure of a link status if
one is detected whilst in operation.
3.
USB connector and update buttons
The MINI USB connection allows the firmware of the DARK16AO to be
updated. To prepare the DARK16AO for a firmware update; power on the unit,
press and hold down the reset button, press and hold down the identify
button, release the reset button and then release the identify button a second
after.
1. PSU and Link status
2. Alarm status connection
3. USB connector and
update buttons
4. Network SFP
connections
5. Network RJ45
connections


