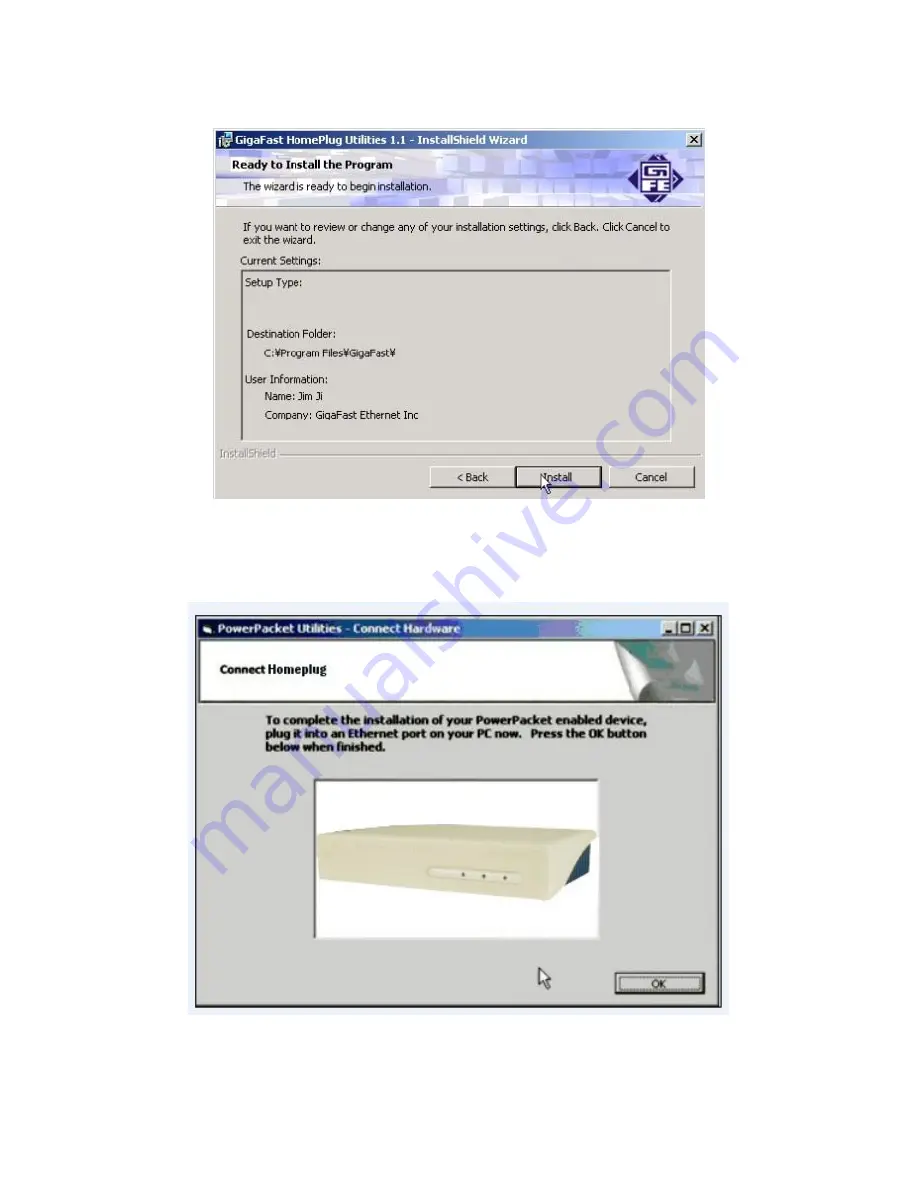
This section allows a user to go ‘
Back
’ or ‘
Install
’ the utility. In case if the user
wishes to change the previous options then go ahead and click on ‘
Back
’ to
change the settings. If not, continue and click the ‘
Install
’ button.
When you see this screen showing above, please stop at this screen. Process
the next step to install the HomePlug Ethernet Bridge.
11
Summary of Contents for PE902-EBx
Page 1: ...HomePlug Ethernet Bridge PE 902 EBx User Manual ...
Page 8: ...Wire Diagram 8 ...
Page 24: ...Checking IP Address Windows 98SE ME 2000 XP 1 Click Start and click Run 24 ...
Page 25: ...2 Type Command in the run prompt Click OK 25 ...
Page 26: ...3 A Dos Command prompt will open Type in ipconfig and press Enter 26 ...
Page 27: ...4 Your IP Address will Display along with the Subnet Mask and your Gateway 27 ...
Page 29: ...2 Click on TCP IP for the network adapter you want to set IP addresses for 29 ...
Page 31: ...4 Click on the Gateway tab and add in your gateway IP address 31 ...
Page 33: ...5 To save the changes you must restart so click YES 33 ...
Page 34: ...Part 2 Windows 2000 XP 1 Right click My Network Places and click Properties 34 ...
Page 36: ...3 Click Properties 36 ...
Page 37: ...4 Click Highlight Internet Protocol TCP IP and click Properties 37 ...
Page 40: ...Release and Renew an IP address Part 1 Windows 98 SE ME 1 Click Start then click Run 40 ...
Page 41: ...2 Type winipcfg and click OK 41 ...
Page 42: ...3 Select the Network adapter you want to release IP s for 42 ...
Page 43: ...4 Click Release 43 ...
Page 44: ...5 Your IP Address should turn to 0 0 0 0 44 ...
Page 46: ...Part 2 Windows 2000 XP 1 Click Start then click Run 46 ...
Page 47: ...2 Type Command and click OK 47 ...
Page 48: ...3 Type ipconfig release and press Enter 48 ...
Page 49: ...4 Your IP Address should turn to 0 0 0 0 To Renew your address check Renewing IP Address 49 ...
Page 52: ...2 Double Click the Drive where the folder that you want to share is located 52 ...
Page 53: ...3 Right Click on the folder you want to share and click Properties 53 ...
Page 58: ...2 Right click on the drive you want to share and click Properties 58 ...
Page 63: ...3 Type and the IP address of the computer you want to access Format is XXX XXX XXX XXX 63 ...
Page 64: ...4 All the files that the computer you are trying to access will open in a new window 64 ...
Page 66: ...6 All the files that the computer you are trying to access will Open in a new window 66 ...
Page 68: ...2 Right click on the printer you want to share and click Properties 68 ...
Page 70: ...4 A hand should appear under the printer you want to share 70 ...
Page 71: ...Part 2 Network Printer Installation 1 Click Start and click on Printers and Faxes 71 ...
Page 73: ...3 The Add Printer Wizard should appear click Next to proceed 73 ...
Page 74: ...4 Select A network printer or a printer attached to another computer and click Next 74 ...
Page 77: ...7 Click Yes to proceed 77 ...
Page 79: ...9 Click Finish to finish the network installation 79 ...
Page 81: ...Access Internet Part 1 Windows 98SE ME 1 Double Click Internet Explorer 81 ...
Page 83: ...3 Click I connect through a local area network LAN Click Next 83 ...
Page 84: ...4 Click Automatic discovery of proxy server recommended Click next 84 ...
Page 86: ...6 Click the box and click Finish 86 ...
Page 88: ...Part 2 Windows 2000 XP 1 Double Click on Internet Explorer 88 ...
Page 89: ...2 The New Connection Wizard might open If this does not happen skip to Step 7 Click Next 89 ...
Page 90: ...3 Click Connect to the Internet and click Next 90 ...
Page 91: ...4 Click Set up my connection manually 91 ...
Page 92: ...5 Click Connect using a broadband connection that is always on 92 ...
Page 93: ...6 Click Finish 93 ...


