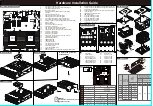
Hardware Quick Installation Guide
CAUTION
Slide / Rail mounted equipment is not be
used as a shelf or a work space.
TWO PERSON LIFT REQUIRED
Firmly hold the bottom of the system when
required to lift and carry the system.
Disconnect all AC power cords from both
system and external peripherals prior to
installing/removing options.
Do not drop any screws inside the system.
To avoid the risk of personal injury, be
careful when accessing the inside of the
system.
System Overview
Top Rear Cover Removal
2.5” HDD Installation
3.5” HDD Installation
PSU Removal
Front Side
LEDs and Buttons
Rear Side
LAN1
LAN2
LAN3
RSV
LAN4
1
2
3
3
Front Panel Buttons and LEDs
Front Panel Buttons and LEDs
Power Button with LED
ID Button with LED
LAN Link/Active LED
System Status LED
Reserved Function Button
REV
Server Management LAN Port
VGA Port
GbE LAN Ports x 2
USB 3.0 Port x 2
Reset Switch
Top Rear Cover
3.5 HDD Bay
1
1
1
2
USB 3.0 Port x 2
3
2
HDD1
HDD25
HDD29
HDD33
HDD26
HDD30
HDD34
HDD_OS1 HDD_OS2
HDD27
HDD31
HDD35
HDD28
HDD32
HDD36
HDD5
HDD9
HDD13
HDD17
HDD21
HDD2
HDD6
HDD10
HDD14
HDD18
HDD22
HDD3
HDD7
HDD11
HDD15
HDD19
HDD23
HDD4
HDD8
HDD12
HDD16
HDD20
HDD24
3
2
Primary PSU
Secondary PSU
1
1
2
3
4
ID Button with LED
10GbE LAN Port x 2
PCIe Card Bay x 7
5
6
7
2
4 5
6
7
3
1
1
1
1
2
2
2
2
2
3
3
3
4
4


