


System Hardware Installation
- 36 -
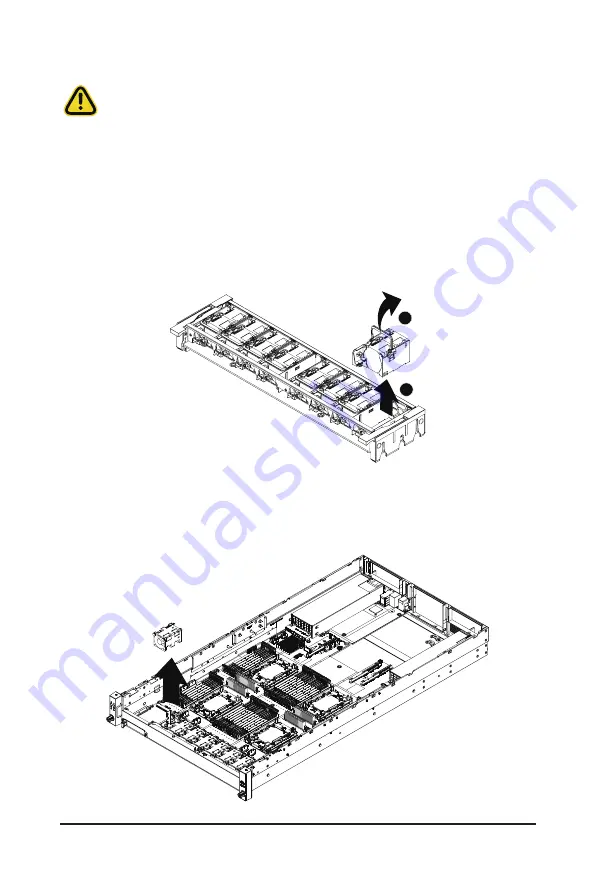
3-11 Replacing the Fan Assembly
Follow these instructions to replace the fan assembly:
1. Open the fan latch.
2. Lift up the fan assembly from the chassis.
3. Reverse the previous steps to install the replacement fan assembly.
1. Lift up the fan assembly from the chassis.
2. Reverse the previous steps to install the replacement fan assembly.
• Voltages can be present within the server whenever an AC power source is connected. This
voltage is present even when the main power switch is in the off position. Ensure that the
system is powered-down and all power sources have been disconnected from the server prior to
replacing a system fan.
Failure to observe these warnings could result in personal injury or damage to equipment.
2
1
Fan Wall
Front System Fan
Summary of Contents for R292-4S0
Page 14: ...Hardware Installation 14 1 3 System Block Diagram ...
Page 15: ... 15 Hardware Installation ...
Page 28: ...System Hardware Installation 28 6 1 2 3 4 5 4 ...
Page 40: ...System Hardware Installation 40 Rear Fan Cable GPU Card 0 Power Cable for R292 4S0 only ...
Page 45: ... 45 System Hardware Installation NVMe Card 0 1 NVMe Card 2 3 ...
Page 46: ...System Hardware Installation 46 NVMe Card 4 5 R292 4S0 R292 4S1 ...
Page 47: ... 47 System Hardware Installation NVMe Card 6 7 R292 4S0 R292 4S1 ...
Page 48: ...System Hardware Installation 48 NVMe Card 8 9 ...
Page 64: ...BIOS Setup 64 5 2 4 PCI Subsystem Settings ...
Page 73: ... 73 BIOS Setup 5 2 12 Intel R X710 10GBASE T Network Connection ...
Page 75: ... 75 BIOS Setup 5 2 13 VLAN Configuration ...
Page 80: ... 80 BIOS Setup 5 3 1 Processor Configuration ...
Page 83: ... 83 BIOS Setup 5 3 3 UPI Configuration ...
Page 122: ... 122 BIOS Setup This page intentionally left blank ...


