8
OSD Selection
After you press the
MENU
button to enter the OSD menu, use
,
,
,
to select the items you want
to adjust. Then press the
SET AUTO
button. After the screen fonts turn from black to blue you may
start to make the adjustments. Just use
,
,
,
to adjust the screen parameters as required. If no
action is taken for 45 seconds after the setting, the system will automatically save your settings and exit
the OSD.
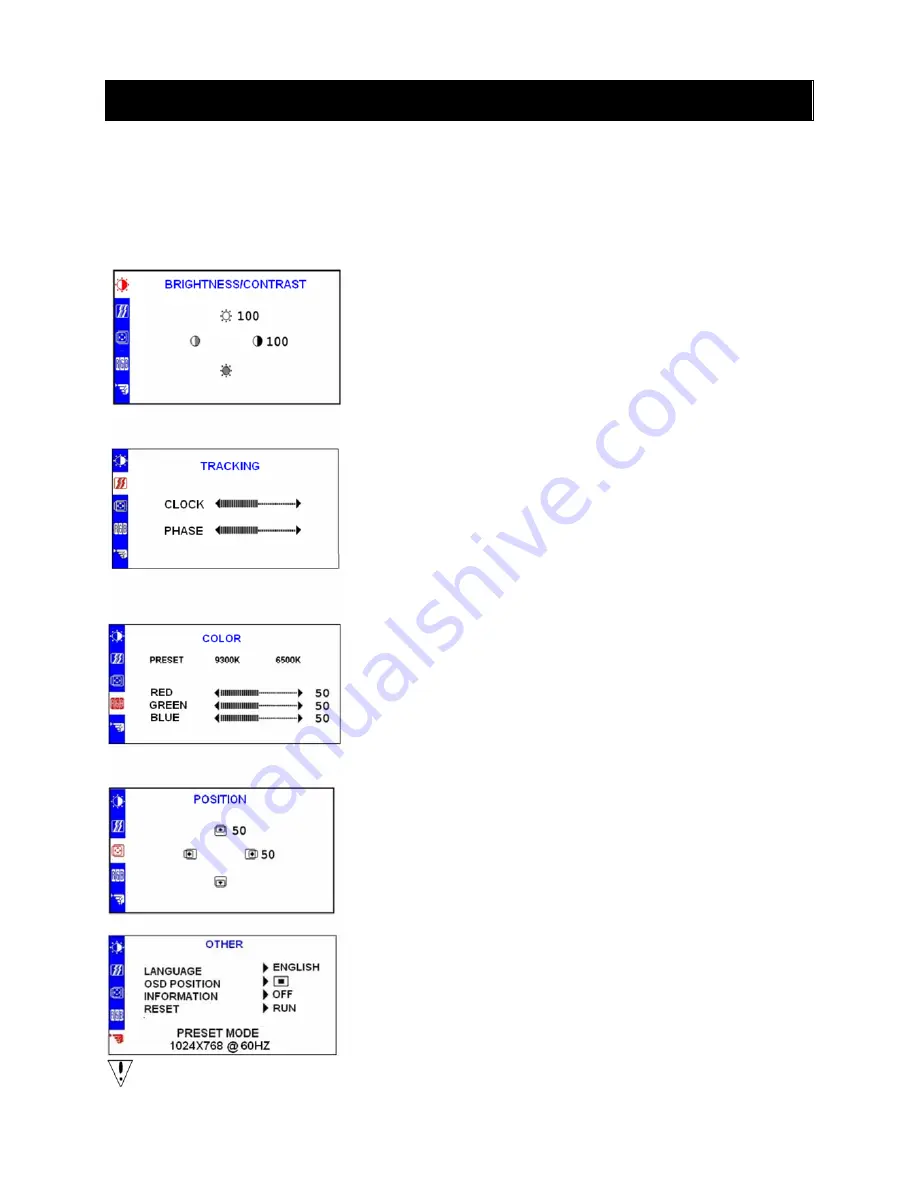
OSD Menu
Brightness/Contrast
Brightness
: Press
or
(
○
6
and
○
5
in figure 4) to adjust the brightness
of the screen.
Contrast
: Press
or
(
○
4
and
○
3
in figure 4) to adjust the contrast of the
screen.
Image Control:
Auto Adjustment: Use the
MENU
button (X in figure 4) to automatically
optimize the image parameters (such as image position and phase).
Horizontal Position Adjustment: Adjust horizontal position of the image.
Vertical Position Adjustment: Adjust vertical position of the image.
Clock: Set up the internal clock. Increase or decrease the value allows
adjusting the image width.
Phase: Adjust the time offset of the internal clock. It is used to optimize
the screen image.
Color Temperature:
In the OSD, press
or
(
○
4
and
○
3
in figure 4). This option allows you to
select a default color temperature (
9300K
or
6500K
). Color temperature
changes will take effect immediately on the display. To adjust a color
independently, select the “User Adjustment” item and then press
MENU
(X in figure 4) to select red, green or blue. In the OSD, press
or
(
○
6
and
○
5
in figure 4) to select the required values. When you return to the
menu of previous level or exit the OSD menu, current settings will be
saved automatically.
OSD Control
:
OSD
horizontal position adjustment: Adjust the horizontal position of the
OSD menu.
OSD
vertical position adjustment: Adjust the vertical position of the OSD
menu.
OSD timeout
: Set the time duration (in seconds) when the OSD menu
disappears from the screen if no action is taken.
Other
Language: English, Simplified Chinese, Traditional Chinese
Input Signal: Control the selection of input signals. The display allows
you to connect to an analog video card via 15-pin mini D-Sub interface.
Volume: Adjust the output volume of the display speaker.
Information: This OSD screen is optional (On/Off). It displays the latest
screen resolution settings.
Note:
Do not adjust the screen settings when animation is displayed and make sure to adjust the
settings in full screen mode.
Summary of Contents for GD-2018BP
Page 1: ......


