


GA-73UM-S2H Motherboard
- 16 -
1-4
Installing the Memory
Read the following guidelines before you begin to install the memory:
•
Make sure that the motherboard supports the memory. It is recommended that memory of
the same capacity, brand, speed, and chips be used.
(Go to GIGABYTE's website for the latest memory support list.)
•
Always turn off the computer and unplug the power cord from the power outlet before
installing the memory to prevent hardware damage.
•
Memory modules have a foolproof design. A memory module can be installed in only one
direction. If you are unable to insert the memory, switch the direction.
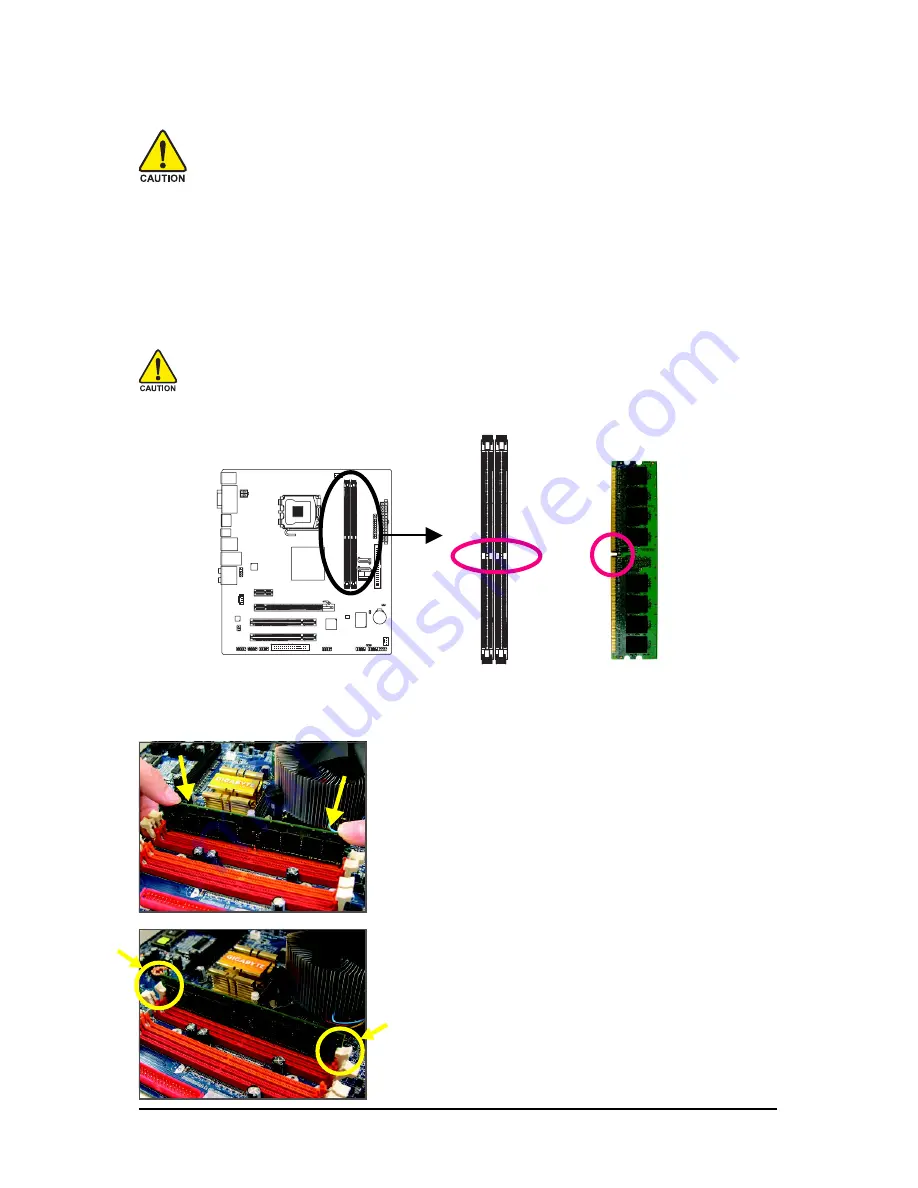
1-4-1 Installing a Memory
Notch
DDR2 DIMM
Before installing a memory module , make sure to turn off the computer and unplug
the power cord from the power outlet to prevent damage to the memory module.
DDR2 DIMMs are not compatible to DDR DIMMs. Be sure to install DDR2 DIMMs on
this motherboard.
A DDR2 memory module has a notch, so it can only fit in one direction. Follow the steps below to
correctly install your memory modules in the memory sockets.
Step 1:
Note the orientation of the memory module. Spread the retaining
clips at both ends of the memory socket. Place the memory
module on the socket. As indicated in the picture on the left,
place your fingers on the top edge of the memory, push down
on the memory and insert it vertically into the memory socket.
Step 2:
The clips at both ends of the socket will snap into place when
the memory module is securely inserted.
Summary of Contents for GA-73UM-S2H
Page 2: ...Oct 5 2007 Motherboard GA 73UM S2H Motherboard GA 73UM S2H Oct 5 2007...
Page 32: ...GA 73UM S2H Motherboard 32...
Page 58: ...GA 73UM S2H Motherboard 58...
Page 94: ...GA 73UM S2H Motherboard 94...
Page 95: ...Appendix 95...
Page 96: ...GA 73UM S2H Motherboard 96...
Page 97: ...Appendix 97...
Page 98: ...GA 73UM S2H Motherboard 98...


