


Browning Dial
The browning setting required will vary according to the moisture content and thick-
ness of the bread.
Technical Information
Before First Use
1. Remove all packaging materials, stickers and labels.
2. Check that the toasting slots are empty.
3. Set the browning control to the highest setting (6)
4. Plug the appliance into the mains supply and switch on at the socket.
5. Operate the toaster without bread, to cure the new elements.
NOTE: The elements smoke a bit, but this is nothing to worry about.
6. Allow to cool, then wipe the main unit with a soft damp cloth and dry thoroughly.
Using Your Toaster
1. Place your toaster on a level, stable, heat resistant surface.
2. Plug the appliance into the mains socket and switch on.
3. Select the required browning setting.
4. Place the bread slices into the toasting slots. The maximum thickness allowed is
38mm / 1.5”.
5. Press down the bread carriage handle until it stops (at the same time the grid
inside the slots will tighten around the bread in order to keep it away from the
quartz heating elements).
6. Release the pressure and the handle will stay in the lowered position. The
heating process has begun.
NOTE: If the handle comes up immediately, check the appliance is plugged in
as the bread carriage cannot lock if the toaster is not connected to the electricity
supply.
7. When toasting is complete the toast will pop up.
8. Switch off at the mains socket, unplug and allow to cool.
5
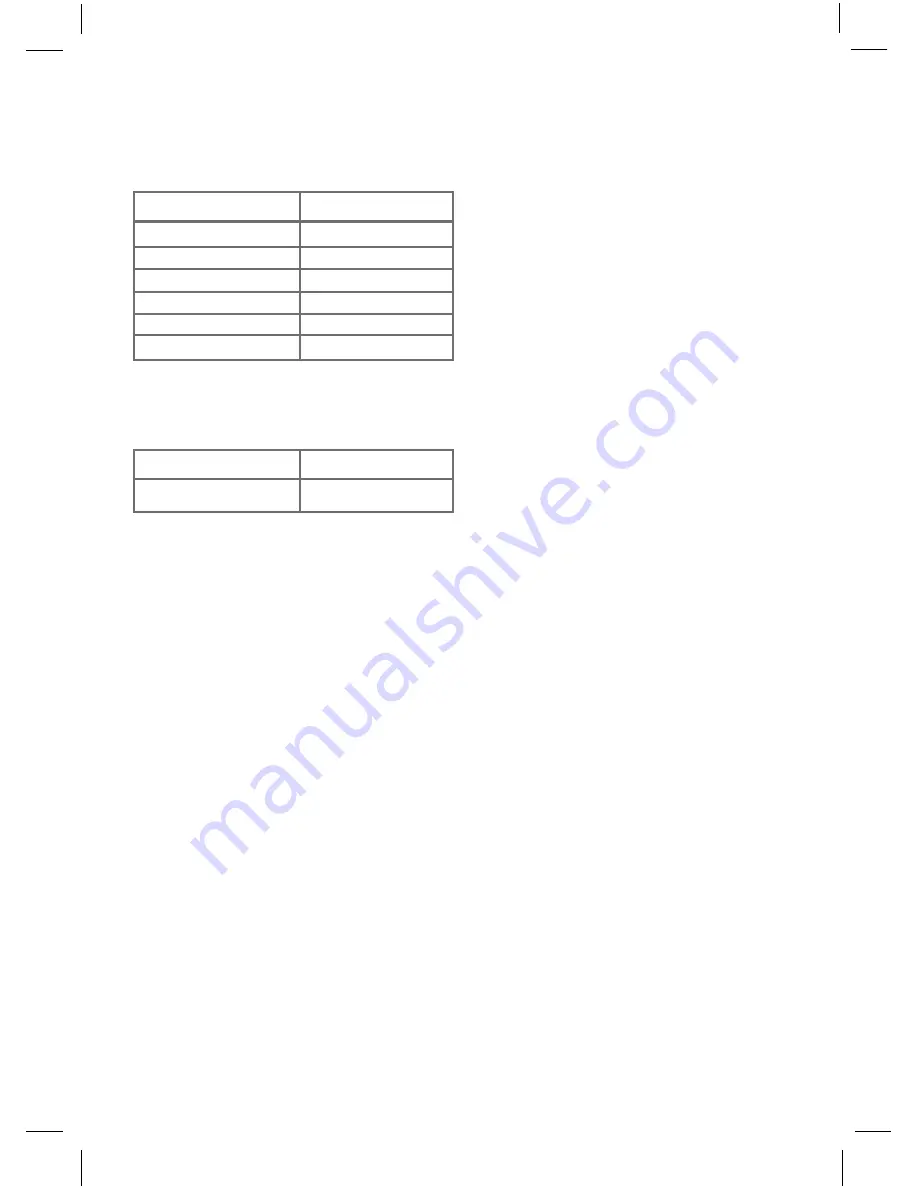
Browning Level
Browning Time
1 (light browning)
60 seconds
2
85 seconds
3
125 seconds
4
175 seconds
5
215 seconds
6 (dark browning)
240 seconds
Voltage
220-240V
Rated Power
1200W


