background image


12 


7


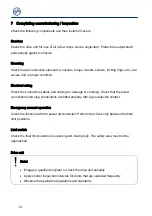
Completing commissioning / inspection 

Check the following components and then install all covers. 
 
Gearbox 

Check the drive unit for loss of oil (a few drops can be neglected). Protect the output-shaft 
permanently against corrosion. 
 
Mounting  

Check that all connection elements (consoles, torque mounts, screws, locking rings, etc.) are 
secure and in proper condition. 
 
Electrical wiring 

Check the connection cables and cabling for damage or crushing. Check that the screw 
connections and plug connections are fitted properly with a good electric contact. 
 
Emergency manual operation 

Check the function with the power disconnected. Perform the check only between the final 
limit positions. 
 
Limit switch 

Check the final limit positions by opening and closing fully. The safety area must not be 
approached. 
 

Drive unit 


Note! 


Engage a qualified engineer to check the drive unit annually 


Apply shorter inspection intervals for doors that are operated frequently 


Observe the applicable regulations and standards 


Summary of Contents for 10004398 30012

Page 1: ...f Installation Instructions ELEKTROMAT SE 8 60 FU 25 40 Model 10004398 30012 en Status 09 07 2020 ...

Page 2: ...2 GfA ELEKTROMATEN GmbH Co KG Wiesenstraße 81 D 40549 Düsseldorf www gfa elektromaten de info gfa elektromaten de ...

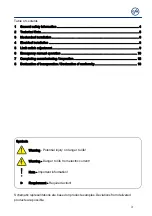
Page 3: ...al operation 10 7 Completing commissioning inspection 12 8 Declaration of incorporation Declaration of conformity 13 Symbols Warning Potential injury or danger to life Warning Danger to life from electric current Note Important information Requirement Required action Schematic representations are based on product examples Deviations from delivered products are possible ...

Page 4: ...ll be rendered null and void Safety information Installation and initial operation tasks are to be performed by trained skilled fitters only Only trained electrical craftsmen are permitted to work on electrical equipment They must assess the tasks assigned to them recognise potential danger zones and be able to take appropriate safety measures The installation is only to be carried out with the su...

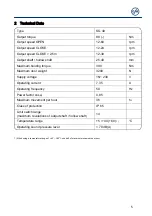
Page 5: ...Maximum door weight 3200 N Supply voltage 1N 230 V Operating current 7 35 A Operating frequency 50 Hz Power factor cos φ 0 85 Maximum movement per hour 36 h 1 Class of protection IP 65 Limit switch range maximum revolutions of output shaft hollow shaft 14 Temperature range 5 40 60 1 C Operating sound pressure level 70 dB A 1 When using a temperature range of 40 60 C use half of maximum movements p...

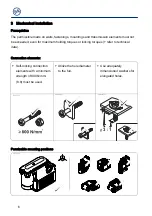
Page 6: ...even for maximum holding torques or locking torques refer to technical data Connection elements Self locking connection elements with a minimum strength of 800 N mm2 8 8 must be used Utilize the hole diameter to the full Use adequately dimensioned washers for elongated holes BAGAB00002_Z002 BAGAB00003_Z002 3 1 Permissible mounting positions ...

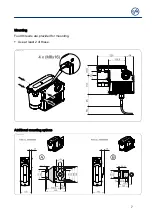
Page 7: ...7 Mounting Fourt threads are provided for mounting Use at least 2 of these Additional mounting options ...

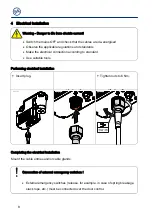
Page 8: ...e the electrical connection according to standard Use suitable tools Performing electrical installation Insert plug Tighten nuts to 6 Nm Completing the electrical installation Mount the cable entries and or cable glands Connection of external emergency switches External emergency switches release for example in case of spring breakage slack rope etc must be connected over the door control ...

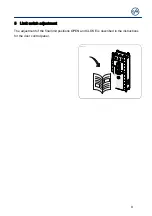
Page 9: ...9 5 Limit switch adjustment The adjustment of the final limit positions OPEN and CLOSE is described in the instructions for the door control panel ...

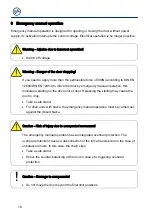
Page 10: ...this indicates a stalling on the drive unit or door Releasing the stalling may cause the door to drop Take a safe stand For drive units with brake the emergency manual operation must be carried out against the closed brake Caution Risk of injury due to unexpected movement The emergency manual operation has an integrated overload protection The overload protection causes a disconnection of the forc...

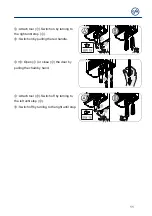
Page 11: ...turning to the right until stop Ⓑ Switch on by pulling the red handle Ⓐ Ⓑ Open or close the door by pulling the chain by hand Ⓐ Attach tool Switch off by turning to the left until stop Ⓑ Switch off by turning to the right until stop ...

Page 12: ...ion cables and cabling for damage or crushing Check that the screw connections and plug connections are fitted properly with a good electric contact Emergency manual operation Check the function with the power disconnected Perform the check only between the final limit positions Limit switch Check the final limit positions by opening and closing fully The safety area must not be approached Drive u...

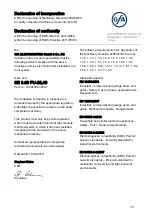
Page 13: ...d complies with the provisions of the above mentioned directives Authorised representative to compile the technical documents is the undersigned Düsseldorf 10 08 2018 Stephan Kleine CEO Signature The following requirements from Appendix I of the Machinery Directive 2006 42 EC are met 1 1 2 1 1 3 1 1 5 1 2 2 1 2 3 1 2 6 1 3 2 1 3 3 1 3 9 1 5 1 1 5 2 1 5 4 1 5 6 1 5 7 1 5 8 1 5 9 1 5 10 1 5 11 1 5 1...

Page 14: ...14 ...

Page 15: ...15 ...

Page 16: ...16 ...

Reviews: