background image


8.


When  the  brewing  process  is  completed  and  the  Water  Level  Indicator  is  empty,  there  will 
still  be  hot  liquid  in  the  Filter  Basket.  Wait  a  few  minutes  for  the  rest  of  the  liquid  to  drip 
through the coffee into the carafe.  

 
9.


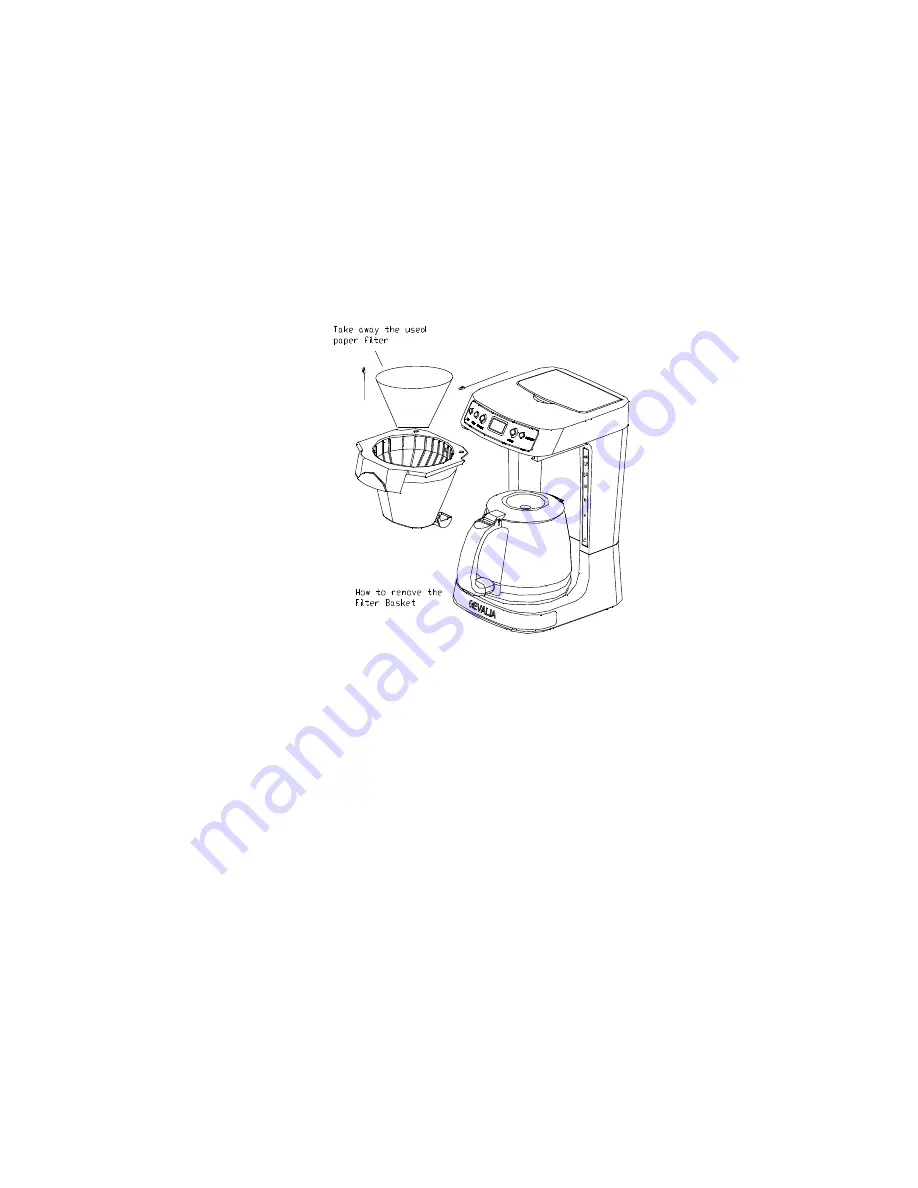
After  coffee  grounds  have  cooled,  remove  the  Carafe  from  the  Coffee  Maker  and  carefully 
slide  out  the  Filter  Basket  by  grasping  the  center  handle  and  slowly  pulling  it  towards  you 
until it separates from the Coffee Maker. Discard the used coffee filter and grounds.  Replace 
the Filter Basket and return the Carafe to the Warming Plate.  


CAUTION:  When  removing  the  Filter  Basket,  the


Filter  Basket  may  be  heavy  due  to 

saturated coffee grounds.  


CAUTION:  The  Coffee  Maker  becomes  very  hot  during  the  brew  cycle.  Please  handle 
with extreme care.  


10.


The Warming Plate will continue to operate for up to two hours after the brew cycle has been 
completed, as long as the red Indicator Light encircling the ON/OFF button is illuminated. 


11.


Always switch the Coffee Maker to OFF when the Carafe is empty or you no longer want to 
keep  the  coffee  hot.  The  Coffee  Maker  will  shut  off  automatically  after  2  hours.  When  the 
Coffee Maker is OFF, the red Indicator Light encircling the ON/OFF button will no longer be 
illuminated. 


12.


If  two  (2)  or  more  pots  of  coffee  are  to  be  made  in  succession,  it  is  recommended  that  the 
Coffee Maker be allowed to cool for 10 minutes between each brewed pot. The Filter Basket 
should also be rinsed out after each brew cycle.  


Summary of Contents for CM-22 Series

Page 1: ...1 Care and Use Instructions 12 Cup Automatic Coffee Maker Created Exclusively For Gevalia Logo CM 22 Series ...

Page 2: ...e for other than intended use 14 WARNING To reduce the risk of fire or electric shock do not remove bottom cover No user serviceable parts are inside Repair should be done by authorized personnel only 15 Do not remove the Filter Basket during the brew cycle or while the Carafe is in place 16 Scalding may occur if the Filter Basket is removed or the Water Reservoir Cover is lifted during the brewin...

Page 3: ... glass Carafe to break 3 Never stir inside the Carafe with a spoon or other utensils 4 Does not use a cracked glass Carafe or a Carafe having a loose or weakened handle If the glass Carafe should break do not consume beverage 5 Never use ice cubes in the Carafe or place the Carafe in the refrigerator 6 Never drink directly from Carafe Always check beverages for broken glass before drinking 7 Do no...

Page 4: ...nsed thoroughly PREPARATION FOR USE Manual Operation 1 Place the Coffee Maker on a hard flat surface With the Coffee Maker turned off plug the unit into a 120V outlet 2 Fill the Carafe with fresh cold water preferably bottled or filtered water Open the Swing Up Reservoir Cover and pour the water into the Water Reservoir The number of cups is shown by the Water Level Indicator Pour to the desired n...

Page 5: ...e Maker making sure it is fully seated on the Warming Plate This will activate the Pause Serve mechanism CAUTION To avoid Filter Basket overflow the Carafe must fit securely into the Coffee Maker with the Lid on If not properly positioned on the Warming Plate hot water or hot coffee could overflow from the Filter Basket 3 Remove the Filter Basket by firmly grasping the center handle and pulling it...

Page 6: ...aligning the edges on the right and left sides of the Filter Basket with the rails of the Coffee Maker and gently push it into place 6 Close the Water Reservoir Cover 7 With the Water Reservoir Cover firmly closed and the Carafe securely in place press the ON OFF button once The red Indicator Light encircling the ON OFF button will illuminate to indicate the brew cycle has started CAUTION 1 Never ...

Page 7: ...vy due to saturated coffee grounds CAUTION The Coffee Maker becomes very hot during the brew cycle Please handle with extreme care 10 The Warming Plate will continue to operate for up to two hours after the brew cycle has been completed as long as the red Indicator Light encircling the ON OFF button is illuminated 11 Always switch the Coffee Maker to OFF when the Carafe is empty or you no longer w...

Page 8: ...ng by using the Hour and Min buttons following the same directions for setting the clock Make sure the AM PM indicator is set properly Note After setting the Auto Brew start time the PROGRAM indicator will automatically stop flashing after a few seconds and the display will return to the current time 4 To confirm your Auto Brew start time simply press the PROGRAM button and the pre set time will b...

Page 9: ...ce any parts of your Coffee Maker in the dishwasher 3 Never use harsh or abrasive cleansers on any part of your Coffee Maker To clean simply wipe off with a soft damp cloth The Warming Plate may be wiped with a clean damp cloth when necessary For hard to remove stains use a plastic mesh pad or cloth dampened in vinegar IMPORTANT Never immerse the Warming Plate or main housing in water or any other...

Page 10: ...ng This model information can be located by looking at the bottom of your coffee maker for the word MODEL The date code information is located either on the bottom of your Coffee Maker as a 4 digit code and on the blades of your electrical plug On the blades of your electrical plug the date code is the 4 digit number that follows a letter S Printed in China CM2205 V 1 0 LIMITED WARRANTY Global Mar...

Reviews: