


8
9
Operation
1. Set the Speed Control Knob(5) at [MIN.] position.
2. Turn on the Power Switch(1), the lamps for forward and reverse as well
as the output jack will come on. If the Handpiece is connected with the
selected output jack, the set speed is displayed in the Rotational Speed
Display(9).
3. Push the Rotation Selection Button(15) momentarily to set directional
rotation forward or reverse.
4. The output jack can be changed with Station A Selection Button(4) or
Station B Selection Button(6).
5. Set the rotation speed beforehand with the Speed Control Knob(5).
6. When Start/Stop Button(12) or hand Button(B) is pushed, the Handpiece
rotates.
7. When Start/Stop Button(12) or hand Button(B) is pushed again, the
Handpiece stops.
Operation with Variable Foot Controller
You can use the Variable Foot Controller VC90(D) to vary the speed of the
Handpiece, by adjusting the pressure applied to the Variable Foot Controller.
In this case, the maximum speed is limited by the Speed Control Knob(5).
Auto cruise function
The rotational speed can be maintained by pushing the Start/Stop Button(12)
or Hand Button(B) to fix the speed while using the Foot Controller. In that case,
Start/Stop Lamp(11) blinks. Please push the Start/Stop Button(12) again, or
Hand Button(B) to release it or step on the pedal once.
Low-speed rotation
If after not using for some time the Handpiece won't operate at low-speed, run
at high-speed for ten seconds. This will remove oxides that may have formed
on the motor commutator.
Load Indicator
• Load Indicator(13) is composed of 8 lamps. The number of lighting
increases as the load of the motor rises.
• Make sure the Load Indicator(13) lights are green when operating the
device. Working in high pressure (Red) for a long time will cause the
Circuit Breaker to shut off.
• While handpiece is rotating without any pressure, if two green lamps or
more of the Load Indicator(13) light up, there is a possibility that some part
of handpiece is defective. Please contact us if this occurs.
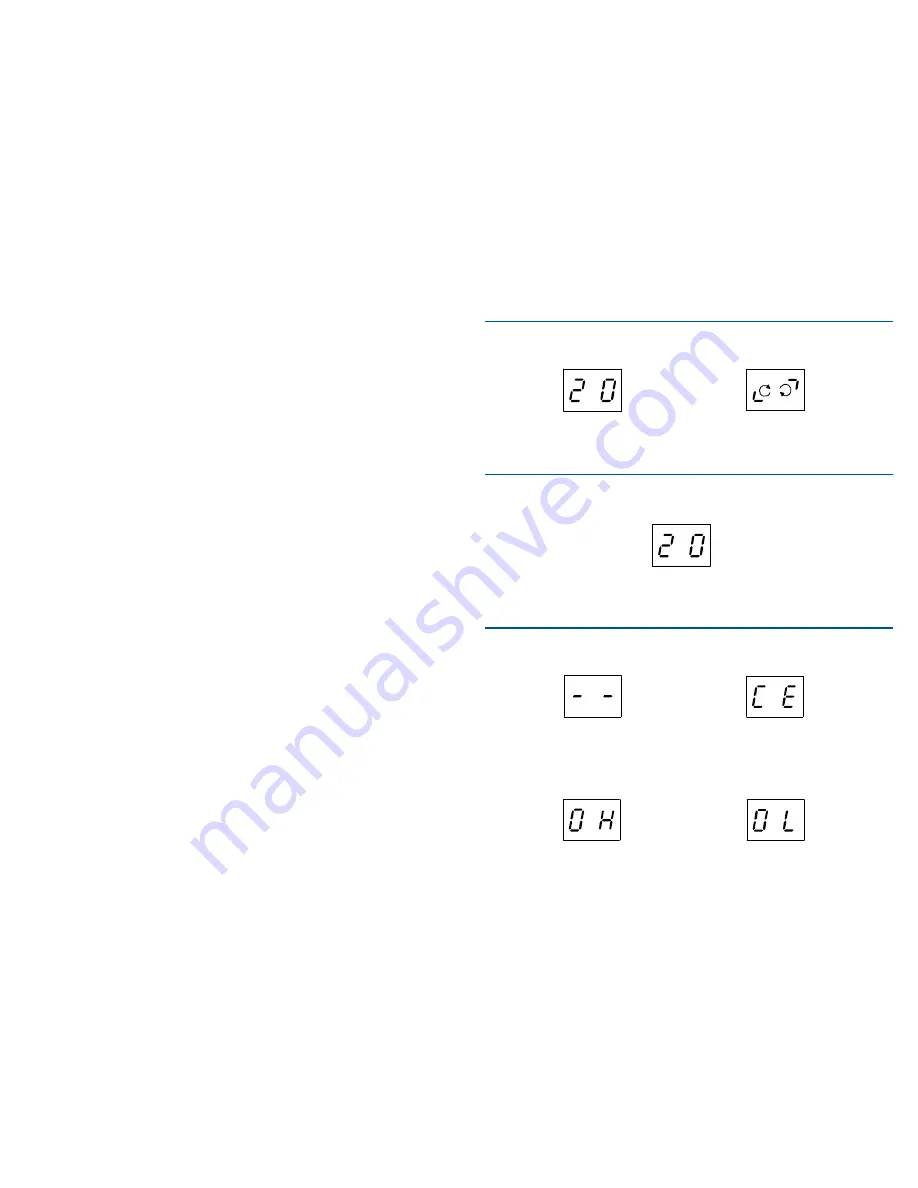
Rotational Speed Display
Rotational Speed Display(9) is displayed as follows:
1. When the handpiece is on
2. When the handpiece is turned off
3. Error Codes
Rotational Speed
(2 digits × 1000rpm)
Setting of Rotational Speed
(2 digits × 1000rpm)
CE (Coil Error)
Disconnection of Handpiece
power line or coil
OL (Over Load)
Circuit Breaker operated
Handpiece disconnected
OH (Over Heat)
Controller Over Heat
When PH2X handpieces
are connected