S
M
A
5
0
B
E
R
-
13
-
23
.G1
/
0
1.
05
.2
02
1
/ V
0
1.
01
-
E
N
G
©
13
Settings
Lock spindle
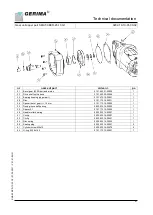
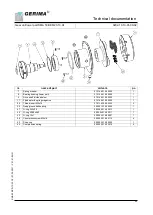
Replacing carbide inserts / guiding roll / milling
head
Before replacing always disconnect
the machine from the power supply
by removing the power cable from
the socket and secured against
reconnection!
Lock the spindle, then loosen the guiding roll
with the hexagonal wrench SW 5 and lift/
remove the guiding roll.
Loosen the clamping screws with the Torx
wrench T15 and replace the carbide inserts.
The inserts must be fastened to the mounting
seat on the milling head bymeans of the origi-
nal locking screws (max. tightening torque:
4.0
–
5.0
Nm).
Attention: Wear gloves due to risk
of cutting and burns
Loosen the milling head
retaining screw with the
hexagonal wrench SW 5
and remove the milling
head.
To remove the milling head easier out
of the guiding of the driving shaft you
have to turn the guiding roll a little bit
into the milling head and use the guide
wheel as a handle to lift the milling
head up.
Please note:
At tighten of the holding screw of the
milling head always turn to the stop so
that the locking washer is active in the
milling head.
A
B
C
Setting the bevel length
The bevel length (a) is set by adjusting the position
of the guide plate (2). The height setting can be read
out at the main scale (1) and the vernier collar (4).
Release locking pin (5) and clamping screw (3).
Rotate the guide plate (2) until the required bevel
length has been set as shown by the main scale (1)
in combination with the vernier scale on the collar
(4). Retighten clamping screw (3) and lock locking
pin (5).
Once the bevel height has been set, a bevel should
be milled on a test sample to check whether further
height adjustments are required. These may be
necessary because the precision of the scale is
approximately ± 1 mm, depending on the type of
milling head fitted.
The values below are experical values, no guarantee
values! Some materials can harden on the edges of
the workpiece when working with flame cutting,
plasma and laser cutting.This can result in significant
deviations from the specified reference values.
a leg length = bevel length a
b leg length = bevel length b
C bevel width
α
bevel angle
β
opposite angle
A bevel size
h bevel height
S oddment
t plate thickness
1
3
4
2
5


