


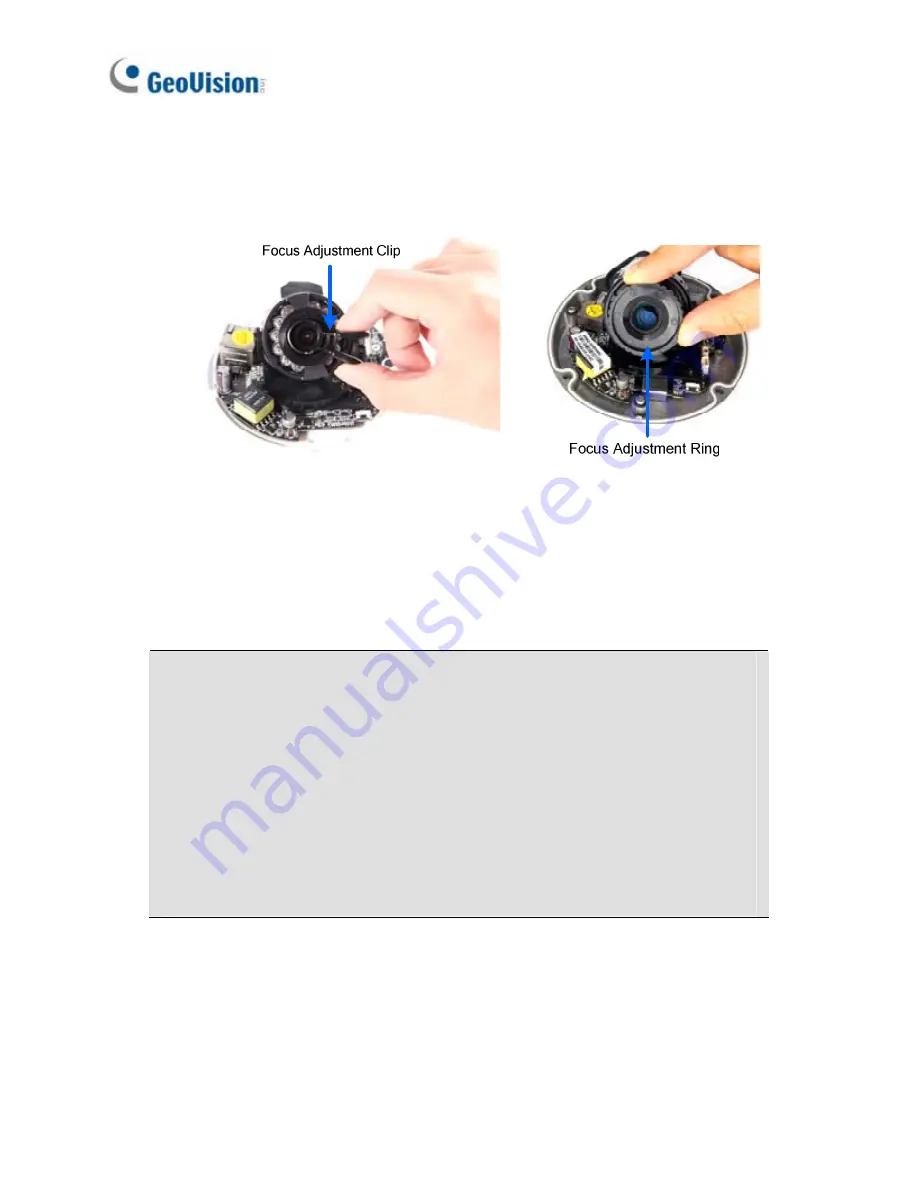
6. For
Target Mini Fixed Dome
and
Target Mini Fixed Rugged Dome
,
hold the camera cover close to the lens and use the supplied focus
adjustment tool for precise focus adjustment.
7. For
Mini Fixed Dome
and
Mini Fixed Rugged Dome
, hold the
camera cover close to the lens for precise focus adjustment.
8. Adjust
the
Zoom Screw
and the
Focus Screw
of the camera slowly
until the focus value reaches the maximum.
Note:
1. For locations of adjustment screws and rings in each model, see
Locations of Adjustment Screws
, section,
Getting Started
Chapter,
GV-IPCAM H.264 Firmware Manual
on the Software DVD.
2. Do not over tighten the screws. The screws only need to be as tight
as your fingers can get them to be. Do not bother using any tool to
get them tighter. Doing so can damage the structure of lens.
3. The maximum focus value may vary when the environment
changes.
226
Summary of Contents for GV-BX1200 Series
Page 10: ...Pinhole Camera 247 viii...
Page 157: ...Pan Adjustment Tilt Adjustment Rotational Adjustment 122...
Page 168: ...Vandal Proof IP Dome Part II 13 13 2 Overview 1 2 3 4 5 6 8 7 9 10 12 11 13 14 133...
Page 179: ...Tilt Adjustment Rotational Adjustment 144...
Page 186: ...Target Vandal Proof IP Dome 14 14 2 Overview 1 2 3 4 5 6 13 12 10 7 8 9 14 11 151...
Page 204: ...Fixed IP Dome 15 Pan Adjustment Tilt Adjustment Rotational Adjustment 169...
Page 232: ...PT Camera 19 19 2 Overview 1 2 3 4 5 6 7 8 9 10 11 12 197...
Page 241: ...M3 Screw x 2 M2 Screw GV IPCAM H 264 Software DVD GV NVR Software DVD Warranty Card 206...
Page 242: ...Pinhole Camera 20 20 2 Overview Camera Lens 1 2 3 4 Main Body 6 7 8 9 4 5 207...
Page 258: ...Accessing the Camera 21 6 Unplug the Ethernet cable 223...
Page 263: ...22 The Web Interface 1 2 3 4 5 6 7 8 9 10 11 12 13 228...


