Gentec Pronto-250 User Manual Download Page 13

Pronto-250 User Manual 

Revision 2.2 


3.2.5. Adjusting the CALIBRATION 

 
It is possible to adjust the calibration of the device. You can do so by applying a 

Correction Factor

 to the 

measurements.  To  access  the 

Calibration

  menu,  simply  press  the  CAL  button 

.  The  number 

displayed is the multiplication factor that will be applied to the measurements. A factor of 1.000 keeps the 
calibration unchanged. You can enter any number between 0.500 and 2.500. 
 
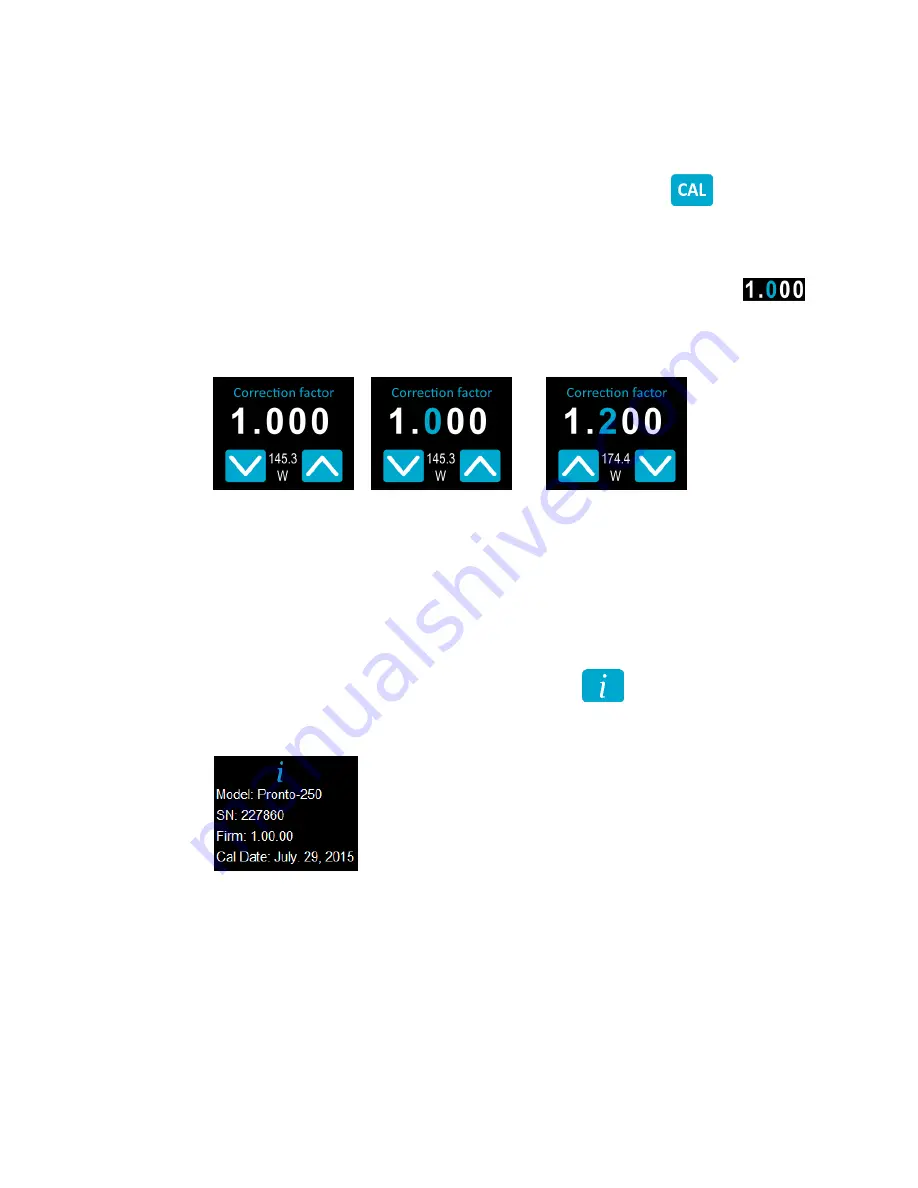
The  4  digits  of  the  correction  factor  are  changed  individually.  For  example,  if  the 

Correction  Factor

  is 

1.000 and you want to change it to 1.200, just press the first 0 (make sure it turns blue, like this 

and then increment it twice with the Up button. 
 

Initial Setting 

Select the Digit 

Change the Digit using 

the Up Button 


The last measured 

value (145.3 W) is 

displayed between 

the Up/Down buttons


The selected digit 

turns blue


The adjusted power value 

(174.4 W) is displayed 
between the Up/Down 

buttons


Once the value is entered, press the On/Off/Settings button to exit the menu and automatically save your 
new settings. 


3.2.6. Getting Information ABOUT the Device 


Relevant  information  about  the  device  are  stored  in  the  About  menu 

.  These  information  can  be 

useful when returning the device for repairs or recalibration. These include, the Model Name, The Serial 
Number, the Firmware version and the Last Calibration Date. 


Press the On/Off/Settings button to exit the menu and go back to the measurement screen. 

Summary of Contents for Pronto-250

Page 1: ...Pronto 250 User Manual Revision 3 0 i...

Page 2: ...er Support Gentec Electro Optics Inc 445 St Jean Baptiste Suite 160 Qu bec QC Canada G2E 5N7 Tel 418 651 8003 Fax 418 651 1174 E mail service gentec eo com Website gentec eo com Lifetime Warranty Gent...

Page 3: ...und to comply with the limits for a Class A digital device pursuant to part 15 of the FCC Rules These limits are designed to provide reasonable protection against harmful interference when the equipme...

Page 4: ...ing Transferring and Deleting Data 11 3 4 1 Acquiring the Data 11 3 4 2 Transferring the Data 11 3 4 3 Deleting the data 11 4 Safety Instructions 12 4 1 General 12 4 2 Damage to the Optical Absorber M...

Page 5: ...BEAM IMMEDIATELY TO AVOID DAMAGING THE SENSOR Be careful not to exceed the maximum levels and densities stated in the specifications The handle on the Pronto 250 is for carrying purposes only The user...

Page 6: ...l Range 190 nm 20 m Calibrated Spectral Range 0 248 2 5 m and 10 6 m Power Noise Level 10 mW Response Time 0 100 5 s Typical Sensitivity 0 23 mV W Calibration Uncertainty 3 Linearity with Power 2 Repe...

Page 7: ...sidered as the safe minimum diameter Figure 1 Minimum Beam Size for Pronto 250 Absorber at 1064 nm Max Power Density 1 064 m CW 10 6 m CW 45 kW cm2 14 kW cm2 Dimensions 59 0W x 181 4L x 17 3D mm Weigh...

Page 8: ...r a safe use during the measurements Touch Screen Display and Controls The touch screen interface controls the device On Off Settings Button This button is used to turn the device On press when the de...

Page 9: ...cquisition Press Starts Data Acquisition Press Stops Data Acquisition If gray Function is inactive UP DOWN Press Increments the selected units Press Decrements the selected units About Press Opens the...

Page 10: ...Battery indicators Ready Dots appear in sequence while the device waits for a trigger signal In this state the Zero is continuously updated to ensure the accuracy of the measurement Countdown A live C...

Page 11: ...ration Displays the current Correction Factor applied to the measurements and the corresponding corrected power to help the user adjust the value Displays Up Down controls to adjust the correction fac...

Page 12: ...blue and use the Down button to reduce it to 0 Select the 2nd number Make sure it turns blue and use the Up button to increase it to 5 Select the 3rd number Make sure it turns blue and use the Down b...

Page 13: ...it turns blue like this and then increment it twice with the Up button Initial Setting Select the Digit Change the Digit using the Up Button The last measured value 145 3 W is displayed between the Up...

Page 14: ...to its initial state displaying the last measured value 3 Place the device in the laser beam path Be careful to conform to all the recommended specifications for beam size placement and laser power 4...

Page 15: ...to your computer with a USB cable and use the ProntoDataTransfer software You can download our latest version of the software in the Downloads section of our website https gentec eo com downloads The...

Page 16: ...to 80 of the sensor s aperture For the Pronto 250 this corresponds to a diameter of 16 17 mm In any case the beam s incident area should not be less than 10 of the detector s area Please contact Gente...

Page 17: ...ing holes with an 8 32 thread see Figure 2 Figure 3 Recommended setup when making a measurement install the device on an optical stand before placing it in the laser beam path Gentec EO offers a compa...

Page 18: ...device s firmware are created it is in your best interest to update your PRONTO 250 The latest device firmware can be downloaded from the Gentec EO website at https gentec eo com downloads Go to the D...

Page 19: ...is declared Emissions Product Standard Test Standard Description EN 61326 1_Ed2 2013 IEC 61326 1_Ed2 2012 CISPR 11 A1 2010 Class A Radiated Emissions EN 61326 1_Ed2 2013 IEC 61326 1_Ed2 2012 Radiated...

Page 20: ...ter when the detector reaches the end of its life Removing the insulation or troubling the inside of the monitor will void the detector warranty The complete Detector contains 1 Detector 1 cable 1 cal...

Page 21: ...website 2 Download the software file from our website 3 Double click the EXE file to start the installer 4 Choose the folder for the installation and click Next until the installation is complete The...

Page 22: ...a Download File button 7 Click the Download File button and select a known folder on your computer where you will save the data Don t forget to also enter a file name The file format is TXT 8 You can...

Page 23: ......

Reviews: