Wearing Wave
3
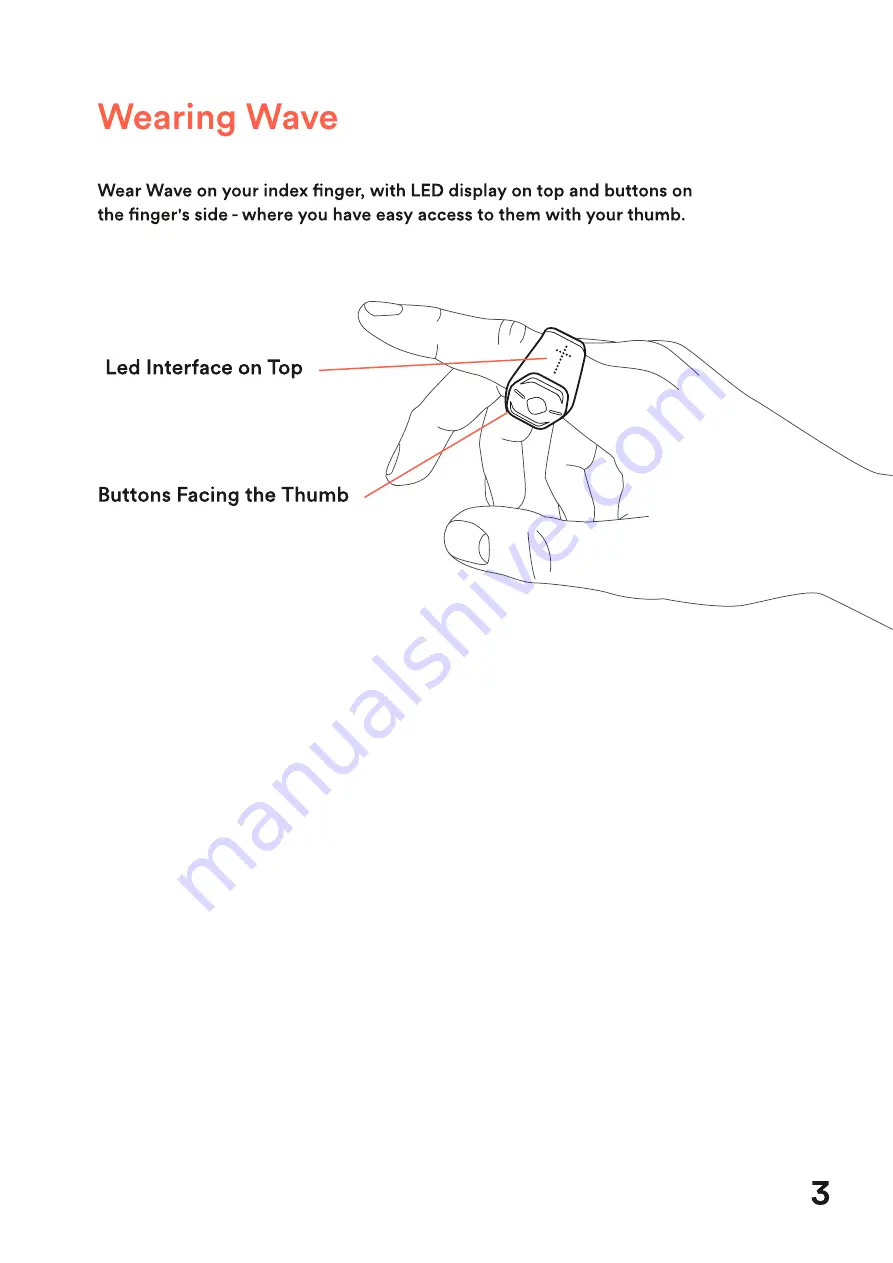
Wear Wave on your index finger, with LED display on top and buttons on the finger's side - where you have easy access to them with your thumb.
Buttons Facing the Thumb
Led Interface on Top
Page 1: ...WAVE FOR MUSIC QUICKSTART GUIDE...
Page 2: ...Contents About Wave for Music 1 Included in the box 2 Wearing Wave 3 Turning Wave on and off 4 Charging Wave 5 Function 6 15 Overview 8 Vibrato 11 Tap 12 Tilt Pan and Roll 9 10 Click 13 15...
Page 3: ...hat allows you to control sound with motion Wave has three buttons a LED display for visual feedback micro USB charging port and an adjustable strap Led Interface on Top Upper Button Middle Button Low...
Page 4: ...Included in the box 2 Included in the sales packaging of Wave is One 1 Wave ring One 1 micro USB charging cable One 1 soft case Wave Ring Soft Case Micro USB Charging Cable WAVE by GENKI...
Page 5: ...Wearing Wave 3 Wear Wave on your index finger with LED display on top and buttons on the finger s side where you have easy access to them with your thumb Buttons Facing the Thumb Led Interface on Top...
Page 6: ...top of the ring To turn Wave off hold the Up and Down button on Wave simultaneously until the lights on the ring turn off If Wave doesn t turn on then the battery might be drained Try charging the ri...
Page 7: ...full charge takes 90 minutes and gives 8 hours in constant use A quick charge of 20 minutes gives you approximately 2 hours of use In order to maintain a good battery life Wave must be charged regula...
Page 8: ...order to map functions from Softwave to your DAW such as Ableton Live or Logic Pro you need to attach a MIDI CC number to the function You can assign any CC number but make sure each function has an i...
Page 9: ...meters Roll Roll hand side to side to control parameters Tap Hit any surface to trigger samples or notes Pan Pan hand horizontally to control parameters Vibrato Move Wave sideways to control parameter...
Page 10: ...nge one function to another press the function s icon in the top left corner of the function window The icons representing the functions should now be visible until you select a new function Using Wav...
Page 11: ...he same time The current state of a movement is indicated by the brown circle on each slider Movement range You can control the range of each movement by moving the white ticks at each end of the slid...
Page 12: ...ou want to map has been selected in your DAW move Wave in order for the MIDI message to register If you select Pitch Bend the function will map to a pitch bend parameter in your DAW Movement curve Lin...
Page 13: ...ess so Vibrato direction If you press the Direction Arrow the parameter will move in the opposite direction of your movement MIDI map Vibrato Pitch Bend and CC To map vibrato to your DAW you need to t...
Page 14: ...between all Tap functions controlled by the same Wave so if you change the sensitivity for one Tap it will automatically update the sensitivity of other Taps MIDI map Tap CC Note To map Tap to your DA...
Page 15: ...ch button has an icon shown below Next select how the button behaves There are 6 types of behaviors you can choose fromj Z Click Trigget Z Click LatchinR Z Long Press Trigget Z Long Press LatchinR Z M...
Page 16: ...ong Press is activated after half a second Long Press allows you to choose between Trigger and Latching A drop down menu is available in the bottom left corner of the Click function window when either...
Page 17: ...Now use your computer keyboard to type in the key command you want to register For Key Commands to work the DAW window has to have focus 1 2 3 Key commands Shortcuts Click can send Key Commands Short...