


12
2007.07.23 73-0174-001
(Optional )Touch Screen Calibration
1. Use the pen (stylus) provided with the touch screen display option.
2. Select
Start
,
Programs
,
Touchkit
, then
Configure Utility
.
3. Select the
Tools
tab.
4. Select the
4 pts Calibration
button for basic touch screen
calibration. Select the
Linearization
button for better touch screen
linearity.
5. Touch and hold the tip of the pen to the center of each blinking
symbol as they appear on the screen until calibration is complete.
6. Select
OK
to save and exit.
Controls
The GoBook MR-1 is designed with several special controls to help you use
your device more effectively and to assist you in navigating Windows
®
XP.
Some of these are explained below.
Mouse Controls
Your GoBook MR-1 comes equiped with multiple input devices to help you
control the mouse pointer on the screen. These controls are explained
below.
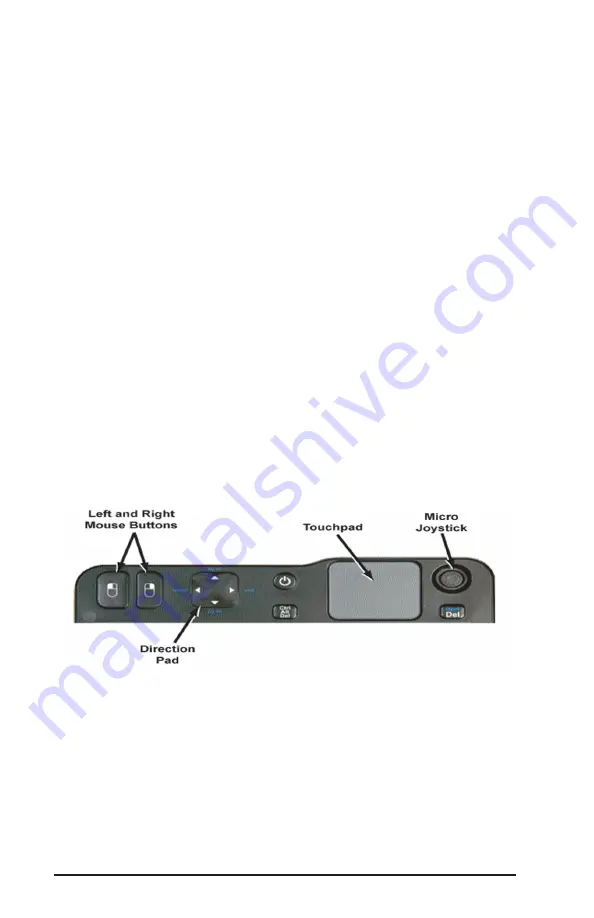
Mouse Buttons
Your keyboard contains special keys for left and right mouse clicks (see
image below). Pressing either button functions like a left of right button on a
standard mouse.
Touchpad
The touchpad (see previous image for location) enables you to control the
cursor on the screen with your finger. Put the tip of your finger on the
touchpad and lightly move your finger in the direction you want to move the
cursor on the screen.
Direction pad
The Direction Pad (see image above) controls up, down, right and left
cursor movement within an application.
Summary of Contents for GoBook MR-1
Page 1: ...GoBook MR 1 Getting Started Guide...
Page 2: ...2 2007 07 23 73 0174 001...
Page 5: ...73 0174 001 2007 07 23 5...
Page 15: ...73 0174 001 2007 07 23 15...
Page 16: ...73 0174 001 Printed in the USA...


