background image

Page 4

 L (WHITE)

 R (RED)

 GND (Spade Lug)

MIXER OR

RECEIVER

OUTPUT CONNECTORS

PHONO L CHANNEL

PHONO R CHANNEL

GND Screw

UNIT PLACEMENT:

1. Place unit on a flat, vibration free surface. Use the turntable feet to

horizontally stabilize the unit.

2. Try to place the unit as far away from the speakers as possible.

3. Keep the unit away from direct exposure to the sun, heat, moisture

or dirt.

4. Keep the unit well ventilated.

CONNECTIONS:

1. Plug the AC power plug into an appropriate outlet.

2. See Table A for proper connection of the output RCA plugs and

ground connector. Make sure that all the plugs are firmly plugged
into the appropriate jacks. To reduce hum, make sure the ground lug
is firmly connected to the ground screw.

TABLE A

Operating Instructions

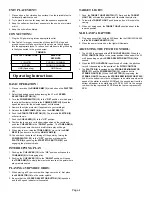
BASIC OPERATION:

1. Place a record on the RUBBER MAT (3) which sits on the PLATTER

(2).

2. Select the desired speed by depressing the 33 or 45 SPEED

SELECTOR BUTTON (14).

3. Turn the POWER SWITCH (12) to the “ON” position, at which point

the strobe illuminator (built into the POWER SWITCH (12) and the
speed indicator (for the selected speed) will illuminate.

4. Remove the stylus protector (if applicable to your cartridge).

5. Release the ARM CLAMP (8) found on the ARM REST (9).

6. Push the START STOP BUTTON (13). The turntable PLATTER (2)

will start to spin.

7. Push the CUE LEVER (15) to the “UP” position.

8. Position the tone arm over the desired position on the record and

push the CUE LEVER to the “DOWN” position.  The TONE ARM (5)
will slowly lower onto the record at which time play will begin.

9. When play is over, raise the TONE ARM (5), move it to the ARM

REST (9), and secure it with the ARM CLAMP (8).

10. You now have the option of turning off the power by turning the

POWER SWITCH (12) to the “OFF” position, or stopping the
PLATTER (2) by pushing the START STOP BUTTON (13) and
engaging the electronic brake.

INTERRUPTING PLAY:

1. Pushing the CUE LEVER (15) to the “UP” position will cause the

TONE ARM (5) to lift stopping play.

2. Pushing the CUE LEVER (15) to the “DOWN” position will cause

the TONE ARM (5) to slowly lower onto the record at the point where
play was interrupted.

PLAYING 45 RPM RECORDS:

1. When playing a 45 rpm record with a large center hole,  first place

the 45 ADAPTOR (16) on the center spindle.

2. Be sure that the 45 SPEED SELECTOR BUTTON (14) is pushed

and the 45 speed indicator is illuminated.

TARGET LIGHT:

1. Push  the TARGET LIGHT SWITCH (17) firmly and the TARGET

LIGHT (18) will raise into position and illuminate the stylus tip.

2. To lower the TARGET LIGHT, push down on it until it locks in the

casing.

3. When not  being used, the TARGET LIGHT should be kept in the

lowered position.

XLR LAMP ADAPTOR:

1. Plug a gooseneck light with an XLR base, like the GEMINI GNL-500,

into the XLR LAMP ADAPTOR (19).

2. When the power is turned on, the light will illuminate.

ADJUSTING THE PITCH CONTROL:

1. The XL-500 is equipped with a PITCH CONTROL (20). When the

PITCH CONTROL (20) is in the center position the speed will be 33
or 45 depending on which SPEED SELECTOR BUTTON (14) is
pushed.

2. When the PITCH CONTROL is positioned off center, the pitch can

vary ±8% depending on the position of the PITCH CONTROL.

3. The PLATTER (2) is equipped with a STROBE RPM INDICATOR

STRIP (21) and the POWER SWITCH (12) contains built in
STROBE LIGHTS (22). When the PLATTER (2) is spinning, the
STROBE LIGHTS illuminate the STROBE RPM INDICATOR STRIP.
At 60 Hz the bottom row of dots will appear to be stationary when the
speed of the platter is exactly 45 RPM and the second row from the
bottom will appear to be stationary at 33 RPM. At 50 Hz, the second
row from the top represents 45 RPM and the top row represents 33
RPM.

Summary of Contents for XL-500

Page 1: ...GEMINI XL 500 DIRECT DRIVE MANUAL TURNTABLE OPERATIONS MANUAL Multi Language Instructions English Page 3 5 Deutsch Page 6 8 Espa ol Page 9 11 Francais Page 12 14 Italiano Page 15 17...

Page 2: ...Page 1 1 3 2 4 6 5 8 10 7 15 11 12 13 22 21 16 17 18 14 19 9 20 Figure 1...

Page 3: ...Page 2 Figure 2 Figure 3A Figure 3B...

Page 4: ...uded with the cartridge ATTENTION STANTON 680 CARTRIDGE USERS When using a Stanton 680 or similar cartridge where the body is grounded to a cartridge terminal remove the grounding strap from the cartr...

Page 5: ...2 to the OFF position or stopping the PLATTER 2 by pushing the START STOP BUTTON 13 and engaging the electronic brake INTERRUPTING PLAY 1 Pushing the CUE LEVER 15 to the UP position will cause the TON...

Page 6: ...mble 56 dB Unweighted TONEARM SECTION Type Universal S Shaped Tubular Arm Effective Length 9 1 16 230 1 mm Overhang 19 32 15 2 mm Effective Mass 9 g Without Cartridge Offset Angle 22 Friction Less Tha...

Page 7: ...hte an den Tonabnehmerklemmen anschlieen Um den Anschlu zu erleichtern sind die meisten Tonabnehmerklemmen farbkodiert Die Zuleitungsdr hte an den Klemmen der jeweiligen Farbkennzeichnung anschlieen...

Page 8: ...G HEBEL in die DOWN Position schieben Der TONARM 5 wird sich langsam auf die Platte senken woraufhin die Platte zu spielen beginnt 9 Bei Beendigung des Spielens heben Sie den TONARM 5 schieben ihn auf...

Page 9: ...Platten Tonabnehmer oder Tonarme Rumpeln 56 dB Fremdspannung TONARM Typ S f rmiger r hrenartiger Universalarm Nutzl nge 230 1 mm 9 1 16 berhang 15 2 mm 19 32 Effektive Masse 9 g ohne Tonabnehmer Reibu...

Page 10: ...la instalaci n correcta 1 Conecte los alambres conductores a los terminales del cartucho Para su conveniencia los terminales de la mayor a de los cartuchos est n codificados por colores Conecte cada a...

Page 11: ...y ponga la PALANCA DE INDICACION en la posici n de ABAJO El BRAZO DE FONOCAPTOR 5 se bajar lentamente sobre el disco en cuyo momento empezar a reproducir 9 Una vez que haya terminado de reproducir le...

Page 12: ...SECCI N DE BRAZO DE FONOCAPTOR Tipo Brazo tubular universal en forma de S Largo efectivo 9 1 16 230 1 mm Gama de ajuste de altura del brazo 0 6 mm Proyecci n 19 32 15 2 mm Masa efectiva 9 g Sin cartuc...

Page 13: ...d une bonne installation 1 Branchez les fils aux bornes de la cartouche Pour vous faciliter la t che les bornes de la plupart des cartouches sont cod es par couleurs Branchez chaque fil la borne de la...

Page 14: ...ositionnez le bras de lecture au dessus du sillon d sir du disque et poussez le LEVIER DE COMMANDE vers la position DOWN Bas Le BRAS DE LECTURE 5 descendra lentement et d posera l aiguille sur le disq...

Page 15: ...s les cartouches ou les bras de lectures Ronflement 56 dB non pond r PARTIE DU BRAS DE LECTURE Type Bras tubulaire universel en S Longueur r elle 230 1 mm 9 1 16 Surplomb 15 2 mm 19 32 po Poids r el 9...

Page 16: ...la maggior parte delle cartucce hanno colori codificati Collegate ciascun conduttore con il terminale del medesimo colore Bianco L Canale sinistro Blu L Canale sinistro Rosso R Canale destro Verde R C...

Page 17: ...IO 15 su DOWN Il BRACCIO 5 si abbasser lentamente sul disco e inizier la riproduzione 9 Alla fine della riproduzione sollevare il BRACCIO 5 rimetterlo sul PORTABRACCIO 9 e fissarlo con il FERMA BRACCI...

Page 18: ...chi della cartuccia e del braccio Rapporto segnale rumore Meno di 56 dB BRACCIO Tipo Braccio universale tubolare ad S Lunghezza effettiva 230 1 mm Sporgenza 15 2 mm Mass effettiva 9 g senza cartuccia...

Page 19: ...d service on the product should be carried out by Gemini Sound Products Corp or it s authorized agents Gemini Sound Products Corp cannot accept any liability whatsoever for any loss or damage caused b...

Reviews: