R
i
b
b
o
n
K
n
o
b
S
c
r
e
w
s
User’s Manual
© Nippon Telesoft Co., Ltd. March 2003.
4. Changing the ink ribbon cassette
【
Caution
】
:Make sure to Turn Off the power first, then start the following works.
And also, DO NOT remove any parts except the Ink Ribbon Cassette
and the Ink Ribbon Cassette Cover.
Boot up the printer once by turning it on.
As part of the initialization sequence of the printer, the dot matrix print head is moved to
the center position.
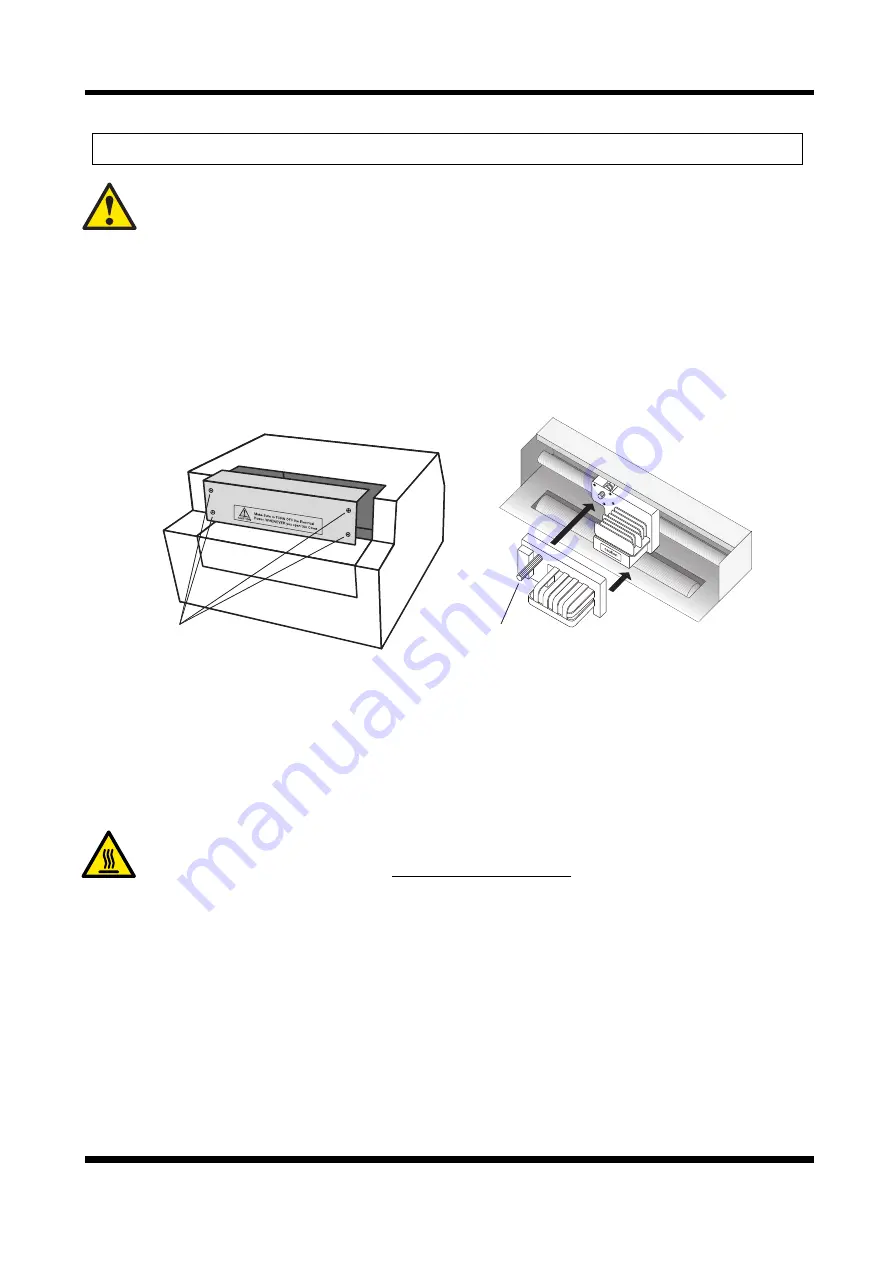
Turn off the electrical power and remove the cover over the ink ribbon cassette portion of the
printer.
Technique for removing the ink ribbon cassette cover
The cover is secured with screws on both sides. Loosen the screws with a Phillips
screwdriver, and take apart them from the cover then remove the cover.
Removing the ink ribbon cassette.
Pull the ink ribbon cassette towards you away from the print head and it can be easily
removed.
【
High temperature caution
】
:Wait at least 30 minutes before replacing
the ribbon. It can be very dangerous immediately after printing due to the
high temperatures of the print head.
Installing the ink ribbon cassette.
Turning the knob on the ink ribbon cassette, remove any of the slack from the ribbon.
The ribbon is installed so that it is in the gap between the paper guide and the print head.
After installation, turn the ribbon knob and remove any slack from the ribbon.
Technique for attaching the ink ribbon cassette cover
Put the cover back to the body where it belongs. Put the screws on both sides and drive
them into the body with a Phillips screwdriver.
10


