P a g e
|
32
Réf. : 450100 FR
4.2.2 – Use on a grooved rail
(if the machine if equipped with grooved rollers)
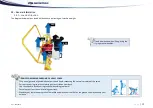
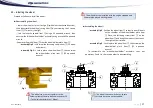
Roll the machine on the rail using its two flat rollers. The guide
flanges, centred in the groove, hold it in place laterally (Refer to 3.3
Adjusting the guide rollers).
■
Start the engine (refer to 4.1 Starting and stopping).
■
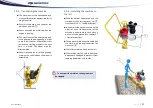
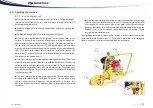
Release the handle Item
③
to raise and lower the wheel.
■
Start by trimming the part to be ground up to roughly 1mm of rail
surface. To do this, work in a series of quick runs, driving the
machine in short movements back and forth along the rail. On
each run, turn by a fraction of a turn the flywheel Item
①
moving
the wheel forward. Grind the horizontal surface as well as the inner
radius of the flange choosing the position of the operating arm
Item
②
furthest with respect to the machine. To this end, loosen
the handle Item
⑤
, separate the two parts (arm/machine) as far
as possible, and retighten the handle Item
⑤
.
■
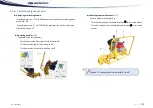
To finish, return to the rail top grinding position. Then adjust the
wheel precisely with respect to the rail profile. To do this, skim the
wheel along the rail (some sparks will appear). You do not need to
perform this operation in zones close to the weld but rather in
zones where rail profile is correct.
■
Grind the entire profile until all weld traces have vanished. Finish
by spreading the fillet over roughly 10 cm on either side of the
weld. Check flatness using a perfectly rectilinear rule. If necessary,
compensate wheel wear using the flywheel
①
. On no account can
an indentation be formed if these instructions are complied with.
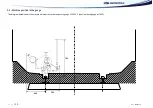
Once grinding is complete, rotate by 3 or 4 turns in an anti-clockwise direction
the wheel forward flywheel Item
①
. The wheel is protected in its casing and
there is no risk of it coming into contact with the next weld.
1
3
2
5
Summary of Contents for MP.12
Page 50: ...K K ...
Page 54: ......
Page 56: ......
Page 64: ...37000 QE R 05 19 PTH NEQ NEA noir black rouge red jaune yellow noir black M Feuille 1 2 ...
Page 65: ......
Page 66: ...37717 JZH 37000 QE R 05 19 Feuille 2 2 ...
Page 68: ......
Page 70: ......
Page 72: ......
Page 76: ......
Page 77: ......
Page 78: ......


