


page | 53
4. Select the desired option by using the ◄ or ► keys.
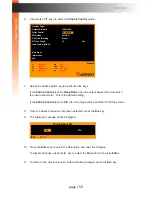
If the
Show PC Name
is set to
Yes
, then the name of the PC will be displayed above
the current input resolution. This is the default setting.
If the
Show PC Name
is set to
No
, then only the input resolution will be displayed.
See
Show Video Signal (page 54)
for more information on hiding / displaying
the current input resolution.
5. Once the desired option has been selected, press the
Esc
key.
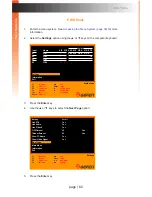
6. The following message will be displayed:
7. Press the
Enter
key to select the
Yes
option and save the changes.
To discard changes, press the ► key to select the
No
option, then press
Enter
.
8. To return to the previous screen, without making changes, press the
Esc
key.
B
asic Oper
ation
OSD Menu
Yes
No
Save Before Exit?
Esc
Back
03
PC03
1920 x 1200
PC Name
Summary of Contents for EXT-DVIK-MV-441
Page 1: ...EXT DVIK MV 441 User Manual 4x1 DVI KVM Multiview Switcher Release A3 Preferred ...
Page 7: ...This page left intentionally blank ...
Page 10: ...This page left intentionally blank ...
Page 11: ...1 Getting Started 4x1 DVI KVM Multiview Switcher ...
Page 20: ...This page left intentionally blank ...
Page 21: ...4x1 DVI KVM Multiview Switcher 2 Basic Operation ...
Page 88: ...This page left intentionally blank ...
Page 89: ...3 Advanced Operation 4x1 DVI KVM Multiview Switcher ...
Page 122: ...This page left intentionally blank ...
Page 123: ...page 113 4 Appendix 4x1 DVI KVM Multiview Switcher ...
Page 129: ...page 119 Appendix Updating the Firmware 6 Click the Manage a Product button ...
Page 131: ...page 121 Appendix Updating the Firmware 8 The Update tab will be displayed ...


