background image

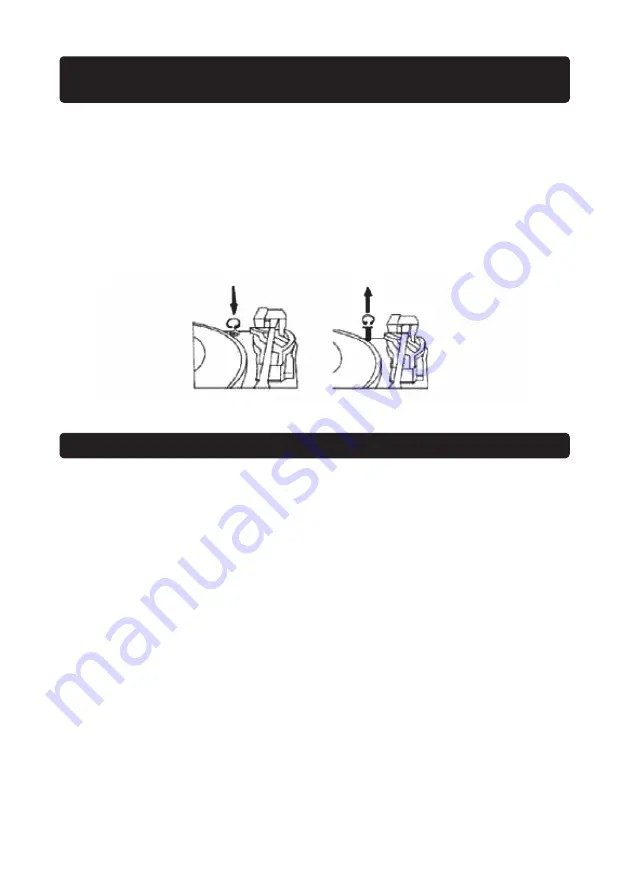
1. To protect the turntable from damage during transportation, a silver trnasit

screw is located on the upper right of the turntable platform.

2. Before playing, please use a screwdriver to turn the transit screw in a

clockwise direction (screw going down) completely to unlock the turntable.

3. To lock the turntable again for trnasportation, please turn screw in a

counter-clockwise direction.

1. Care of the turntable is the same as any piece of furniture.
2. When the dust cover is dusty, you may wipe it using a soft, non-abrasive dust

cloth.

3. If the wood panel becomes smudged with fingerprints, you may use any good

quality commerical dusting and polishing spray cleaner.

4. We recommend spraying the cleaner on a cloth, not directly on the wooden

panel.

10

IMPORTANT!

TRANSPORTING THE SYSTEM

CARE OF THE WOOD PANEL AND DUST COVER

Summary of Contents for LP-56U-BT

Page 1: ...MODEL NO LP 56U BT Instruction Manual PLEASE READ BEFORE USING THIS EQUIPMENT...

Page 2: ...1...

Page 3: ...be exposed to excessive heat such as sunshine fire or the like Caution marking is located at the rear or back of the apparatus The marking information is located at the rear or back of apparatus L app...

Page 4: ...ER 2 TURNTABLE 3 CONTROL PANEL 4 TRANSIT SCREW CROSSING 5 LIFT LEVER 6 SPEED SELECTOR 33 45 78 RPM 7 AUTO STOP CONTROL SWITCH 8 TONE ARM LOCK 9 TONE ARM WITH STYLUS 10 VOLUME DIAL 1 2 4 5 6 7 8 9 10 3...

Page 5: ...BUTTON 20 STANDBY ON BUTTON 21 PHONO REC BUTTON 22 BUTTON 23 PHONO PLAYER BUTTON 24 BT BUTTON 25 USB SOCKET 26 BUTTON 27 BUTTON 4 STANDBY ON PHONO REC USB MP3 PHONO USB BT 15 19 20 21 22 23 24 26 27...

Page 6: ...tic stylus cover from the phonograph stylus by sliding it in the direction of the arrow 6 Be cautious and gentle when removing this stylus cover as damage to the stylus is not covered by warranty 7 Re...

Page 7: ...elf the tone arm gently lifter onto the record The song will stop playing 6 At the end of the record the TONE ARM will stop automatically Put the LIFT LEVER gently backward to yourself the TONE ARM ge...

Page 8: ...button on the front left panel to activate the BLUETOOTH function and the blue LED light will e flashing 2 Set up the Bluetooth playback device so it searches for other Bluetooth devices 3 Select the...

Page 9: ...Please follow the steps below to change the stylus 1 Lift the tone arm off the tone arm lock 2 At the front end of the tone arm place the tip of your fingernail between the red stylus holder and the b...

Page 10: ...l the functions on the auxiliary devcie as usual 6 Please note that AUX IN funcion is a first priority function Even if the indicator light for USB MP3 PHONO BT is on these functions won t work while...

Page 11: ...again for trnasportation please turn screw in a counter clockwise direction 1 Care of the turntable is the same as any piece of furniture 2 When the dust cover is dusty you may wipe it using a soft n...

Page 12: ...s to the new cartridge 4 Carefully connect the terminals to the new cartridge not included 5 To re install the new cartridge to the tone arn first lock the front end of the new cartridge on the hook o...

Page 13: ...upported storage Dimensions L W H Unit weight Version 2 1 EDR DC 9V 2000 mA 2 x 4W RMS USB 434 x 360 x 135 5 mm 4 38 kg Specifications and functions connected to the continual improvement of the devic...

Reviews: