background image

37

Safety Instr

uctions

Operating Instr

uctions

Car
e and Cleaning

Tr

oubleshooting T

ips

Customer Ser

vice

Before You Call For Service…

Troubleshooting Tips 
Save time and money! Review the charts on the following
pages first and you may not need to call for service.

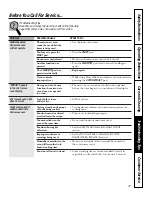
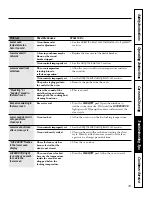
Problem

Possible Causes

What To Do

Control panel on

The microwave oven

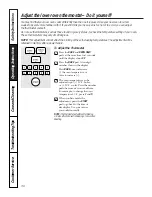
Use the lower oven timer.

microwave oven

cannot be used while the

will not operate

timer is being used.

You forgot to press the

Press the 

START

pad.

START

pad.

Door not securely closed.

Make sure the microwave oven door is closed.

Another function was

Press the 

CLEAR/OFF

pad twice to cancel it and begin 

pressed.

again.

The 

CLEAR/OFF

pad was 

Begin again.

pressed accidentally.

Oven controls 

While using Timed Defrost numbers not entered after 

improperly set.

pressing the 

AUTO DEFROST

pad.

“ERROR” appears 

During an Auto Sensor

The microwave oven door should not be opened

in the microwave 

function the microwave

before the time begins to count down in the display.

oven display

oven door was opened 
too soon.

Microwave oven light

Light bulb is loose

Call for service.

does not work

or defective.

Foods overcooked or

Varying density and amount

Varying density and amount sometimes require more

undercooked in the

of foods being cooked.

cooking time.

microwave oven

Food not turned or stirred

Turn or stir food and begin again.

as called for in the recipe.

Too many dishes in the 

Do not overload your microwave oven.

oven at the same time.

Food not thoroughly 

See the 

Using the microwave auto sensor controls 

defrosted.

section.

Improper cookware or

See the 

Microwave safe cookware section of the 

coverings being used.

Important Safety Instructions 

section.

Humidity or moisture in the 

Make sure the inside of the oven and the outside of

oven will lessen the Auto 

the containers are dry.

Sensor cooking time.

Food not allowed to stand.

Some standing time is recommended for certain  

vegetables cooked with the Auto Sensor Controls.

Summary of Contents for JTP95

Page 1: ...ances Part No 164D3333P099 Pub No 49 8863 12 97 CG JTP95 Owner s Manual Cooking Center Microwave Convection The electrical output of the microwave oven in this cooking center is 900 watts IEC 705 Test Procedure ...

Page 2: ...his appliance only for its intended use as described in this manual Do not use corrosive chemicals or vapors in this appliance Thiscookingcenterisspecifically designed to heat or cook food and is not intended for laboratory or industrial use Be sure your appliance is properly installed and grounded by a qualified technician in accordance with the provided Installation Instructions Have the install...

Page 3: ...t holders moist or damp pot holders on hot surfaces may result in burns from steam Do not let pot holders touch hot heating elements Do not use a towel or other bulky cloth Such cloths can catch fire on a hot element Always keep dish towels dish cloths pot holders and other linens a safe distance from your oven Always keep wooden spoons and plastic utensils and canned food a safe distance away fro...

Page 4: ...d in the oven when not in use If materials inside the oven should ignite keep oven door closed turn oven off and disconnect the power cord or shut off power at the fuse or circuit breaker panel If the door is opened the fire may spread This microwave oven is not approved or tested for marine use Some products such as whole eggs and sealed containers for example closed jars will explode and should ...

Page 5: ...e Oversized food or oversized metal cookware should not be used in a microwave oven Electrical shock or fire could occur While paper plates may be used for timed cooking and defrosting do not use them with Auto Sensor cooking Use microwave safe plates or bowls for reheating Cover with plastic wrap Cookware may become hot because of heat transferred from the heated food Pot holders may be needed to...

Page 6: ... for 30 to 40 seconds after the oven has shut off Do not boil liquids in narrow necked containers such as soft drink bottles wine flasks and especially narrow necked coffee cups Even if the container is opened excessive steam can build up and cause it to burst or overflow Arcing is the microwave term for sparks in the oven Arcing is caused by Metal or foil touching the side of the oven Foil not mo...

Page 7: ... cooking utensilsorfoodintheovenwhennotinuse After broiling always take the broiler pan out of the oven and clean it Leftover grease in the broiler pan can catch fire next time you use the pan Never leave jars or cans of fat drippings in or near your oven Clean only parts listed in this Use and Care Manual Do not use aluminum foil to line oven bottoms except as suggested in this manual Improper in...

Page 8: ...l of time and money over the life of your cooking center You ll find many answers to common problems in the Before You Call For Service section If you review our chart of Troubleshooting Tips first you may not need to call for service at all READ THIS MANUAL GE You A Service Partnership FOR YOUR RECORDS Write the model and serial numbers here You can find them on a label inside the upper oven on t...

Page 9: ...set by the sensor POPCORN Press to pop popcorn ADD 30 SEC Each time you press this pad the set time is increased 30 seconds POWER LEVEL Press to choose the power level you want to set Watch the display while pressing this pad to select the power level you want to set You will also see a defrost level This setting will allow you to choose your own defrost time by using the number pads CLEAR OFF Pre...

Page 10: ...top the countdown and a second time to clear the display When time is up the oven control signals The display shows Enjoy your meal and then goes blank NOTE The minute second timer is independent of all the other functions and it does not control the oven Power Level By using POWER LEVEL you can change the power level for cooking and defrosting Most cooking uses Power Level High but you may choose...

Page 11: ...he START pad How to Set a Delayed Start and Automatic Stop You can set the microwave control to delay start the oven to cook for a specific length of time Press the KITCHEN TIMER MIN SEC pad Press the number pads to set the desired amount of delayed time Press the POWER LEVEL pad to select the desired power level Press the number pads to set the desired length of cooking time Press the START pad T...

Page 12: ...et the defrost time For example Press 5 0 0 to set 5 minutes Press the START pad NOTE Foods frozen in paper or plastic can be defrosted in the package Tightly closed packages should be slit pierced or vented after foods have partially defrosted Plastic storage containers should be partially uncovered Prepackaged frozen dinners can be defrosted and microwaved If foods are in a foil container transf...

Page 13: ...lops Chops 8 to 10 minutes Separate turn over and rearrange halfway through defrosting time Chicken 8 to 10 minutes Separate halfway through defrosting time pieces How to Set a Timed Combination Defrost Hold and Cooking Time Press the POWER LEVEL pad until the display shows DEFROST Press the number pads to set the length of defrosting time Press the KITCHEN TIMER MIN SEC pad Press the number pads ...

Page 14: ...ins to count down in the display The room temperature should not be above 95 F when using the Auto Sensor Controls Do not use the Auto Sensor Controls for foods that are less than 4 ounces Foods less than 4 ounces should be cooked by power and time only When using the Auto Sensor Controls make sure the glass tray in the oven is dry to assure the best cooking results For proper cooking results be s...

Page 15: ...al power and time Do not reheat raw or uncooked food You cannot use Auto Sensor Reheat if the microwave oven cavity is warm The display will let you know if the cavity is too warm for the sensor to work properly You can still time cook in the microwave by choosing your own cooking time instead of using Auto Sensor Reheat Do not reheat beverages Do not reheat frozen foods For best results when usin...

Page 16: ... to stand in order to let the inside defrost You may take the food out of the oven during this standing time You must set the weight of foods by pounds and ounces Press 1 LB to set the pound weight Each time the pad is pressed the weight increases by 1 pound Press 1 OZ to set the ounces you need During auto defrosting the control will beep to let you know when to turn foods General Information On ...

Page 17: ... the display when the oven is first turned on BROIL HI LO Pad Pressthispadtoselectthebroilfunction BAKE Pad Pressthispadtoselectthebakefunction CONVECTION BAKE Pad Press this pad to select baking with the convection function CONVECTION ROAST Pad Press this pad to select roasting with the convection function Number Pads Use to set any function requiring numbers suchasthetimeofdayontheclock thetimer...

Page 18: ... again and the display will show no shdn no shut off Press the START pad to activate the no shut off and leave the control set in this special features mode Fahrenheit or Centigrade Temperature Selection Your oven control is set to use the Fahrenheit temperature selections but you may change this to use the Centigrade selections Press the BAKE and BROIL HI LO pads at the same time for 3 seconds un...

Page 19: ...ery 6 seconds Press the START pad 12 Hour 24 Hour or Clock Black Out Your control is set to use a 12 hour clock If you would prefer to have a 24 hour military time clock or black out the clock display follow the steps below Press the BAKE and BROIL HI LO pads at the same time for 3 seconds until the display shows SF Press the CLOCK pad once The display will show 12 hr If this is the choice you wan...

Page 20: ...TART pad to activate the cook and hold feature and leave the control set in this special features mode Using Convection Conversion By using the Convection Conversion feature you can automatically convert the oven temperature from regular baking to Convection Bake temperatures To convert the oven temperature for convection baking follow the steps below Press and hold the CONVECTION BAKE pad for 4 t...

Page 21: ...Type of Food Shelf Position Frozen pies on cookie sheet C or D Angel food cake B bundt or pound cakes Biscuits muffins brownies C or D cookies cupcakes layer cakes pies Casseroles C or D Preheating and Pan Placement Preheat the oven if the recipe calls for it To preheat set the oven at the correct temperature Preheating is necessary for good results when baking cakes cookies pastry and breads For ...

Page 22: ...l Done 1 2 to 3 4 thick E 10 9 patties take about the same time Beef Steaks Rare 1 thick E 8 6 Steaks less than 1 Medium 1 to 11 2 lbs E 10 8 thick cook through Well Done E 12 10 before browning Pan frying is recommended Slash fat Rare 11 2 thick E 10 8 Medium 2 to 21 2 lbs E 15 14 16 Well Done E 25 20 25 Chicken 1 whole C 25 10 Reduce time about 5 2 to 21 2 lbs to 10 minutes per side split length...

Page 23: ... the START pad When the timer reaches 00 the control will beep 3 times followed by one beep every 6 seconds until the KITCHEN TIMER ON OFF pad is pressed The 6 second tone can be canceled by following the steps in the Special features of your lower oven control section under Tones at the End of a Timed Cycle The timer is a minute timer only The timer does not control oven operations The maximum se...

Page 24: ...e temperature reaches 100 F The oven will continue to cook for the programmed amount of time then shut off automatically Press the CLEAR OFF pad to clear the display How to Set a Delayed Start and Automatic Stop You can set the oven control to delay start the oven cook for a specific length of time and then turn off automatically Make sure the clock shows the correct time of day Press the BAKE pad...

Page 25: ...est part of the roast For bone in ham or lamb insert the probe into the center of the lowest large muscle or joint Insert the probe into the center of dishes such as meat loaf or casseroles When cooking fish insert the probe from just above the gill into the meatiest area parallel to the backbone Insert the probe into the meatiest part of the inner thigh from below and parallel to the leg of a who...

Page 26: ...d the food Preheating is not necessary with foods having a bake time of over 15 minutes Convection Roast Good for large tender cuts of meat uncovered Heat comes from the top heating element The convection fan circulates the heated air evenly over and around the food Meat and poultry are browned on all sides as if they were cooked on a rotisserie Using the roasting rack provided heated air will be ...

Page 27: ...o Set the Oven for Convection Baking or Roasting Press the CONVECTION BAKE or CONVECTION ROAST pad Press the number pads to set the desired oven temperature Press the START pad To change the oven temperature press the CONVECTION BAKE or CONVECTION ROAST pad and then the number pads to set the new temperature When the oven starts to heat the changing temperature starting at 100 F will be displayed ...

Page 28: ...en the door is opened but the heat will not turn off You can use the timer even though you cannot use timed oven operations For best results when roasting large turkeys and roasts we recommend using the probe included in the convection oven To change the oven temperature during the Convection Roast cycle press the CONVECTION ROAST pad and then press the number pads to set the new desired temperatu...

Page 29: ...ion bake the oven will turn off The end of cycle tone will sound Press the CLEAR OFF pad to clear the display if necessary Remove the food from the oven Remember foods that are left in the oven continue cooking after the controls are off How to Set a Delayed Start and Automatic Stop You can set the oven control to delay start the oven cook for a specific length of time and then turn off automatica...

Page 30: ...ffect the broiling or the self cleaning temperatures The adjustment will be retained in memory after a power failure To Adjust the Thermostat Press the BAKE and BROIL HI LO pads at the same time for 3 seconds until the display shows SF Press the BAKE pad A two digit number shows in the display PressBAKE oncetodecrease theoventemperature or twice to increase The oven temperature can be adjusted up ...

Page 31: ... Make sure the oven light bulb cover on some models is in place and the oven light is off Wipe up heavy soil on the oven bottom How to Set the Oven for Cleaning Press the SELF CLEAN pad Using the number pads enter the desired clean time if a time other than 4 hours is needed Clean cycle time is normally 4 hours You can change the clean time to any time between 3 hours and 5 hours depending on how ...

Page 32: ...en door until the temperature drops below the lock temperature and the LOCKED DOOR light goes off When the LOCKED DOOR light is off open the door After a Clean Cycle You may notice some white ash in the oven Wipe it up with a damp cloth after the oven cools If white spots remain remove them with a soap filled steel wool pad and rinse thoroughly with a vinegar and water mixture These deposits are u...

Page 33: ...e interior fresh Spills and spatters are easy to remove from walls and floor if they are wiped up soon after the food is removed Some spatters wipe up with a paper towel some may require a damp cloth Remove greasy spatters with a sudsy cloth then rinse and dry Do not clean with metal scouring pads Pieces can break off the pad causing electrical shock Wipe up spatters on the window on the inside of...

Page 34: ...wer oven The lower oven door is removable for cleaning Do not lift the door by the handle To remove the door open it to the broil stop position Grasp firmly on each side and lift the door straight up and off the hinges Do not place hands between the hinge and the oven door frame To replace the door make sure the hinges are in the broil stop position Position the slots in the bottom of the door squ...

Page 35: ... polish dry with a soft cloth Do not use abrasive cleansers strong liquid cleansers plastic scouring pads or oven cleansers on the control panel they will damage the finish A 50 50 solution of vinegar and hot water works well Broiler Pan Grid lower oven Do not clean the broiler pan or grid in a self cleaning oven After broiling remove the broiler pan from the oven Remove the grid from the pan Care...

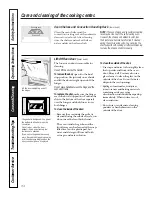
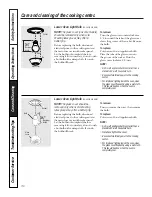
Page 36: ...0 watt household bulb Reconnect electrical power to the cooking center For improved lighting inside the oven clean the glass cover frequently using a wet cloth This should be done when the oven is completely cool Bulb Socket Tab Maximum length 31 2 Glass cover Lower Oven Light Bulb on some models NOTE The glass cover should be removed only when cold Wearing latex gloves may offer a better grip Bef...

Page 37: ... door should not be opened in the microwave function the microwave before the time begins to count down in the display oven display oven door was opened too soon Microwave oven light Light bulb is loose Call for service does not work or defective Foods overcooked or Varying density and amount Varying density and amount sometimes require more undercooked in the of foods being cooked cooking time mi...

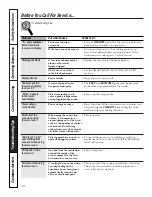
Page 38: ...top position as lower oven recommended Oven controls improperly set Make sure you press the BROIL HI LO pad Improper shelf position See the Broiling Guide being used Food being cooked in Use the broiling pan and grid that came with your oven a hot pan Make sure it is cool Cookware not suited Use the broiling pan and grid that came with your oven for broiling The probe is plugged into the Unplug an...

Page 39: ...ing sound in metal heating and cooling the lower oven during both the cooking and cleaning functions Excessive smoking in Excessive soil Press the CLEAR OFF pad Open the windows to the lower oven rid the room of smoke Wait until the LOCKED DOOR light goes off Wipe up the excess soil and reset the clean cycle Lower oven door will Oven too hot Allow the oven to cool below locking temperature not ope...

Page 40: ...Enter a probe temperature in the lower enter a probe temperature oven display after plugging in the probe Power outage Power outage or surge Reset the clock If the oven was in use you must reset clock flashes it by pressing the CLEAR OFF pad setting the clock and resetting any cooking function Steam from the When using the convection This is normal vent when using feature it is normal to see the l...

Page 41: ... protection or you may request your money back on the remaining value of your contract No questions asked It s that simple Protect your refrigerator dishwasher washer and dryer range TV VCR and much more any brand Plus there s no extra charge for emergency service and low monthly financing is available Even icemaker coverage and food spoilage protection is offered You can rest easy knowing that al...

Page 42: ...stment Complete and mail your Consumer Product Ownership Registration today Have the peace of mind of knowing we can contact you in the unlikely event of a safety modification After mailing the registration below store this document in a safe place It contains information you will need should you require service Our service number is 800 GE CARES 800 452 2737 Read your Owner s Manual carefully It ...

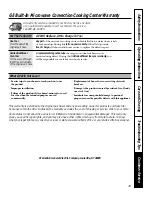
Page 43: ...year from date of the original purchase Service trips to your home to teach you how to use the product Improper installation Failure of the product if it is abused misused or used for other than the intended purpose or used commercially Replacement of house fuses or resetting of circuit breakers Damage to the product caused by accident fire floods or acts of God Incidental or consequential damage ...

Page 44: ... expires Parts and Accessories 800 626 2002 Individuals qualified to service their own appliances can have parts or accessories sent directly to their homes VISA MasterCard and Discover cards are accepted Instructions contained in this manual cover procedures to be performed by any user Other servicing generally should be referred to qualified service personnel Caution must be exercised since impr...

Reviews: