GE Wireless Color Digital Home Monitoring Kit User Manual Download Page 8

8

3. Press and release the 

‘ok’

 button. Use the directional keypad

    to highlight either 

‘1x’ 

or 

‘2x’.


4. Press and release the 

‘ok’

 button. Press and release the 

‘menu’


    button to exit. Use the directional keypad to digitally
    pan and tilt the displayed image.
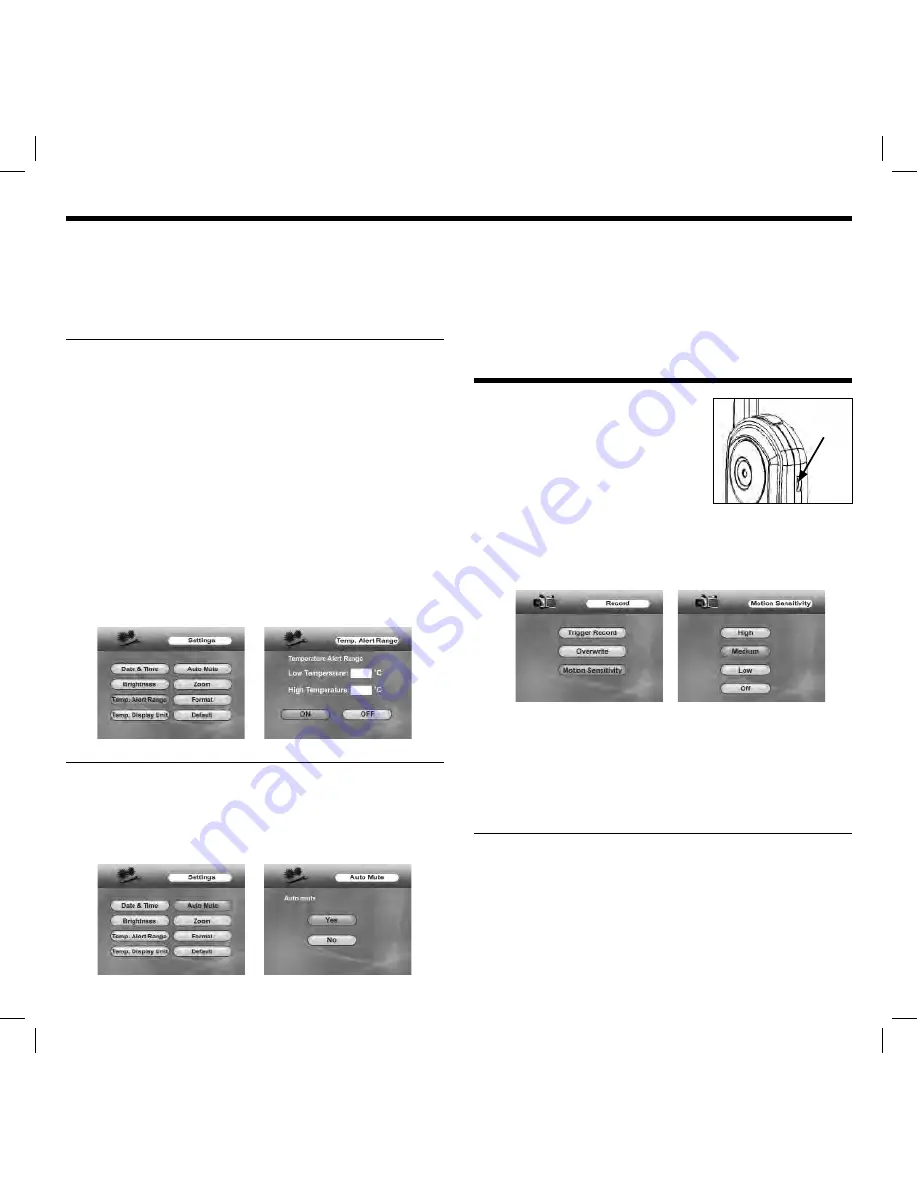
 TEMPERATURE ALERT

Monitor the temperature near the camera with alarm notifi cation. 
When activated, the temperature reading on the display will 
blink red continuously when the temperature range is exceeded. 
Additionally, the monitor will beep twice every 60 seconds. The 
alarm resets automatically when the temperature returns within 
the range selected. Functional range: -4–131°F (-20–55°C)
1. Press and release the 

‘menu’

 button on the monitor. Using the

    directional keypad, highlight the 

‘Settings’

 option. 

2. Press and release the 

‘ok’

 button. Using the directional

    keypad, highlight the 

‘Temp. Alert Range’

 option.

3. Press and release the 

‘ok’

 button. Use the directional keypad

    to adjust the values displayed. 
4. Use the directional keypad to highlight 

‘On’ 

or 

‘Off’

5. Press and release the 

‘ok’

 button to save. Press and release

    the 

‘menu’

 button to exit. 

 AUTO MUTE

Mutes monitor speaker until camera is activated by motion or 
audio (if enabled). Speaker transmits audio from activated camera 
for approximately 5 seconds after camera no longer detects 
motion or audio. Can be triggered for an indefi nite period of time.

1. Press and release the 

‘menu’

 button on the monitor.

    Using the directional keypad, highlight the 

‘Settings’

 option. 

2. Press and release the 

‘ok’

 button. Use the directional keypad

    to highlight 

‘Auto Mute’.

 Press and release the 

‘ok’

 button. 

3. Use the directional keypad to highlight either 

‘Yes’

 or 

‘No’.


    Press and release the 

‘ok’

 button to save. 

4. Press and release the 

‘menu’

 button to exit. 

SETTINGS:

 ADJUSTING THE SOUND AND/OR 

MOTION DETECTION SENSITIVITY

• Sound

1. Identify the 

‘sensitivity’

 dial and 

    adjust as shown.
2. Turn the dial completely down to disable sound detection.

• Motion

1. Press and release the 

‘menu’

 button on the monitor. Using the 

    directional keypad, highlight the 

‘Record’

 option. 

2. Press and release the 

‘ok’

 button. Using the directional

    keypad, highlight the 

‘Motion Sensitivity’

 option. 

3. Press and release the 

‘ok’

 button. Use the directional

    keypad to highlight 

‘High, ‘Medium’, ‘Low’

 or 

‘Off’.

 Press and 

release the 

‘ok’

 button.

4. Press and release the 

‘menu’

 button to exit. 

 SETTING THE DATE AND TIME

1. Press and release the 

‘menu’

 button on the monitor.

    Using the directional keypad, highlight the 

‘Settings’

 option. 

2. Press and release the 

‘ok’

 button. Press and release the 

‘ok’

    button to select 

‘Date & Time’.

3. Use the directional keypad to adjust the values displayed.
    Press and release the 

‘ok’

 button to save. Press and release

    the 

‘menu’

 button to exit.

sensitivity 
control

Summary of Contents for Wireless Color Digital Home Monitoring Kit

Page 1: ...nder license by Jasco Products Company LLC 10 E Memorial Road Oklahoma City OK 73114 www jascoproducts com http goo gl 3wUHy HOME MONITORING SMALL BUSINESS PROTECTION BABY MONITORING NANNY CAM THEFT D...

Page 2: ...CED FEATURES Connecting to a computer 9 Using with add on cameras 9 View live video with 1st priority motion and or sound detection 10 Recording with optional MicroSD card 10 Manually record 10 Automa...

Page 3: ...ng audio to monitor automatically Built in night light manually activated on camera or remotely activated on monitor 4 Musical lullabies remotely activated on monitor Tabletop or wall mount options Po...

Page 4: ...r direct to monitor mini USB auto record back play pause fast forward stop delete rewind RECORDING PLAYBACK manual activates the single viewing mode quad scan toggles between multiscreen and sequentia...

Page 5: ...unting the camera To simplify the mounting process a custom wall mounting plate is included with the mounting hardware 1 After selecting an ideal location use the supplied mount as a template Drill 3...

Page 6: ...can easily pass through your home s interior walls but the signal may be re ected by power wires or plumbing inside those walls Usually a slight adjustment to the position of the monitor and or camer...

Page 7: ...de multi screen view only in single camera view TALK BACK Speak directly to currently selected camera channel 1 Locate the talk back button on the left side of the monitor 2 Press and hold the talk ba...

Page 8: ...after camera no longer detects motion or audio Can be triggered for an inde nite period of time 1 Press and release the menu button on the monitor Using the directional keypad highlight the Settings o...

Page 9: ...2 Using the directional keypad highlight the Settings option 3 Press and release the ok button 4 Using the directional keypad highlight the Default option 5 Press and release the ok button 6 Use the d...

Page 10: ...is in standby mode In addition to turning the screen back on and beeping 4 tones when motion and or sound is detected the screen will jump to the applicable camera The screen will remain lit for appr...

Page 11: ...and then the auto button on the right side of the monitor WITH noti cation alarm In addition to recording when motion and or sound is detected by camera sounds 4 beeping tones that can be triggered r...

Page 12: ...tely 15 seconds after the video motion and or sound stops To be noti ed with the screen in standby mode In addition to turning the screen back on when motion and or sound is detected the screen will j...

Page 13: ...the menu button on the monitor Using the directional keypad highlight the Record option 2 Press and release the ok button Using the directional keypad highlight the Trigger Record option Press and re...

Page 14: ...amera slightly or moving the camera away from the light source if known to allow the camera to focus properly TECHNICAL SUPPORT For additional assistance Online www jascoproducts com support Email sup...

Page 15: ...his device may not cause harmful interference and 2 this device must accept any interference received including interference that may cause undesired operation FCC NOTE The manufacturer is not respons...

Reviews: