background image

8

SETTING UP THE VCR

Using the Menus to Set Up Features

You can set up your VCR’s features by using the remote
control’s buttons to enter your choices from on-screen
instructions. Each menu item is explained in this section.

You can set up features individually by using the menu system.
Each feature that appears in the initial set up is explained in this
section as well as a few others you may want to setup before you
begin using your VCR.

Language Selection

1.

On your remote control, press the MENU button to display

the VCR MAIN MENU.

2.

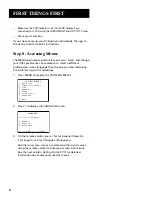
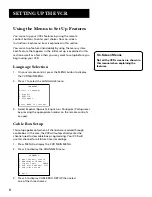
Press 7 to select the LANGUAGE menu.

       LANGUAGE

Select a language.

1 Español
2 English
3 Português

Press MENU to continue

3.

Select Español (Spanish), English, or Português (Portuguese)

by pressing the appropriate number on the remote control’s

key pad.

Cable Box Setup

This setup applies only when all channels are received through
a cable box. In this case, the VCR will automatically enter the
channel used to view cable box pr ogramming. Your VCR will
use this channel for all future timer recordings.

1.

Press MENU to display the VCR MAIN MENU.

2.

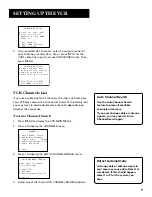
Press 4 to display the CHANNELS menu.


CHANNELS

1 Auto Channel Search
2 Add/Remove Channels
3 Signal Type:     CABLE  
4 VCR Plus+ Channel List
5 Cable Box Setup

0 Exit

3.

Press 5 to display CABLE BOX SETUP, then select

one of the three choices:

On-Screen Menus

Not all the VCR screens are shown in
this manual when explaining the
features.

Summary of Contents for VGS330

Page 1: ...VCR User s Guide VGS330 We bring good things to life It is important to read these instructions before using this product for the first time TOCOM 15469420...

Page 2: ...ce the risk of electric shock match the wide blade of plug to wide slot and fully insert Power Requirement 100 240V AC 50 60 Hz Power Consumption 19 watts Cable TV Installer This reminder is provided...

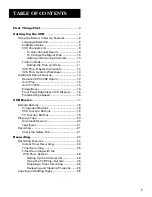
Page 3: ...VCR2 Option 14 Auto Play 15 Auto TV VCR 15 EnergySaver 16 Front Panel Brightness VCR Display 16 Preferred Tape Speed 16 VCR Basics 17 Remote Buttons 18 Component Buttons 18 VCR Function Buttons 18 TV...

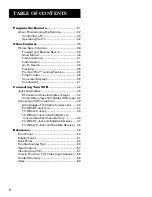
Page 4: ...VCR 42 Jacks and Cables 42 RF Jacks and Coaxial Cables F type 42 Audio Video Jacks and Cables RCA type 42 Choosing a VCR Connection 43 Advantages of A V Cable Connections 43 TV With RF Jack Only 44 TV...

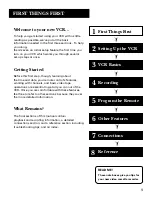
Page 5: ...tures working with channels and basic video tape operations are essential to get all you can out of the VCR Once you are comfortable with these features feel free to refer to other sections because th...

Page 6: ...to your TV use the VCR s IN FROM ANT and OUT TO TV jacks for a good signal as shown to the right If you have a TV with AUDIO VIDEO jacks use the jacks for a better connection Refer to the section Conn...

Page 7: ...ote control s number buttons to select options Seleccione un idioma Select a language Escolha uma idioma 1 Espa ol 2 English 3 Portugu s 1 Press 1 for English 2 for Espa ol Spanish or 3 for Portugu s...

Page 8: ...han the one you selected during the initial set up do the following 1 Press MENU to display the VCR MAIN MENU VCR MAIN MENU 1 VCR Plus 2 Timer Recordings 3 Time 4 Channels 5 Setup 6 Preferences 7 Lang...

Page 9: ...t Up for a Cable Box Set Up a Channel List Auto Channel Search Setting Time and Date Set Up VCR Plus System Channels Set the Auto Play Feature Set the EnergySaver Feature Set the Front Panel Brightnes...

Page 10: ...1 Espa ol 2 English 3 Portugu s Press MENU to continue 3 Select Espa ol Spanish English or Portugu s Portuguese by pressing the appropriate number on the remote control s key pad Cable Box Setup This...

Page 11: ...add or delete some channels depending on whether they are active To Auto Channel Search 1 Press MENU to display the VCR MAIN MENU 2 Press 4 to display the CHANNELS menu CHANNELS 1 Auto Channel Search...

Page 12: ...hange the Signal Type between CABLE and ANTENNA Adding or Removing Channels You may want to add or r emove channels after you Auto Channel S earch especially if some of the channels have weak signals...

Page 13: ...and date are set manually Setting the Time and Date You set the clock through the TIME menu 1 Press MENU to display the VCR MAIN MENU 2 Press 3 to display the SET TIME AND DATE menu SET TIME AND DATE...

Page 14: ...NELS 1 Auto Channel Search 2 Add Remove Channels 3 Signal Type CABLE 4 VCR Plus Channel List 5 Cable Box Setup 0 Exit 3 Press 4 to display the VCR Plus Channel List screen VCR Channel My Channel 5 4 3...

Page 15: ...r the channel number you receive this station on Check your local listings for broadcast or VCR Plus channel number assigned VCR Plus System Worksheet Broadcast or Cable TV Station Name VCR Plus Syste...

Page 16: ...00 5 Front Panel AUTO 6 Tape Speed EP 0 Exit Now you are ready to select an item from the menu to set up Remote VCR1 VCR2 Option If you own a compatible RCA GE or PROSCAN remote that has a VCR2 VCR2...

Page 17: ...a tape with its safety tab removed to start playing automatically Auto TV VCR This feature controls whether the TV VCR switch changes automatically to the VCR mode Press 3 to switch between ON and OFF...

Page 18: ...ent display panel on the front of the VCR In the PREFERENCES menu press 5 to switch between the options AUTO brightens the display when the VCR is on and dims the display when the VCR is off BRIGHT ke...

Page 19: ...gram should do just that This section shows you the basics of using your VCR It discusses things like using the remote control playing a tape and recording programs VCR Basics tells you what you need...

Page 20: ...r recording F ADV Lets you view one frame with each press of the button when tape is in pause FORWARD Fast forwards the tape when the VCR is stopped Searches forward through a tape during playback Sta...

Page 21: ...ture jitter during stop action playback TV VCR Switches the picture signal so that it either comes from the VCR or cable antenna system TV Function Buttons CHAN Up or Down Selects next higher or lower...

Page 22: ...ar y on VCR PLA Y on remote to begin ape play ress P STILL P AUSE on r emote for stop action ress TRACKING up or down to remove any streaks from the icture if necessar y ress STOP EJECT on VCR STOP on...

Page 23: ...the next section Check the Safety Tab o matter which recording option you use you need to make ure there is a tape in the VCR and that the tape s safety tab is in lace You cannot record on a tape with...

Page 24: ......

Page 25: ...rding features available to suit your needs Recording Features on your VCR include Recording explained in the VCR Basics section Instant Timer Recording Timer Recording Timer Recording with VCR Plus S...

Page 26: ...rogramming the VCR by just entering a PlusCode programming number found in TV guides Instant Timer Recording Use Instant Timer Recording when you want to quickly record the remaining portion of the pr...

Page 27: ...am with the number buttons The data includes the channel number press INPUT to select the line input start time and end time including AM or PM The start date is automatically entered based on the VCR...

Page 28: ...els through a cable box the VCR can control the cable box or if you receive your TV signal off air Setting Up the Channel List If you did not set up the VCR Plus programming system channel list you ca...

Page 29: ...R PlusCode programming number shown in your local television guide VCR PLUS Enter PlusCode Number from TV listing 12876 Press CLEAR to correct Press MENU when done 4 Press MENU to enter the VCR PlusCo...

Page 30: ...onds Reviewing and Clearing Programs To review programs that you have already set up 1 Press 2 when the VCR MAIN MENU is displayed to display the TIMER RECORDINGS menu TIMER RECORDINGS 1 Create a New...

Page 31: ...lace into recording VCR 6 Using visual search locate the segment you want to copy on the playback VCR Pause the tape at this location 7 Press RECORD on the recording VCR then PAUSE 8 Press PAUSE on bo...

Page 32: ......

Page 33: ...to control a television The remote is already programmed to control an RCA GE or PROSCAN TVs Other manufacturer s brands need to be programmed 5 Setting Up the VCR 2 First Things First 1 Recording 3...

Page 34: ...If the TV responds to the remote commands the remote is programmed 6 If the TV does not respond repeat these steps using the next code listed for your TV s brand Operating the TV After you set up the...

Page 35: ...12 Mitsubishi 06 12 MTC 06 NAD 07 NEC 06 Panasonic 04 08 11 Philco 04 06 12 Philips 03 04 06 12 Pioneer 06 Portland 06 12 ProScan 01 Proton 06 Quasar 11 Radio Shack 01 05 13 RCA 01 06 12 Realistic 05...

Page 36: ......

Page 37: ...eration Commercial Scan Picture Search Options Tracking Pro Tect Plus Locking Time Counter On screen Displays 5 Setting Up the VCR 2 First Things First 1 Recording 3 VCR Basics 4 Other Features 7 6 Co...

Page 38: ...D or REVERSE again or press PLAY to return to normal playback Slow Motion You can view a tape during play or play pause using slow motion Slow motion works well for tapes recorded at the SP or SLP spe...

Page 39: ...H screen 3 If you want to search through a certain number of index marks press two number buttons to enter the number of marks you want to search Press CLEAR on the remote to correct an entry 4 Press...

Page 40: ...cking especially if the tape was recorded on a different VCR Just use the TRACKING buttons to reduce the distortion You can also use tracking when you pause a tape to reduce jittering of the picture W...

Page 41: ...u may want to press PLAY to verify Now you can begin recording at this spot 5 Press INFO to remove the time counter from the screen and return to the normal display mode On screen Displays The INFO bu...

Page 42: ......

Page 43: ...oil any twin lead cables and keep them away from the audio video cables as much as possible Make sure all antennas and cables are properly grounded Refer to the Safety Tips sheet packed with your unit...

Page 44: ...ons The RF jacks on the VCR are labeled IN FROM ANT and OUT TO TV The coaxial cable supplied with your VCR is used to connect the VCR s OUT TO TV jack and your TV s antenna input Audio Video Jacks and...

Page 45: ...video jacks and cable box to unscramble pay channels only TV with RF jack and satellite receiver TV with audio video jacks and satellite receiver If you need to connect additional components not shown...

Page 46: ...ng a cable box for all channels To use this connection you must have 1 coaxial cable for cable or antenna connection 2 for cable box To connect 1 Connect cables as shown 2 Return to First Things First...

Page 47: ...ecord one channel while watching another except when using a cable box for all channels To use this connection you must have 1 coaxial cable for cable antenna connection 2 for cable box 2 audio video...

Page 48: ...mbled or unscrambled channel through the cable box while watching an unscrambled channel To use this connection you must have 3 coaxial cables 2 audio video cables 1 splitter To connect 1 Connect cabl...

Page 49: ...itch on the back of the receiver Turn off receiver To watch and or record from the digital satellite receiver tune your VCR to its line input L1 appears in display To play a tape 1 Insert a tape 2 If...

Page 50: ...ite receiver To record from the digital satellite receiver tune your VCR to its line input L1 appears in the display To play a tape 1 Insert a tape 2 If necessar y press VCR and then PLA Y To record o...

Page 51: ...scription of the unit s controls and displays You will also find the section Troubleshooting Tips in this Appendix This areas might help resolve some simple problems 5 Setting Up the VCR 2 First Thing...

Page 52: ...play pause and increases slow motion speed P STILL Pauses action for viewing during playback Pauses recording to prevent recording of unwanted scenes PLAY Plays a tape POWER Turns the VCR on or off R...

Page 53: ...E VCR turned off PLAY In playback flashes during play pause and slow REC Recording and REC P For record pause or pause mode REW Rewinding 0 30 Express recording in progress SRCH and SRCH Forward or re...

Page 54: ...a VCR or camcorder when it is connected to these jacks Use INPUT on the remote to select L1 to record from these jacks AUDIO and VIDEO OUT Jacks Sends signals from VCR to another component like a TV o...

Page 55: ...d correct Snowy or no picture during playback Press TV VCR to turn VCR indicator on Check TV channel selected 3 or 4 to make sure it matches the channel selected with CH 3 CH 4 switch on back of VCR C...

Page 56: ...rewound VCR Plus or timer recording not made or wrong program recorded Check to make sure the correct VCR Plus program number is entered Check to make sure the program was entered correctly wrong chan...

Page 57: ...ctly Check to make sure the antenna connections are secure and correct Check to make sure the Signal Type CABLE ANTENNA feature is set correctly If Detect Automatically was selected for the Signal Typ...

Page 58: ...shes The clock is not set Check to make sure there is a cassette in the VCR when a timer recording is set Time counter disappears during searching This is normal On screen menus appear in English Port...

Page 59: ...270 mm Weight 7 5 pounds 3 4 kg Storage Temperature 22 F to 149 F Range 30 C to 65 C Operating 41 F to 104 F Temperature Range 5 C to 40 C Check your cable company s compatibility requirements Cleani...

Page 60: ...TV If so follow the step above If those options do not work try the following ideas You might access the Video Input Channel by pressing a button on the remote see table below selecting the channel f...

Page 61: ...ypes of 42 Care and Cleaning i2 CH3 CH4 switch 5 44 47 52 CHAN buttons 19 32 CHANNEL buttons 18 Channel List 26 Channel number display 51 Channel VCR viewing 5 Channels adding removing 10 CHANNELS men...

Page 62: ...EP 16 SP 16 SPEED button 19 27 Speeds recording 16 Status indicators 51 EJEC Eject 51 FF 51 PLAY 51 REC 51 REW 51 SRCH and SRCH 51 STOP 51 STOP button 19 20 21 28 37 38 39 STOP EJECT button 20 STOP EJ...

Page 63: ......

Page 64: ...please contact your dealer or the nearest Servicenter from the yellow pages Please do not send any products to the Indianapolis address listed in this manual or on the carton This will only add delay...

Reviews: