background image

21

Safety Instructions

Operating Instructions

Care and Cleaning

Tr

oubleshooting T

ips

Consumer Support

www.GEAppliances.ca

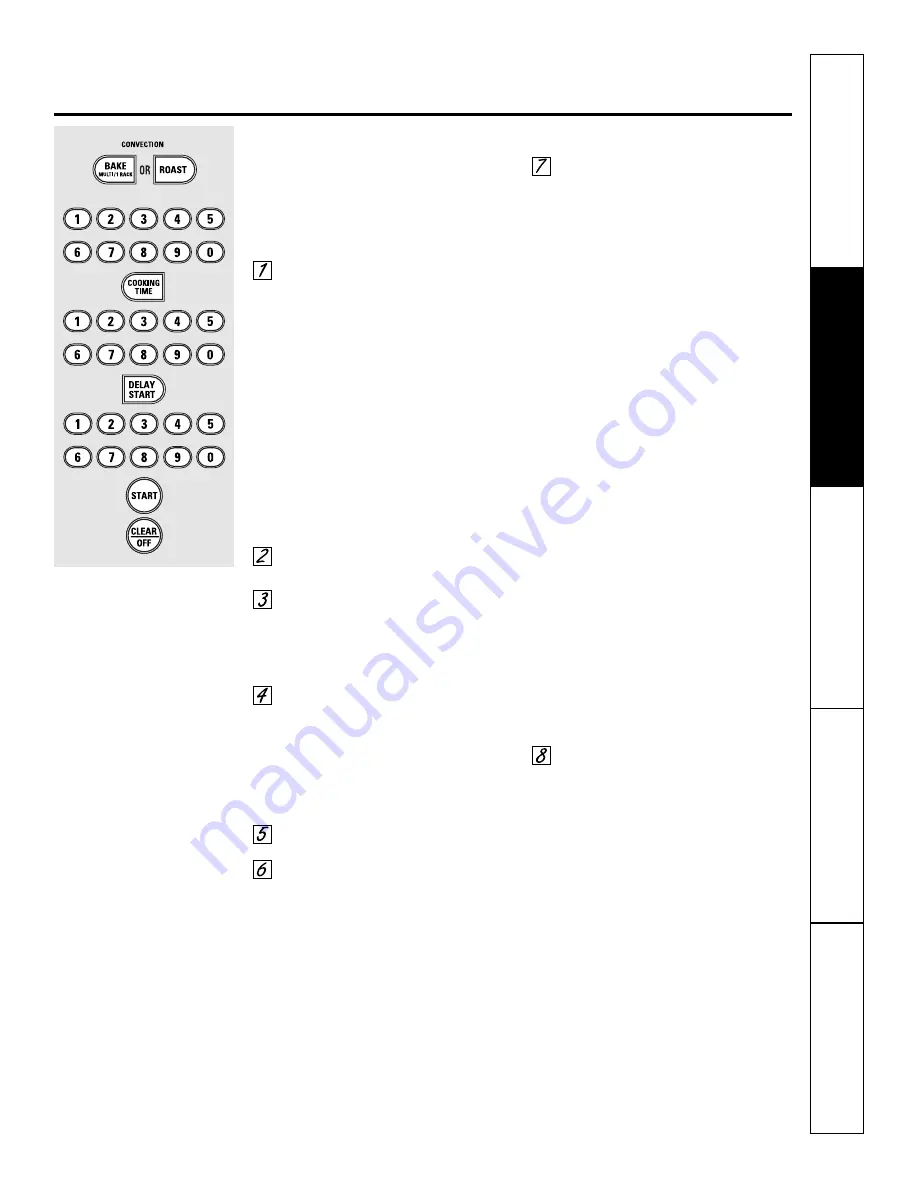
How to Set a Delayed Start and Automatic Stop

The oven will turn on at the time of day you set,
cook for a specific length of time and then turn off
automatically.

Make sure the clock shows the correct 
time of day.

Touch the 

CONVECTION BAKE

MULTI/1 RACK

pad once for multi-

rack convection baking. This mode
is used for cooking food items on
more than one rack (i.e., 2, 3 or
more racks) at the same time in
convection bake. See 

Multi-Rack

Baking

section for more information.

Touch the 

CONVECTION BAKE

MULTI/1 RACK

pad twice for one rack

convection baking. This mode is
used for cooking food items on only
one rack in convection bake.

Touch the 

CONVECTION ROAST

pad

for convection roasting.

Touch the number pads to set the
oven temperature.

Touch the 

COOKING TIME

pad.

NOTE: 

If your recipe requires preheating, you may

need to add additional time to the length of the
cooking time.

Touch the number pads to set the
desired length of cooking time. The
minimum cooking time you can set 
is 1 minute.

The oven temperature that you set
and the cooking time that you
entered will be in the display.

Touch the 

DELAY START

pad.

Touch the number pads to set the
time of day you want the oven to
turn on and start cooking.

Touch the 

START

pad.

NOTE: 

An attention tone will sound if you are 

using timed baking or roasting and do not touch 
the 

START

pad.

NOTE: 

If you would like to check the times you

have set, touch the 

DELAY START

pad to 

check the start time you have set, or touch the

COOKING TIME

pad to check the length of

cooking time you have set.

When the oven turns 

ON

at the time 

of day you set, the display will show 
the cooking time countdown and the
changing temperature starting at 100°F.
(The temperature display will start to
change once the oven temperature
reaches 100°F.) When the oven reaches
the temperature you set, 3 beeps will
sound.

NOTE: 

If the Auto Recipe

Conversion Feature 

is on, it will automatically reduce the set regular
baking temperature by 25°F to the appropriate
convection temperature. See Auto Recipe

Conversion in the Special Features section.

The oven will continue to cook for the
programmed amount of time, then shut 
off automatically, unless the 

WARM

feature was set. See the 

How to Set the

Oven for Warming

section.

After the oven turns off, the end-of-cycle
tone will sound.

Touch the 

CLEAR/OFF

pad to clear 

the display if necessary. Remove 
the food from the oven. Remember,
even though the oven shuts off
automatically, food left in the oven 
will continue cooking after the oven
turns off.

Summary of Contents for JCB905

Page 1: ...Yourself 17 Timed Baking and Roasting Features 14 Warming Feature 23 Care and Cleaning 30 35 Installation Instructions 36 39 Accessories 40 Troubleshooting Tips 41 44 Consumer Support Consumer Support 48 Product Registration 45 46 Warranty 47 www GEAppliances ca JCB905 JCB968 164D4290P395 1 49 80244 1 08 04 JR Write the model and serial numbers here Model ______________ Serial ______________ You c...

Page 2: ...of the range and injury WARNING ANTI TIP DEVICE When using electrical appliances basic safety precautions should be followed including the following Use this appliance only for its intended purpose as described in this Owner s Manual Be sure your appliance is properly installed and grounded by a qualified installer in accordance with the provided installation instructions Have the installer show y...

Page 3: ...th a well fitting lid cookie sheet or flat tray Use a multi purpose dry chemical or foam type fire extinguisher Flaming grease outside a pan can be put out by covering it with baking soda or if available by using a multi purpose dry chemical or foam type fire extinguisher Flame in the oven can be smothered completely by closing the oven door and turning the oven off or by using a multi purpose dry...

Page 4: ...rs or cooktops can lead to broken or shattered glass Do not operate the radiant surface units if the glass is broken Spillovers or cleaning solution may penetrate a broken cooktop and create a risk of electrical shock Contact a qualified technician immediately should your glass cooktop become broken Never use the glass cooktop surface as a cutting board The surface units are automatically disabled...

Page 5: ... disabled during the self clean cycle Make sure that all surface unit controls are turned off at all times during the self clean cycle Any surface unit that is set to an on position while the self clean cycle is operating will automatically come on after the self clean cycle is finished and could result in an on unattended surface unit Wait until the self clean cycle is finished to set and use the...

Page 6: ...w when its corresponding radiant element is turned on and will remain on until the surface has cooled below 150 F NOTE Hot surface indicator light will Come on when the surface unit is turned on Stay on even after the unit is turned off Glow brightly until the unit has cooled below 150 F NOTE A slight odor is normal when a new cooktop is used for the first time It is caused by the heating of new p...

Page 7: ... enamel as it may scratch the glass ceramic cooktop Glass ceramic usable but not recommended Poor performance May scratch the surface Stoneware usable but not recommended Poor performance May scratch the surface Check pans for flat bottoms by using a straight edge Pans with rounded curved ridged or warped bottoms are not recommended www GEAppliances ca The following information will help you choos...

Page 8: ...op will glow when any radiant element is turned on It will remain on until the surface is cooled to approximately 150 F Hot surface indicator light will come on when the unit is hot to the touch stay on even after the unit is turned off glowuntiltheunitiscooledtoapproximately150 F WARNING The surface units are automatically disabled during the self clean cycle Make sure that all surface unit contr...

Page 9: ... when the glass surface is hot and will remain on until the surface is cool enough to touch Lower settings may not heat the glass surface enough to cause the HOT surface indicator light to come on A WARMING ZONE indicator light will glow when the unit is on NOTE The WARMING ZONE will not glow red like the cooking elements Food Type Control Setting Sauces LO Soups cream Medium Stews Medium Vegetabl...

Page 10: ...lay when there has been a power outage SELF CLEAN STD LO Pad Touch to select self cleaning function See the Using the self cleaning oven section OVEN LIGHT ON OFF Pad Touch to turn the oven light on or off DELAY START Pad Use along with COOKING TIME or SELF CLEAN STD LO pads to set the oven to start and stop automatically at a time you set COOKING TIME Pad Touch and then touch the number pads to s...

Page 11: ...n touch the number pads to set the amount of time you want your food to cook The oven will shut off when the cooking time has run out DELAY START Pad Use along with COOKING TIME or SELF CLEAN STD LO pads to set the oven to start and stop automatically at a time you set OVEN LIGHT ON OFF Pad Touch to turn the oven light on or off SELF CLEAN STD LO Pad Touch to select self cleaning function See the ...

Page 12: ... at minimum time on recipe Cook longer if necessary Touch the CLEAR OFF pad when cooking is complete Preheating and Pan Placement Preheat the oven if the recipe calls for it Preheating is necessary for good results when baking cakes cookies pastry and breads To preheat set the oven at the correct temperature The control will beep when the oven is preheated and the display will show your set temper...

Page 13: ...Tails 2 4 C 18 20 Do not Cut through back of 10 to 12 oz each turn shell Spread open over Brush with melted butter before broiling and after half of broiling time Fish Fillets 1 4 to 1 2 thick E 6 5 Handle and turn very carefully Brush with lemon butter before and during cooking if desired Ham Slices 1 2 thick D 6 6 Increase time 5 to 10 precooked minutes per side for 11 2 thick or home cured ham ...

Page 14: ...ve the food from the oven Remember even though the oven turns off automatically food left in the oven will continue cooking after the oven turns off How to Set a Delayed Start and Automatic Stop The oven will turn on at the time of day you set cook for a specific length of time and then turn off automatically Make sure the clock shows the correct time of day Touch the BAKE pad Touch the number pad...

Page 15: ...a plug at the other end that goes into the outlet in the oven Plug Cable Handles Probe Using the probe on some models www GEAppliances ca For many foods especially roasts and poultry internal food temperature is the best test for doneness The temperature probe takes the guesswork out of roasting by cooking foods to the exact doneness you want Read and remove label How to Set the Oven For Baking Ro...

Page 16: ...wn When the Kitchen Timer reaches 00 the control will beep 3 times followed by one beep every 6 seconds until the KITCHEN TIMER ON OFF pad is touched The 6 second tone can be canceled by following the steps in the Special features of your oven control section under Tones at the End of a Timed Cycle To Reset the Kitchen Timer If the display is still showing the time remaining you may change it by t...

Page 17: ...ween increasing and decreasing the oven temperature The oven temperature can be adjusted up to 35ºF hotter or 35ºF cooler Touch the number pads the same way you read them For example to change the oven temperature 15ºF touch 1 and 5 When you have made the adjustment touch the START pad to go back to the time of day display Use your oven as you would normally The type of margarine will affect bakin...

Page 18: ...ing section below Multi Rack Convection Baking Because heated air is circulated evenly throughout the oven foods can be baked with excellent results using multiple racks Multi rack baking may increase cook times slightly for some foods but the overall result is time saved Cookies muffins biscuits and other quickbreads give very good results with multi rack baking To cook food on more than one rack...

Page 19: ... bake Touch the CONVECTION ROAST pad for convection roasting Touch the number pads to set the oven temperature Touch the START pad NOTE If the Auto Recipe Conversion Feature is on it will automatically reduce the set regular baking temperature by 25 F to the appropriate convection temperature See Auto Recipe Conversion in the Special Features section To change the oven temperature touch the CONVEC...

Page 20: ...ne rack in convection bake Touch the CONVECTION ROAST pad for convection roasting Touch the number pads to set the oven temperature Touch the COOKING TIME pad NOTE If your recipe requires preheating you may need to add additional time to the length of the cooking time Touch the number pads to set the desired length of cooking time The minimum cooking time you can set is 1 minute The oven temperatu...

Page 21: ...ch the DELAY START pad Touch the number pads to set the time of day you want the oven to turn on and start cooking Touch the START pad NOTE An attention tone will sound if you are using timed baking or roasting and do not touch the START pad NOTE If you would like to check the times you have set touch the DELAY START pad to check the start time you have set or touch the COOKING TIME pad to check t...

Page 22: ...ay survive Source Safe Food Book Your Kitchen Guide USDA Rev June 1985 Using the convection oven on some models How to Set the Oven for Convection Roasting when Using the Probe Place the oven rack in the position that centers the food between the top and bottom of the oven Insert the probe into the meat Make sure it is pushed all the way in Plug the probe into the outlet in the oven Make sure it i...

Page 23: ...splay How to Set the Oven For Warming on some models The WARM feature keeps cooked foods hot This feature is not designed to reheat cold food To use the WARM feature touch the WARM pad and then the START pad To use the WARM feature after Timed Baking or Roasting follow these steps Touch the mode of cooking that you want to use BAKE CONVECTION BAKE MULTI CONVECTION BAKE 1 RACK or CONVECTION ROAST T...

Page 24: ... health of some birds is extremely sensitive to the fumes given off during the self cleaning cycle of any range Move birds to another well ventilated room How to Set the Oven for Cleaning WARNING The surface units are automatically disabled during the self clean cycle Make sure that all surface unit controls are turned off at all times during the self clean cycle Any surface unit that is set to an...

Page 25: ...start time It will not be possible to open the oven door until the temperature drops below the lock temperature and the LOCKED light goes off When the LOCKED light goes off you will be able to open the door After a Clean Cycle You may notice some white ash in the oven Wipe it up with a damp cloth after the oven cools If white spots remain remove them with a soap filled steel wool pad and rinse tho...

Page 26: ... the DELAY START pad until no shdn no shut off appears in the display Touch the START pad to activate the no shut off and leave the control set in this special features mode Fahrenheit or Celsius Temperature Selection Your oven control is set to use the Fahrenheit temperature selections but you may change this to use the Celsius selections Touch the BROIL HI LO and BAKE pads at the same time for 3...

Page 27: ...Touch the CLOCK pad once The display will show 12 hr If this is the choice you want touch the START pad Touch the CLOCK pad again to change to the 24 hour military time clock The display will show 24 hr If this is the choice you want touch the START pad Touch the CLOCK pad again to black out the clock display The display will show OFF If this is the choice you want touch the START pad NOTE If the ...

Page 28: ...s the correct time of day and the oven is off Touch and hold both the BROIL HI LO and BAKE pads at the same time until the display shows SF NOTE If bake or broil appears in the display the BROIL HI LO and BAKE pads were not touched at the same time Touch the CLEAR OFF pad and begin again Tap the DELAY START pad until SAb bAtH appears in the display Touch the START pad and will appear in the displa...

Page 29: ...ouch the START pad After a random delay period of approximately 30 seconds to 1 minute will appear in the display indicating that the oven is baking roasting If doesn t appear in the display start again at Step 7 To adjust the oven temperature touch the BAKE pad enter the new temperature using the number pads and touch the START pad When cooking is finished the display will change from to and 0 00...

Page 30: ...if it is baked on Control Knobs The control knobs may be removed for easier cleaning Before removing the knobs for cleaning please note that the knobs are in the OFF position When replacing the knobs check the OFF position to insure proper placement Wash the knobs in soap and water or a vinegar and hot water solution but do not soak Oven Vent The oven vent is located above the right rear surface u...

Page 31: ... not rub or clean the door gasket it has an extremely low resistance to abrasion If you notice the gasket becoming worn frayed or damaged in any way or if it has become displaced on the door you should have it replaced Hinge lock Indentation Bottom edge of slot Hinge lock Slot Push hinge locks up to lock Pull hinge locks down to unlock Hinge arm Hinge arm Removal position www GEAppliances ca Clean...

Page 32: ...over so it doesn t fall when released With fingers of the same hand firmly push back the wire cover holder Lift off the cover Do not remove any screws to remove the cover Replace bulb with a 40 watt appliance bulb To replace the cover Place it into groove of the light receptacle Pull wire forward to the center of the cover until it snaps into place Connect electrical power to the range Broiler Pan...

Page 33: ...n racks on some models and the convection roasting rack may be cleaned in the self cleaning oven However the racks will darken in color lose their luster and become hard to slide if cleaned during the self cleaning cycle To make the racks slide more easily apply a small amount of vegetable oil to a paper towel and wipe the edges of the oven racks with the paper towel Do not spray with Pam or other...

Page 34: ...fective To maintain and protect the surface of your glass cooktop follow these steps Before using the cooktop for the first time clean it with Ceramic Cooktop Cleaner This helps protect the top and makes cleanup easier Daily use of Ceramic Cooktop Cleaner will help keep the cooktop looking new Shake the cleaning cream well Apply a few drops of Ceramic Cooktop Cleaner directly to the cooktop Use a ...

Page 35: ... cooktop Metal Marks and Scratches www GEAppliances ca To clean the cooktop seal around the edges of the glass lay a wet cloth on it for a few minutes then wipe clean with nonabrasive cleaners Cooktop Seal Glass surface potential for permanent damage Damage from Sugary Spills and Melted Plastic Turn off all surface units Remove hot pans Wearing an oven mitt a Use a single edge razor blade scraper ...

Page 36: ...emove lower drawer ANTI TIP DEVICE WARNING To reduce the risk of tipping the appliance must be secured by properly installed Anti Tip bracket packed with this appliance If the Anti Tip device supplied with the range does not fit this application use the universal Anti Tip device WB2X7909 WARNING All ranges can tip Injury to persons could result Install Anti Tip bracket packed with range See Instal...

Page 37: ...tected wood or metal cabinet and 15 minimum between countertop and adjacent cabinet bottom Recommended spacing to heat sensitive surfaces 1 TOOLS YOU WILL NEED 37 Installation Instructions PREPARE TO INSTALL THE RANGE MATERIALS YOU MAY NEED Anchor Sleeves Lag Bolts For Anti Tip Bracket Mounted on Concrete Floors Only Adjustable Wrench Level Phillips Screwdriver Drill with 1 8 Bit Pencil Safety Gla...

Page 38: ...cation use the universal Anti Tip device WB2X7909 See instructions to install supplied with bracket Unless properly installed the range could be tipped by stepping or sitting on the door Injury may result from spilled hot liquids or from the range itself 2 38 Installation Instructions INSTALL THE RANGE Stop Typical installation of anti tip bracket attachment to wall Bracket Screw must enter wood o...

Page 39: ...to the Anti Tip bracket and that the bracket is securely installed 6 OPERATION CHECKLIST Turn on one of the surface units to observe that the element glows within 60 seconds Turn the unit off when glow is detected If the glow is not detected within the time limit recheck the range wiring connections If change is required retest again If no change is required have building wiring checked for proper...

Page 40: ...or your appliance call our National Parts Center at 1 800 661 1616 Tired of discolored racks Wishing you had extra heavy duty oven racks NOW AVAILABLE for your range GE s innovative self cleanable porcelain coated oven racks Heavy Duty Durable Able to be cleaned in a self cleaning oven Oven Racks Broiler Pan Oven Elements Light Bulbs Knobs Cleaner Cleaning Pads Scraper Accessories ...

Page 41: ...until the self clean cycle is finished to set and use the surface units See the About the radiant surface units section Surface unit stops This is normal The unit glowing when turned is still on and hot to a lower setting Scratches may appear Incorrect cleaning Scratches are not removable Tiny scratches will become as cracks on cooktop methods being used less visible in time as a result of cleanin...

Page 42: ...n Food does not broil Oven controls improperly set Make sure you touch the BROIL HI LO pad properly Improper rack position See the Broiling Guide being used Cookware not suited for broiling Use the broiling pan and grid that came with your range The probe is plugged into the Unplug and remove the probe from the oven outlet in the oven on some models Aluminum foil used on the See the Using the oven...

Page 43: ... the clean cycle Oven door will not Oven too hot Allow the oven to cool below locking temperature open after a clean cycle Oven not clean after a Oven controls not properly set See the Using the self cleaning oven section clean cycle Oven was heavily soiled Clean up heavy spillovers before starting the clean cycle Heavily soiled ovens may need to self clean again or for a longer period of time LOC...

Page 44: ...ed increases the amount of visible steam will increase Burning or oily This is normal in a new oven To speed the process set a self clean cycle for a odor emitting from and will disappear in time minimum of 3 hours See the Using the self cleaning the vent oven section Strong odor An odor from the insulation This is temporary around the inside of the oven is normal for the first few times the oven ...

Page 45: ...Ownership Registration P O Box 1780 Mississauga Ontario L4Y 4G1 Please place in envelope and mail to Cut here 45 ...

Page 46: ...e at www GEAppliances ca 1 2 3 Model Number Serial Number Cut here Complete and mail your Consumer Product Ownership Registration today Have the peace of mind of knowing we can contact you in the unlikely event of a safety modification After mailing the registration below store this document in a safe place It contains information you will need should you require service Our service number is 1 80...

Page 47: ...me service Service trips to your home to teach you how to use the product Improper installation delivery or maintenance Failure of the product if it is abused misused or used for other than the intended purpose or used commercially Damage to the glass cooktop caused by use of cleaners other than the recommended cleaning creams and pads Damage to the glass cooktop caused by hardened spills of sugar...

Page 48: ... www GEAppliances ca To inquire about purchasing a part or an accessory for your appliance call our National Parts Center at 1 800 661 1616 Contact Us www GEAppliances ca If you are not satisfied with the service you receive from GE contact us on our Website with all the details including your phone number or write to Camco Inc 1 Factory Lane Moncton New Brunswick E1C 9M3 Register Your Appliance w...

Reviews: