background image

Chapter 2

Getting Started 


GFK-2847  

Qui   User’s Manual–November 2013  

13 


2.3.2 

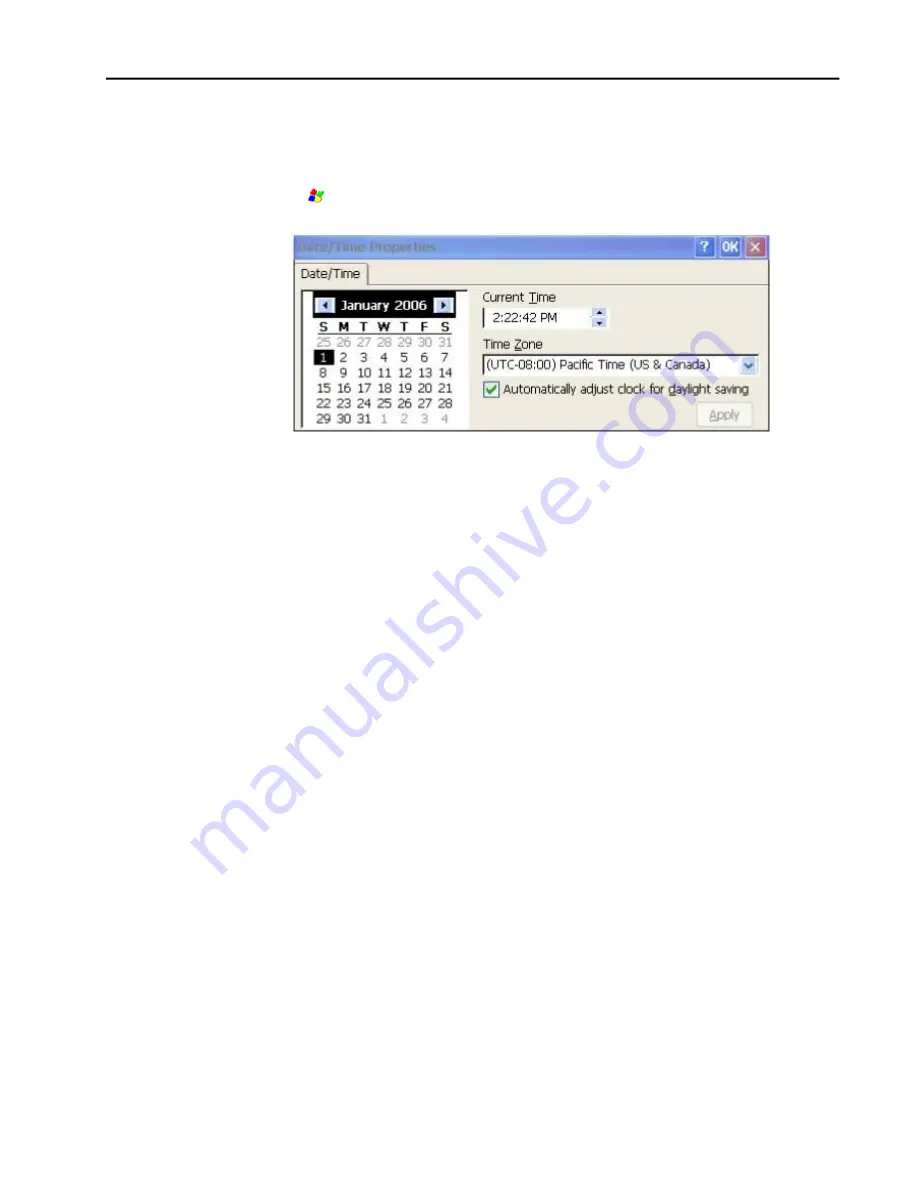
Initial Configuration  

When you first start up the Qui, a few configuration steps are necessary.  

1.  Tap Start 

, point to Settings and then tap Control Panel.  

2.  In the Control Panel, double-tap Date and Time to configure the system clock.  


3.  In the Control Panel, double-tap System to configure a network Device Name. Many 

applications, including Proficy Historian require a unique Device Name. It is recommended 
procedure to set a unique Device Name for the Qui to avoid future conflicts.  

4.  In the Control Panel, double-tap Network and Dial-up Connections to configure network 

settings.  

5.  To save the settings, run Backup.  

2.4   Runtime Setup  

To download an application to a Qui unit, you must set up a data link between it and 

your development workstation. For mo

re information, see 4.6.2, “Ethernet.”  

“Downloading a Machine Edition Project” in the Machine Edition online help.  

2.5   Firmware Updates  

Updates to the QuickPanel firmware are available on the Support web site. This allows you to 

update the unit to the most recent released version of the firmware with the latest feature 
updates and issues addressed.  

2.6   Shutdown  

There are no specific dangers associated with a power failure or other unplanned shutdown 

of the Qui. In general, programs are retained in flash memory and user data can be 

Summary of Contents for IC754CSL12CTD

Page 1: ...he IC754CSL12CTD for the GE QuickPanel has CONTROL LOADED 12IN COLOR TFT TOUCH DC http www qualitrol com shop p 16500 ic754csl12ctd aspx For further information please contact Qualitrol Technical Support at 1 800 784 9385 support qualitrol com ...

Page 2: ... Shutdown 13 Chapter 3 QuickPanel Software 15 3 1 Operating System 15 3 2 Backup Utility 15 3 3 Storage Manager 15 3 4 Copy Project to SD Card 16 3 5 Updating a Machine Edition Project 16 3 6 FTP Server 17 3 6 1 Authentication of Remote Users 17 3 6 2 FTP with Removable Flash Devices 17 3 7 HTTP Server 17 Chapter 4 Installation 19 4 1 Installing the Protective Sheet 19 4 2 Choosing a Mounting Loca...

Page 3: ... 1 2 Configuring the Backlight 32 5 1 3 Calibrating the Touch Screen 33 5 2 Keyboard 34 5 2 1 External Keyboard optional 34 5 2 2 Soft Input Panel 34 5 3 Mouse 34 5 4 Memory 35 5 4 1 DRAM Memory 35 5 4 2 Changing the Memory Allocation 35 Appendix A Product Certifications Installation Guidelines for Conformance 36 Agency Approvals 36 Government Regulations 36 Appendix B Orderable Part Numbers 37 ...

Page 4: ...plication programs The retentive memory consists of 512KB of battery backed SRAM for data storage protecting your valuable data during a power failure 1 1 Specifications 1 1 1 General Specifications Processor Freescale i MX535 1GHz ARM Cortex A8 Memory RAM DDR2 SDRAM 512MB ROM SLC NAND 256MB SRAM 512 KB with Battery backup Operating system Microsoft Windows Embedded Compact 7 Display Type 7 Widesc...

Page 5: ......

Page 6: ...al specifications listed below Cooling Natural convection Ambient Operating temperature 0 C to 50 C Ambient Storage temperature 20 C to 60 C Ambient Humidity operating and storage 85 RH non condensing wet bulb temperature 30 C or less Environment Pollution Degree 2 as defined by UL60950 1 Vibration resistance 5 to 9Hz single amplitude 3 5mm 9Hz to 150Hz constant accelerated velocity 9 8m s2 X Y Z ...

Page 7: ...the primary touch screen interface the QuickPanel supports a variety of communication ports The following diagrams show the physical layout of the QuickPanel including locations of status LEDs communications ports and connectors 1 2 1 Overview Bottom Figure 1 QuickPanel Hardware Features Chapter 1 Introduction Front Right Side ...

Page 8: ...on LED State QuickPanel State Amber steady Operating system starting Green steady Normal operating state Green blinking Backlight off Red blinking Backlight fail Off Power not applied to the QuickPanel 1 2 2 2 Ethernet Port LED Operation The Ethernet port has two LED indicators ACTIVITY and LINK Speed Link Activity GFK 2847 QuickPanel User s Manual November 2013 LED LED State Operating State Speed...

Page 9: ...during shipment However we will fully cooperate with you should such action be necessary After unpacking the unit record all serial numbers Serial numbers are required if you need to contact Customer Care during the warranty period Shipping containers and packing material should be saved in case it is necessary to transport or ship the unit Verify that all components of the system have been receiv...

Page 10: ...Chapter 2 Getting Started 10 QuickPanel User s Manual November 2013 GFK 2847 Serial Port Connector one Power Connector one ...

Page 11: ...C power supply using the supplied quick connect plug Depending on your application you may also want to connect and configure optional input devices communications ports and expansion adapters Figure 3 Basic Setup Diagram Warning Electrical Shock Hazard To avoid personal injury or damage to equipment ensure that the DC supply is disconnected from power and that the leads are not energized before a...

Page 12: ...31 Nm 5 Apply DC power to the unit During normal power up and operation the QuickPanel Status LED display is Solid amber while the QuickPanel unit is starting up Solid green during normal operation 6 Once power is applied the QuickPanel begins initializing The first thing to appear on the display is the splash screen To skip running any programs included in the StartUp folder tap Don t run StartUp...

Page 13: ... Panel double tap Network and Dial up Connections to configure network settings 5 To save the settings run Backup 2 4 Runtime Setup To download an application to a QuickPanel unit you must set up a data link between it and your development workstation For more information see 4 6 2 Ethernet Downloading a Machine Edition Project in the Machine Edition online help 2 5 Firmware Updates Updates to the...

Page 14: ...own the QuickPanel 1 Quit any programs that are running and wait for all file operations to complete 2 If you have not changed operating system settings for example brightness or touch screen sensitivity or do not want to save the changes remove AC power from the DC supply 3 To save changes to operating system settings run Backup When the Backup dialog box displays Completed Successfully remove po...

Page 15: ...dows Registry or Desktop to Flash memory This utility is required because the QuickPanel is not battery powered Specifically Backup does the following Stores the Windows Embedded Compact 7 registry including any control panel settings in Flash memory Stores any changes or additions made to the Windows subtree of the file system in the user block of flash memory Run Backup whenever you make configu...

Page 16: ...pplication currently stored on the QuickPanel with a revision stored on a flash device such as a SD card 1 Insert the flash device containing an upgraded version of the Machine Edition project into the appropriate port 2 Reboot the machine See the settings section below as depending on options set the update may or may not be enabled or may automatically update If there is more than one flash devi...

Page 17: ... user is logged into the FTP root directory This is available from the QuickPanel as and is the root of the flash device 3 6 2 FTP with Removable Flash Devices All removable flash devices appear to remote FTP users as directories off the FTP root directory PC Flash card partitions appear as directories such as SDMemory and USB Flash Keys as directories such as Hard Disk Full access privileges are ...

Page 18: ... 18 QuickPanel User s Manual November 2013 GFK 2847 Note If the server status is changed the QuickPanel must be re booted before changes take effect ...

Page 19: ...l the green curing film off the protective sheet 4 2 Choosing a Mounting Location When mounting the QuickPanel make sure that the mounting area allows room to insert and remove the SD card cables and mounting brackets The QuickPanel should not be mounted at an angle more than 30 from the vertical as illustrated below Figure 4 Mounting Angle Choose a location that will allow natural convection air ...

Page 20: ...n always use a fresh gasket Replacement gaskets can be ordered using the part number listed in Appendix B The unit will not fit through the cutout with any cables connected or with the power supply plug inserted in the socket 1 Cut an opening in the panel according to the specifications in the diagram below Panel thickness supported 1 0mm to 5 0mm Figure 6 Panel Cutout Dimensions for 7 QuickPanel ...

Page 21: ...Note The torque range for the mounting clamp screws is 0 3 Nm 4 4 Mounting on a VESA Arm The QuickPanel can be installed on a commercially available Video Electronics Standards Association VESA MIS D 75mm arm To mount the QuickPanel use the mounting holes located on the back of the unit The mounting holes are 75mm 2 95 inches apart and attach with M4 screws that are 6mm 0 24 inches or less in diam...

Page 22: ...Chapter 4 Installation 22 QuickPanel User s Manual November 2013 GFK 2847 ...

Page 23: ...ng outward 2 Connect the harness connector of the battery to the header noting keyed orientation 3 Pull Make sure that positive red is down and negative black is up 4 Wrap harness connector around to match the picture below 5 Do not let the harness connector go above the tab 6 Slide the battery cover into place taking care not to pinch the harness connector Warning ...

Page 24: ... or dispose of in fire Use of batteries not specified for use with the QuickPanel product may present a risk of fire or explosion Lithium Battery Warning Do not recharge disassemble heat or incinerate lithium batteries Dispose of lithium batteries in accordance with federal state and local regulations Be sure to consult with the appropriate regulatory agencies before disposing of batteries ...

Page 25: ...et port You can connect an Ethernet network cable unshielded twisted pair UTP CAT 5 to the unit via the RJ 45 connector on the bottom of the enclosure LED indicators on the port indicate channel status see Ethernet Port LED Operation on page 11 The port can be accessed by Windows Embedded Compact 7 network communications or by your application Ethernet Port Details Interface Ethernet 10BASE T 100B...

Page 26: ... applicable Note To save the settings run the Backup utility 4 6 3 Serial Port 4 6 3 1 Serial Port Details Interface RS 232 Connectors Euro Terminal Tyco Electronics 284539 5 or Equivalent Pin Number Signal Name Pin out 1 TXD 5 1 2 RXD 3 RTS 4 CTS 5 SGND Mating Connector Tyco Electronics 284 510 or Equivalent 4 6 4Universal Serial Bus USB Ports 4 6 4 1 USB Host Port Details The QuickPanel has two ...

Page 27: ...ve device Interface USB2 0 Number of Ports One Connector Type B Mini connector Pin Number Signal Name Pin out 1 VCC 5 1 2 D 3 D 4 NC 5 GND 4 6 5Audio LINE OUT Details Interface LINE OUT stereo Connector φ3 5 mm Jack Pin Number Signal Name Pin out 1 GND 1 2 3 2 Lineout R 3 Lineout L Maximum output level 1Vrms 4 6 6 Audio MIC IN Details Interface MIC IN monaural Connector φ3 5 mm Jack ...

Page 28: ... Card Slot The QuickPanel is equipped with one standard SD Card port SD SDHC memory cards are supported The SD card slot is spring loaded for easy insertion and removal 4 6 7 1 Storage Details Connectors SD card slot push in push out method Card support SD SDHC memory card Maximum capacity 32GB Note the orientation of the SD card in the diagram below when inserting ...

Page 29: ...tion can be set using the operating system Control Panel 5 1 1 Adjusting the Display Brightness 1 In the Control Panel double tap Display and choose the Brightness tab The Brightness dialog box appears 2 Drag the Brightness slider between Lowest and Highest 3 Tap OK to exit the control panel 4 To save the settings run the Backup utility 5 1 2 Configuring the Backlight 1 In the Control Panel double...

Page 30: ...r Chapter 5 Detailed Operation 5 2 Keyboard The QuickPanel can be configured to use either or both a hardware keyboard and a software emulation keyboard as operator data input devices Typically an external hardware keyboard is used when in a development mode while the included Soft Input Panel is more applicable in an operational environment 5 2 1 External Keyboard optional Any USB compatible keyb...

Page 31: ...nctions an object store for temporary file storage and the main memory for running programs Typically compressed programs stored in flash memory are expanded and moved to DRAM for execution Temporary storage of program variables or data files is also provided by DRAM Any data stored in DRAM is not retained through a power cycle or reboot The split between program memory and storage memory can be a...

Page 32: ...ge and Program memory The amount of memory allocated to and used by each area is shown in the dialog box The blue bar indicates the current amount of unallocated SDRAM and determines the boundaries within which the slider can move 3 Tap OK to apply the new setting 4 To save the settings run the Backup utility ...

Page 33: ... EMC for Industrial Declaration of Conformity found at Control Equipment http www ge ip com for a complete list of approved products Note The agency approvals listed above and on the Declaration of Conformities are believed to be accurate however a product s agency approvals should be verified by the marking on the unit itself Government Regulations The FCC requires the following note to be publis...

Page 34: ... 3 A NMB 3 A Appendix B Orderable Part Numbers Appendix B Orderable Part Numbers IC755CSW07CDA QuickPanel 7 Color TFT Widescreen with Multi touch Projected Capacitive Screen 24 VDC Powered IC755ACC07GAS QuickPanel 7 Replacement Gasket IC755ACC07MNT QuickPanel 7 Accessory Kit Replacement Mounting Clips Power Serial Port Connectors IC755ACC07PRO QuickPanel 7 Replacement Screen Protectors Package of ...

Page 35: ......

Page 36: ...36 mounting location 21 panel mounting 22 protective sheet 21 VESA arm 24 Keyboard Soft Input Panel 34 Machine Edition updating a project 19 Memory 35 changing allocation 35 DRAM 35 Mouse 34 Network device name 16 Operating system 18 Part numbers 37 Power connector 27 Product certifications 36 Proficy Machine Edition updating a project 19 Protective sheet installation 21 RFI standards 36 SD card c...

Page 37: ... Platforms Additional Resources Information Centers For more information please visit the GE Headquarters Intelligent Platforms web site 1 800 433 2682 or 1 434 978 5100 www ge ip com Global regional phone numbers are available on our web site www ge ip com ...

Page 38: ... 2013 GE Intelligent Platforms Inc All Rights Reserved Trademark of GE Intelligent Platforms Inc All other brands or names are property of their respective holders GFK 2847 ...

Reviews: