background image

DIAGNOSTIC STATUS CODES 


SX TRANSISTOR CONTROL


Page 

28


Section 4.3  Recommended Lubrication of Pins and 
Sockets Prior to Installation


Beginning in January of 1999, GE implemented the addition 
of a lubricant to all connections using pins and sockets on 
EV100/EV200 and Gen II products. Any connection made by 
GE to the A, B, X, Y, or Z plugs, includes the lubricant NYE 
760G to prevent fretting of these connections during vehicle 
operation. 


Fretting occurs during microscopic movement at 

the contact points of the connection. This movement 
exposes the base metal of the connector pin which, when 
oxygen is present, allows oxidation to occur. Sufficient 
build up of the oxidation can cause intermittent contact 
and intermittent vehicle operation. This can occur at any 
similar type of connection, whether at the control or in any 
associated vehicle wiring, and the resultant intermittent 
contact can provide the same fault indication as actual 
component failure. 


The addition of the NYE 760G lubricant will prevent 

the oxidation process by eliminating the access of oxygen 
to the contact point.   GE recommends the addition of this 
lubricant  to the 12 pin and 23 pin plugs of all  new Gen II 
controls at the time of their installation into a vehicle 


When servicing existing vehicles exhibiting 

symptoms of intermittent mis-operation or shutdown by the 

GE control, GE recommends the addition of this lubricant to 
all 12 and 23 pin plugs, after proper cleaning of the 
connectors, as a preventative measure to insure fretting is 
not an issue before GE control replacement.   Also, for long 
term reliable control operation, the plug terminals must be 
maintained per these instructions with the recommended 
contact cleaner and lubricant which provides a high 
degree of environmental and fretting protection. 
 
New and re-manufactured control plugs are cleaned and 
lubricated prior to shipment from the factory.  However, in 
applications where severe vibration or high temperature 
cycling and excessive humidity ( such as freezers ) are 
present, it is recommended that the plug terminals be 

cleaned and lubricated every year, per this instructions. In 
normal applications, plug maintenance should be 
performed every two years, unless intermittent problems 
arise with the plugs, requiring more immediate attention. 

Nye

LU

BRI

CA

NT

S

Warning: Do not use any other cleaners or lubricants 
other than the ones specified. 
 

WARNING: Before conducting maintenance on the 

vehicle, jack up the drive wheels, disconnect the battery 

and discharge the 

capacitors.  

Consult the 

Operation and 

Service Manual 

for your particular 

vehicle for details 

on discharging 

the capacitors; 

this procedure 

differs between 

SCR and 

Transistor 

controls. 


Chem

troni

cs

Po

w

-R

-

W

as

H

CZ

con

tact

 cle

ane

r

ciro

zane


1. 

Disconnect

 plug from controller or mating plug. 

2. 

Locate

 the plug that contains the socket (female) 

terminals. 

Maintenance needs only to be performed on 

the plug containing the socket (female) type terminals. 
Reconnecting the plugs will lubricate the pin (male) 
terminals.


3. 

Clean

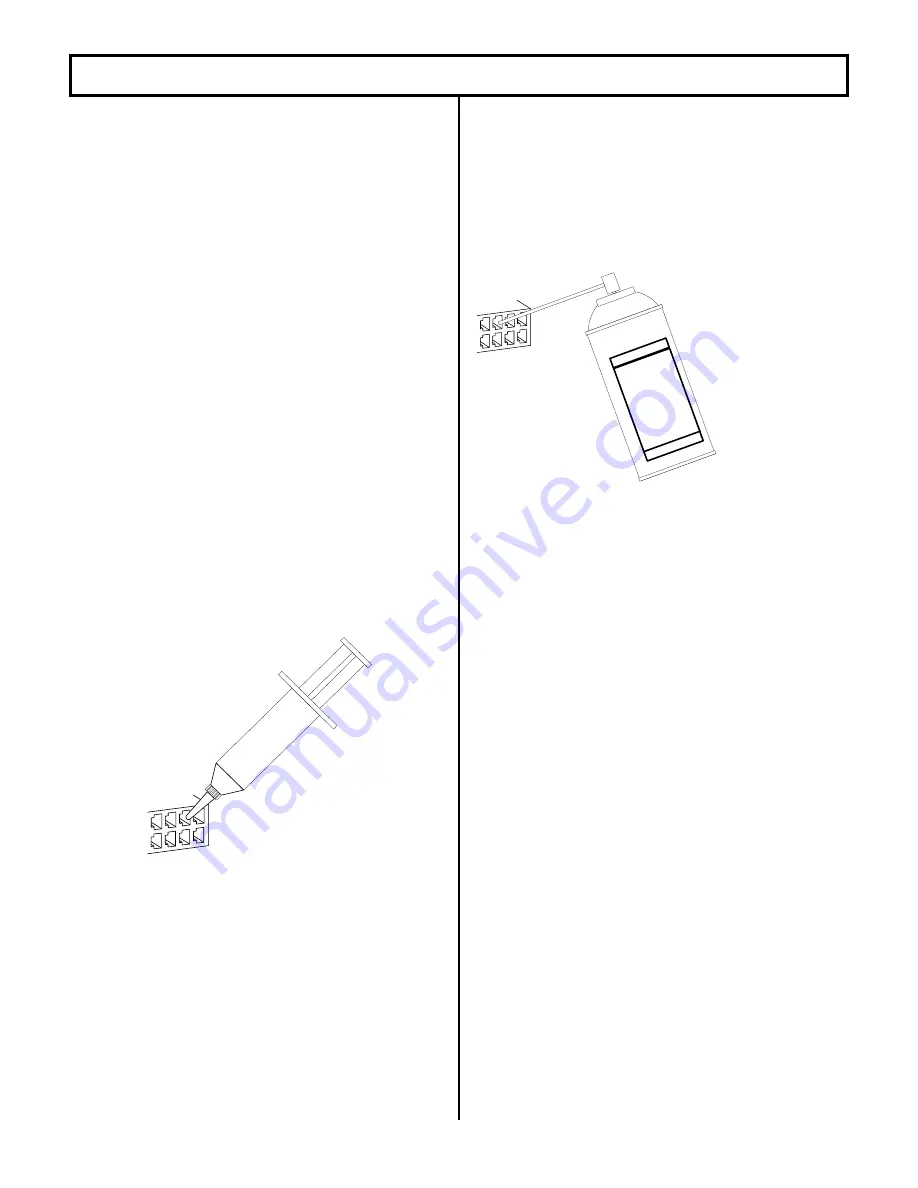
 each terminal using Chemtronics

 contact 

cleaner “Pow-R-WasH CZ “ as shown in Figure 1. 


Figure 1 


4.  

Lubricate

 each terminal using Nye

 760G lubricant as 

shown in figure 2. Apply enough lubricant to each 
terminal opening to completely fill each opening to a 
depth of .125” maximum. 


Figure 2 


5.  

Reconnect

 plugs. 

June 2002


Summary of Contents for H4V262Y1

Page 1: ...For additional information and or problem resolution please refer the matter to the OEM vehicle manufacturer through his normal field service channels Do not contact GE directly for this assistance Ge...

Page 2: ...Size 9 3 3 Standard Elementary for Golf Car Application 10 3 4 Golf Car Application Input Output List 11 Section 4 0 TROUBLESHOOTING AND DIAGNOSTIC STATUS CODES 12 4 1 General Maintenance Instructions...

Page 3: ...curves of Figure 1 the high torque at low speed characteristic of the series motor is evident In a shunt motor the field is connected directly across the voltage source and is therefore independent of...

Page 4: ...y placing a resistor in parallel with the field winding of the motor Bypassing some of the current flowing in the field into the resistor causes the field current to be less or weakened With the field...

Page 5: ...egulate the armature current During regen armature current is allowed to flow from the armature through the current sensor the battery the armature transistor and back to the armature All regen curren...

Page 6: ...control is designed for use down to 50 percent of a nominal battery voltage of 36 84 volts and 75 percent of a nominal battery voltage of 24 volts Lower battery voltage may cause the control to operat...

Page 7: ...7 from the control card these drivers initiate opening and closing the contactor coils All driver modules are equipped with reverse battery protection such that if the battery is connected incorrectly...

Page 8: ...Control Type SH Separately Excited Control Plugging SR Separately Excited Control Regen to Zero Argument 03 Operating Voltage 1 120 volts 5 36 48 volts 2 24 volts 6 24 36 volts 3 36 volts 7 72 80 volt...

Page 9: ...OUTLINE DRAWINGS ELEMENTARY DRAWINGS AND INPUTS OUTPUTS SX TRANSISTOR CONTROL Page 9 Section 3 2 Outline Gen IV Package Size June 2002...

Page 10: ...OUTLINE DRAWINGS ELEMENTARY DRAWINGS AND INPUTS OUTPUTS SX TRANSISTOR CONTROL Page 10 Section 3 3 Standard Elementary for Golf Car Application June 2002...

Page 11: ...WITCH FORWARD REVERSE BUZZER ACCEL POT P1 P2 P3 P4 P5 P11 P10 P15 TACHOMETER P14 P16 P7 P9 P8 ELEMENTARY DRAWING FOR TYPICAL SEPARATELY EXCITED TRACTION MOTOR CONTROLLER FOR GOLF CAR APPLICATIONS PLUG...

Page 12: ...REVERSE SWITCH 6 BATTERY VOLTS FROM KEY SWITCH 7 ACCELERATOR INPUT VOLTAGE SIGNAL 8 ACCELERATOR NEGATIVE 9 ACCELERATOR POT 5 VOLTS SUPPLY 3 WIRE POT 10 BACK UP ALARM AND ZERO SPEED DETECT ALARM 11 LI...

Page 13: ...recharging before 80 percent discharged with periodic equalizing charges Visual inspection of GE contactors contained in the traction and pump systems is recommended to occur during every 1000 hours...

Page 14: ...eral guidelines section 4 2 3 a outlined below 4 2 3 a General Cable Spacing The following general practices should be used for all levels of cabling All cables and wires of like signal levels and pow...

Page 15: ...long term reliable control operation the plug terminals must be maintained per these instructions with the recommended contact cleaner and lubricant which provides a high degree of environmental and...

Page 16: ...the controller should then be replaced as the last option to correct the problem The same device designations have been maintained on different controls but the wire numbers may vary Refer to the ele...

Page 17: ...Display or Handset Defective Dash Display or Handset Replace Dash Display or Handset FU3 KEY SWITCH P1 P2 NEG CHARGER SWITCH TRACTION STATUS CODE DESCRIPTION OF STATUS CAUSE OF STATUS INDICATION 05 S...

Page 18: ...OMETER P14 P16 P7 P9 P8 PLUG 23 PIN KEY SWITCH P6 P18 P19 P20 P21 SHIELDED CABLE INFRARED TRANSCEIVER IrDa RS232 SWITCH RS232 RECEIVE RS232 TRANSMIT P13 P22 P23 TRACTION STATUS CODE DESCRIPTION OF STA...

Page 19: ...3 PIN KEY SWITCH P6 P18 P19 P20 P21 SHIELDED CABLE INFRARED TRANSCEIVER IrDa RS232 SWITCH RS232 RECEIVE RS232 TRANSMIT P13 P22 P23 TRACTION STATUS CODE DESCRIPTION OF STATUS CAUSE OF STATUS INDICATION...

Page 20: ...epair battery Check minimum battery volts at P1 NEG FU3 KEY SWITCH P1 P2 NEG CHARGER SWITCH TRACTION STATUS CODE DESCRIPTION OF STATUS CAUSE OF STATUS INDICATION 16 Battery voltage is too high at init...

Page 21: ...t potentiometer is operating correctly and replace potentiometer unit if necessary L START SWITCH DIRECTIONAL SWITCH FORWARD REVERSE BUZZER ACCEL POT P1 P2 P3 P4 P5 P11 P10 P15 TACHOMETER P14 P16 P7 P...

Page 22: ...ective control Replace controller unit NO GRAPHIC FOR THIS STATUS CODE TRACTION STATUS CODE DESCRIPTION OF STATUS CAUSE OF STATUS INDICATION 27 12V buss is too low This status code will be displayed w...

Page 23: ...iled control GE Sentry for Windows software can be used to monitor control operation and it will display a value for the thermal protector that is greater than 84 corresponding to 1 65V triggering thi...

Page 24: ...an be used to monitor control operation and it will display a value for the motor amps that is less than 117 corresponding to 2 3V triggering this status code TRACTION STATUS CODE DESCRIPTION OF STATU...

Page 25: ...IS STATUS CODE TRACTION STATUS CODE DESCRIPTION OF STATUS CAUSE OF STATUS INDICATION 46 Look Ahead test for A2 volts is less than 12 5 of battery volts This status code will be displayed when the volt...

Page 26: ...ht Defective control Replace controller unit NO GRAPHIC FOR THIS STATUS CODE TRACTION STATUS CODE DESCRIPTION OF STATUS CAUSE OF STATUS INDICATION 51 Capacitor volts are low before the line contactor...

Page 27: ...ips clean them with a solvent Check all power connections at motor and control to verify that they are tight Confirm that power fuse is in good condition or replace fuse Line contactor tips bounce or...

Page 28: ...ICATION 66 The field current exceeds the current limit of the field transistor This status code will be displayed when the field transistor exceeds its current limit The line contactor will drop out a...

Page 29: ...seconds and then turn tow switch back on POWER CONNECTIONS TO CONTROL POS A1 F1 NEG A2 F2 FIELD ARMATURE A1 A2 A1 A2 F2 F1 BATT FU1 LINE 400A FU3 10A TRACTION STATUS CODE DESCRIPTION OF STATUS CAUSE...

Page 30: ...xample Setting 255 260 I max RR Rolling Radius Inches Pi 3 14159265 GR Gear Ratio FUNCTION 5 PLUG CURRENT LIMIT PPR Pulses per rotation of motor This function allows for the adjustment of the maximum...

Page 31: ...volts Range 0 to 20 amps Set 0 to 255 Set 51 to 195 Resolution 0 392 per set unit Resolution 0 15 amps per set unit Example Setting of 0 no speed limit Example Setting of 170 170 51 x 0 15 Setting of...

Page 32: ...battery discharge indication feature of this control to operate properly this function must be set to a value between ____ and ____ for a 48V battery This function adjusts the rate at which the field...

Page 33: ...by field personnel without the permission of the OEM Note When scrolling through the stored status code register the register always starts at status code 1 and scrolls to status code 16 FUNCTION 25 M...

Page 34: ...KM FUNCTION 50 ODOMETER THOUSANDS AND HUNREDS OF MILES OR KILOMETERS SET This function allows for the adjustment of the thousands and hundreds of miles or kilometers on the odometer Range 0 to 99 Set...

Page 35: ...adjusted by Function 24 This function sets the armature current at which minimum field current will achieved The ratio setting is adjusted by Function 26 This function sets the ratio between armature...

Page 36: ...dal Up Regen PC Only None 21 22 Not Applicable PC Only For DD on power up 22 23 Error Compensation PC Only None 23 24 Field Weakening Start or Motor Knee Point PC Only None 24 25 Monitor PC Only GE Te...

Page 37: ...65 Stored Status Code 9 PC Only Reset to Zero Only 65 66 BDI 9 PC Only Reset to Zero Only 66 67 Hours Tens Ones 9 PC Only Reset to Zero Only 67 68 Hours Thou Hun 9 PC Only Reset to Zero Only 68 69 Sto...

Page 38: ...Not applicable PC Only None 104 105 Not applicable PC Only None 105 106 Not applicable PC Only None 106 107 Not applicable PC Only None 107 108 Not applicable PC Only None 108 109 Not applicable PC On...

Reviews: