Chapter 4: Web-Based Management
GE-DS-242-PoE Managed Ethernet Switch User Manual
85
•
Switch 2 configuration
6. Set
System Priority
of the trunk group. For example: 32768.
7. Select a
trunk group ID
by pull down the drop-down menu bar.
8. Enable
LACP
.
9. Include the member ports by clicking the
Add
button after selecting the port
number and the column field of
Work Ports
changes automatically.
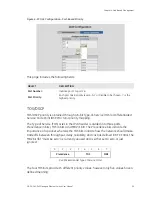
Figure 4-44: Switch 2 configuration interface
10. Click on the tab of
Aggregator Information
to check the trunked group
information as the illustration shown above after the two switches have been
configured.
Figure 4-45: Switch 1 Aggregator Information
Summary of Contents for GE-DS-242-POE
Page 1: ...GE Security P N 1069174 REV 1 0 ISS 22FEB10 GE DS 242 PoE Managed Ethernet Switch User Manual ...
Page 14: ...Chapter 1 Introduction 10 GE DS 242 PoE Managed Ethernet Switch User Manual ...
Page 124: ...Chapter 4 Web Based Management 120 GE DS 242 PoE Managed Ethernet Switch User Manual ...
Page 130: ...Chapter 5 Console Management 126 GE DS 242 PoE Managed Ethernet Switch User Manual ...
Page 204: ...Chapter 8 Power Over Ethernet Overview 200 GE DS 242 PoE Managed Ethernet Switch User Manual ...
Page 210: ......


