background image

Model 

1

000115 (Rev. 0 CAN E/F)

07-0

Printed in China

Thomson Digital Technologies Ltd.

© 007 Thomson Digital Technologies Ltd. 

Trademark(s) ® Registered

Marque(s) déposée(s)

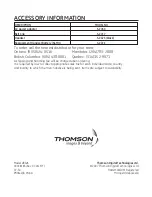
ACCESSorY INforMATIoN

DESCrIPTIoN 

MoDEL No.

AC power adaptor 

5-2760

Belt Clip 

5-2717

Headset 

5-2425 (black)

replacement Handset Battery (Ni-MH) 

5-2721

To order, call the nearest distributor for your area;

Ontario: (905) 64-516 

Manitoba: (04) 7-0

British Columbia: (604) 4-001 

Quebec: (514) 5-9071

A shipping and handling fee will be charged upon ordering.
It is required by law to collect appropriate sales tax for each individual state, country,
and locality to which the merchandise is being sent. Items are subject to availability. 

Summary of Contents for DECT6.0 28128

Page 1: ...8 Series DECT6 0 Cordless Handset Speakerphone Answering System User s Guide Your new GE telephone system is EXPANDABLE up to a total of 7 handsets by purchase of optional Model 28101 handset with cha...

Page 2: ...cularly important in rural areas CAUTION Users should not attempt to make such connections themselves but should contact the appropriate electric inspection authority or electrician as appropriate NOT...

Page 3: ...seful in determining the number of devices you may connect to your telephone line and still have all of these devices ring when your telephone number is called In most but not all areas the sum of the...

Page 4: ...D DO NOT EXPOSETHIS PRODUCT TO RAIN OR MOISTURE THE LIGHTNING FLASH AND ARROW HEAD WITHIN THE TRIANGLE IS A WARNING SIGN ALERTING YOU OF DANGEROUS VOLTAGE INSIDE THE PRODUCT CAUTION TO REDUCE THE RISK...

Page 5: ...e Quick Setup Guide 16 Programming Information 17 Text Entry 17 Programming the Base 17 Answerer 17 Answerer On Off 17 Security Code 18 Message Alert 18 Rings to Answer 18 Message Length 19 Alarm 19 S...

Page 6: ...m 38 Transfer to Cell 38 Making a Landline Call When Talking To Cell Call 39 Making a Cell Call When Talking To Land line Call 39 Conference 39 Call Timer 39 Auto Standby 39 Flash Call Waiting 39 Last...

Page 7: ...om Call 52 Receiving an Intercom Call 52 Push to Talk 53 Scheduler 53 Adding a Reminder 53 Set Snooze 54 Set Cycle Time 54 Set Alarm Melody 54 Reviewing and Editing the Reminder Record 55 Deleting a R...

Page 8: ...hones operate on electricity you should have at least one phone in your home that isn t cordless in case the power in your home goes out Before You Begin Parts Checklist for model 28128xx2 Make sure y...

Page 9: ...nstalled Installation Digital Security System Your cordless phone uses a digital security system to protect against false ringing unauthorized access and charges to your phone line INSTALLATION NOTE S...

Page 10: ...onal computers Never install telephone wiring during a lightning storm Never install telephone jacks in wet locations unless the jack is specifically designed for wet locations Never touch non insulat...

Page 11: ...button PHONE BOOK 3 button REDIAL 6 button END cancel button play stop button repeat button TALK button CID 5 CALLER ID 5 button EARPIECE MUTE answerer button Microphone SKL Soft Key Left Sound Quali...

Page 12: ...Y STOP 3 button indicator PLAY STOP 2 button indicator CID 5 caller ID button PAGE PUSH TO TALK button Visual Message Waiting indicator REDIAL 6 button PAUSE RINGER button Microphone SPEAKER BUTTON Ba...

Page 13: ...he connector is keyed and can be inserted only one way 4 Insert the battery pack 5 Close the battery compartment by pushing the door up until it snaps into place 6 Place the handset in the charging cr...

Page 14: ...y want to write down any stored information you do not want erased IMPORTANT If you are not going to use the telephone for more than 30 days remove the batteries because they can leak and damage the u...

Page 15: ...r 2 Attach the wall mounting pedestal by first inserting the tabs on the open edge of the pedestal into the slots on the lower portion of the bottom of the base Then push down and snap the pedestal in...

Page 16: ...OUNCE button until screen displays ANNOUNCEMENT RECORDING 3 Begin speaking after you hear the beep 4 Release the button when you finish your announcement NOTE To return to the default announcement aft...

Page 17: ...racters More than one letter is stored in each of the number keys For example press the 2 key twice for the letter B Press the 1 key to insert a space Press the TONE button to toggle between upper and...

Page 18: ...will hear a confirmation tone Message Alert This feature sets your answering system to sound an alert tone from the base every 10 seconds when there are new messages From the Answerer menu 1 Use the o...

Page 19: ...our selection You will hear a confirmation tone NOTE The total recording time of this unit is 15 minutes Alarm Set an alarm then program the snooze time occurance and melody preferences 1 Make sure yo...

Page 20: ...ing is Once 4 Press the Select SKL button to save your selection You will hear a confirmation tone NOTE If you select Daily the system will follow the current time setting to turn on the alarm Set Ala...

Page 21: ...d date 4 Press Next SKL button to move to time setup 5 Use the number keys to enter the time and use or button to select AM or PM 6 Press the Store SKL button to save the setting You will hear a confi...

Page 22: ...in the programmable menu are returned to factory default setting Press the Select SKL button to save your selection You will hear a confirmation tone Sound Settings In the Sound Settings Menu there a...

Page 23: ...menu From the Sound Settings menu 1 Use the or button to scroll to Ringer Volume 2 Press the Select SKL button to enter the menu 3 Use the or button to scroll to the desired ringer volume The default...

Page 24: ...se the base menus and not the quick Connect Bluetooth button From the Bluetooth menu 1 Use the or button to scroll to Connect 2 Press the Select SKL button to enter the menu refer to the instruction m...

Page 25: ...splay 3 Press the Yes SKL button to confirm My Base From the Bluetooth menu 1 Use the or button to scroll to My Base the information for the base shows on the display 2 Press the Select SKL button to...

Page 26: ...From the Alarm On menu 1 Use the or button to scroll to Snooze Off 2 Press the Select SKL button to enter the menu Snooze On Off shows on the display 3 Use the or button to select from Off Every 5 min...

Page 27: ...uage This menu allows you to change the language of the display prompts on the handset NOTE The voice prompt language of the handset is determined by the voice prompt language set on the base From the...

Page 28: ...s on the display Handset Name This menu allows you to enter a name for the handset which displays on the idle screen From the Phone Setting menu 1 Use the or button to scroll to Handset Name 2 Press t...

Page 29: ...r selection 5 If you select Yes the handset will automatically be deregistered Successful Deregistration shows in the display followed by HANDSET NEEDS REGISTRATION and PLEASE PUT HANDSET IN BASE 6 Pl...

Page 30: ...button to scroll to Default Setting 2 Press the Select SKL button to enter the menu 3 Use the or button to scroll to No or Yes The default is No 4 If you select Yes all the settings in the programmabl...

Page 31: ...m this menu From the Sound Setting menu 1 Use the or button to scroll to Ringer Volume 2 Press the Select SKL button to enter the menu 3 Use the or button to scroll to the desired ringer volume The de...

Page 32: ...oing announcement the caller can enter the mailbox number 1 2 or 3 while the announcement is playing or within the 2 seconds after the end of announcement and then leave a message in that specific mai...

Page 33: ...le it is playing 1 Press and release the respective mailbox button PLAY STOP 1 PLAY STOP 2 PLAY STOP 3 2 Press the REPEAT 7 and SKIP 8 buttons to select and play the message you want to erase 3 Press...

Page 34: ...ndset keys just like you would use the base buttons see Answering System Setup The button functions are located on the handset above each number key For example to play messages 1 Make sure your hands...

Page 35: ...is charging in the base charge cradle It flashes when you receive a call TALK Indicator and SPKR Indicator on the Handset The TALK Indicator or SPKR Indicator is lit when the handset is in use It flas...

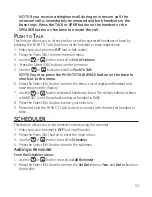
Page 36: ...n press the TALK or SPKR button on handset or the SPEAKER button on the base OR Use the or button to select the desired record then press the TALK or SPKR button on handset or the SPEAKER button on th...

Page 37: ...speakerphone mode 3 To switch between the two calls press Line SKR button while landline call is on hold press Cell SKR button while cellular call is on hold Receiving a Cellular Call during a Landlin...

Page 38: ...feature allows you to create a 3 way conversation please refer to Intercom Operation section of this manual for details Available Options During a Cell Call More During an external cell call press Mo...

Page 39: ...join the ongoing call 2 Press the END cancel button to exit conference With an outside landline and cellular call 1 Press CONF SKL button to conference the landline and cellular call 2 Press the END c...

Page 40: ...SPKR button on the handset or the SPEAKER on the base the number dials automatically OR If you get a busy signal and want to keep dialing the number press the button to quickly redial the number Page...

Page 41: ...ll the handset ringer s at once by pressing one button at the base unit even though the ringer volume of handset s has been preset 1 In the standby mode press the DO NOT DISTURB button on the base 2 T...

Page 42: ...on Receiving CID Records When you receive a call the Caller ID information is transmitted between the first and second ring The Caller ID information appears on the display while the phone rings givin...

Page 43: ...atting a CID Number Before Dialing NOTE Depending on a how the incoming caller s phone number is formatted when it is received and b whether or not you previously pre programmed your local area code i...

Page 44: ...F not in talk mode 2 Press the button 3 Press the View SKL button 4 Use the or button to scroll to the desired CID record 5 Press the More SKL button 6 Use the or button to scroll to Store 7 Press the...

Page 45: ...date time the call was received 4 Press the or button to scroll to the records for desired record 5 Press the More SKL button to see more options 6 Press the or button to select Format or Store 7 Pres...

Page 46: ...Menu SKL button and use the or button to scroll to Phone Book NOTE You may press to shortcut to the phone book 3 Press the Select SKL button to enter the phone book NOTE If there are no records store...

Page 47: ...button on the handset to access the Dialed Calls menu 3 Use the or button to scroll to desired record 4 Press the Store SKL button to save the number 5 Use the or button to select from the desired cat...

Page 48: ...diting a Phone Book Record 1 When reviewing the phone book records list use the the or button to scroll to the desired record or enter the first character of name for alphabetical search 2 Press Optio...

Page 49: ...oll to desired record 4 Press Option SKL button to access the option menu 5 Use the or button to scroll to Grouping 6 Press the Select SKL button and use the or button to select desired group 7 Press...

Page 50: ...Press the Select SKL button and use the or button to select desired location Up to 10 locations 0 to 9 7 Press Select SKL button to confirm Editing the Speed Dialing Number 1 Make sure your phone is...

Page 51: ...button to confirm the selection After the transfer process finish Successful shows on the display Extra Features In the Extra Features Menu there are three programmable submenus Room Monitoring Inter...

Page 52: ...The receiving handset is paged and emits a tone NOTE To cancel the page press the Back SKR button or END cancel button on the originating handset 5 Wait for the person at the receiving handset to pre...

Page 53: ...ALK PAGE button on the base to shortcut to the menu 6 Press the Select SKL button to enter the menu List of registered handset and base shows on the display 7 Use the or button to desired handset or b...

Page 54: ...ter the menu 3 Use the or button to select from Off Every 5 minutes Every 10 minutes Every 15 mintues or Every 30 minutes Off is the default setting 4 Press the Store SKL button to save your selection...

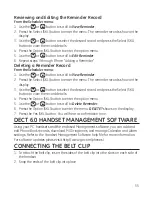
Page 55: ...3 Use the or button to select the desired record and press the Select SKL button to view the record details 4 Press the Option SKL button to enter the option menu 5 Use the or button to scroll to Del...

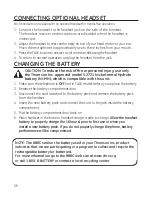
Page 56: ...ith this unit 1 Make sure the telephone is OFF not in TALK mode before you replace the battery 2 Remove the battery compartment door 3 Disconnect the cord attached to the battery pack and remove the b...

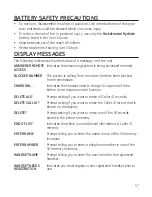
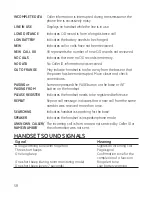
Page 57: ...transmission CHARGING Indicates the handset need to charge for a period of time before it can resume normal function DELETE ALL Prompt asking if you want to erase all Caller ID records DELETE CALL ID...

Page 58: ...and check connections PAGING or Someone pressed the PAGE button on the base or INT PAGING FROM button on the handset PLEASE REGISTER Indicates the handset needs to be registered before use REPEAT Rep...

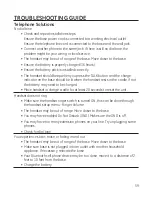
Page 59: ...et rests in the cradle If not the battery may need to be charged Place handset in charge cradle for at least 20 seconds to reset the unit Handset does not ring Make sure the handset ringer switch is t...

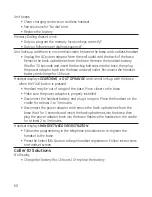
Page 60: ...T OF RANGE and cannot link up with the base when the TALK button is pressed Handset may be out of range of the base Move closer to the base Make sure the power adaptor is properly installed Disconnect...

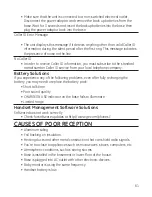
Page 61: ...company Battery Solutions If you experience any of the following problems even after fully recharging the battery you may need to replace the battery pack Short talk time Poor sound quality CHARGE IN...

Page 62: ...ing batteries Should your product not perform properly during the warranty period either 1 Return it to the selling dealer with proof of purchase for replacement OR 2 Remove the batteries where applic...

Page 63: ...6 Changing the Group Name 50 CHARGE IN USE Indicator on the Base 35 CID Error Codes 42 Conference 39 Connect and Pair 24 Connecting Optional Headset 56 Connecting the Belt Clip 55 D DECT 6 0 Handset M...

Page 64: ...Length 19 Message Playback 33 More 38 Mute 41 My Base 25 My Devices 24 P Page 40 Paging from the Base Group Page 40 Parts Checklist 8 Phone Book 46 Phone Setting 20 27 Programming Information 17 Prog...

Page 65: ...e Book 44 Storing the Last Number Dialed 47 T Table of Contents 5 7 TALK Indicator and SPKR Indicator on the Handset 35 Telephone Jack Requirements 9 Telephone Network Information 3 Telephone Operatio...

Page 66: ...5 2717 Headset 5 2425 black Replacement Handset Battery Ni MH 5 2721 To order call the nearest distributor for your area Ontario 905 624 8516 Manitoba 204 783 2088 British Columbia 604 438 8001 Quebe...

Reviews: