Becker HPP-5 High Pressure Positioner Maintenance and Operation Manual | 6
© 2014 General Electric Company. All rights reserved.
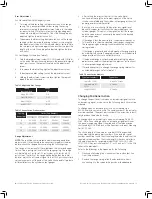
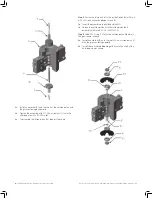
Bias Adjustment
For Standard (Non-Split Range) Systems:
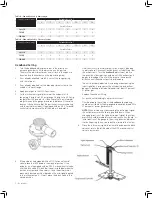
1� To increase the bias setting, increase tension on the range
spring� This is accomplished by either raising the spring
retainer or screwing the bias adjustment stud into the indica-
tor bar or tail rod� Note the two jam nuts tightened against
one another to adjust the length of the stud� When properly
adjusted, tighten the bias lock nut(s)�
2� To decrease the bias setting, decrease tension on the range
spring by either lowering the spring retainer or screwing the
bias adjustment stud out of the indicator bar or tail rod� Note
the two jam nuts tightened against one another to adjust the
length of the stud� When properly adjusted, tighten the bias
lock nut(s)�
For Split Range Systems (see Table 1)
3� Find the bias adjustment screw (1/2-20 thread with 3/8 flats)
on the end of the positioner opposite to the pneumatic signal
input port� Loosen the jam nut located on the adjustment
screw�
4� To increase the bias setting, tighten the adjustment screw�
5� To decrease the bias setting, loosen the adjustment screw�
6� Holding the adjustment screw in place, tighten the jam nut
against the positioner body�
Table 1. Adjustable Bias Springs
Table 2. Range Spring Configurations
Spring
(part number)
Range
(psig)
Green (20-2592)
1-6
Silver (25-1038)
2-11
Blue (25-1036)
4-20
Red (25-1037
8-30
Spring
Range (psi)
Stroke (Part Number)
4”
8”
12”
14”
6
01-6288
01-6287
01-6287
01-6801
12
25-1151
25-1152
25-1153
25-1154
18
25-1599
25-1600
25-1601
25-1602
24
25-1218
25-1219
25-1220
25-1221
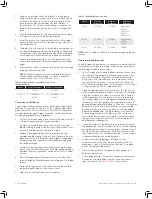
Range Adjustment
NOTE: There will be some interaction between range and bias
adjustments� It may therefore be necessary to readjust the bias
and re-check the range after completing the following steps�
The range, or the amount of travel between the lower and upper
limits of the input signal, is set with the range spring� This range
will typically be 12 psi for a 3-15 psi system or 24 psi for a 6-30
psi system� The limits of the range can be defined as the initial
point at which the instrument signal to the HPP-5 positioner starts
valve movement until the end of the valve stroke and full pressure
differential across the cylinder output gauges�
1� After setting the bias for the start of the valve travel,
continue increasing the instrument signal until the valve
stroke is completed and the cylinder output gauges show full
power gas pressure differential�
2� Be sure not to overshoot at this point as any signal level
above this upper limit will show the same reading on the
cylinder gauges� This point is the highest end of the range,
and the value may not necessarily be equal to the desired
upper range value�
3� If the range is less than desired (i�e�, the actuator reaches its
full travel in less than the specified input range), strengthen
the range spring by winding it counterclockwise onto the
spring retainer�
If the range is greater than desired, weaken the range spring
by winding it clockwise� Repeat adjustments until the desired
range provides full or zero output pressure�
4� If the desired range is not achieved after making the above
adjustments, readjust the bias (per the previous instructions)
to allow proper range adjustment�
5� It may be necessary to change the range spring retainer for
nonstandard ranges (refer to Table 3)�
Table 3. Range Spring Retainer
Type (part number)
Typical Use
Short (01-2509)
8” and 12” Stroke
Intermediate (11-
2572)
6” Stroke
Long (01-2042)
4” Stroke
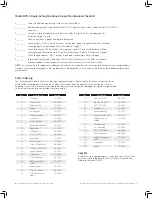
Changing Positioner Action
To change the positioner from open on increasing signal to close
on increasing signal, or vice versa, the following parts kits must be
ordered:
To change open on increasing to close on increasing: Part
#25-1444 plus an extension rod� The serial number of the actuator
must be specified� The exact part number of the extension rod will
vary based on the actuator stroke�
To change close on increasing to open on increasing: Part #25-
1289� Note: If converting a close on increasing signal positioner
to open on increasing signal, the wide end of the tube may be
shortened by 11/16 of an inch with a hacksaw instead of ordering
Part #25-1289�
The stroke length of the actuator cylinder MUST be specified
when ordering the above part numbers� If the actuator serial
number cannot be found, the stroke length can be found from the
regulator model number� The stroke length is the second letter in
the model number� For example model 10H12L6FG-SR-S-HSB-
40/35-100-O has a stroke length of “L”, or 12 inches (“L” is the 12th
letter in the alphabet)�
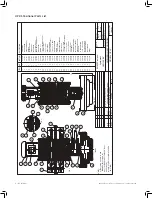
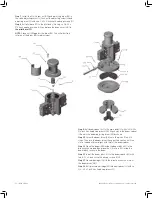
Refer to the drawings in the Appendix for the following:
1� Disconnect all supply lines, instrument line, and output line
from the positioner�
2� Remove the range spring at both ends and those items
connecting it to the rod and the positioner feedback arm�
Summary of Contents for Becker HPP-5
Page 18: ... ...


