


4
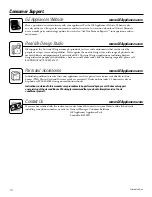
Consumer Support
Tr
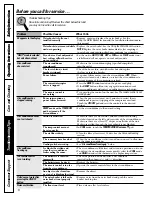
oubleshooting T
ips
Operating Instructions
Safety Instructions
Tr
oubleshooting T
ips
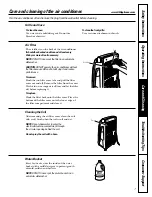
Care and Cleaning
Safety Instructions
Operating Instructions
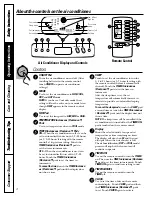
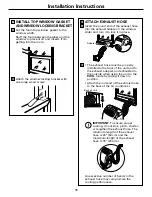
About the controls on the air conditioner.
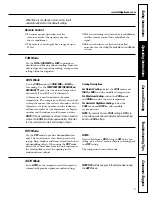
Controls
ON/OFF Pad
Turns the air conditioner on and off. (After
installing batteries in the remote control,
touch
ON/OFF
to operate air conditioner
settings.)
MODE
Use to set the air conditioner to
FAN, COOL,
DRY,
and
AUTO
mode.
NOTE:
If you have a Cool only model, heat
settings will not be active on your model even
though
HEAT
appears in the remote control
display.
FAN Pad
Use to set the fan speed to
LOW, MID
or
HIGH.
TEMPERATURE Increase
▲
/Decrease
▼
Pads
Use to set temperature when in
COOL
mode.
TIMER Increase
▲
/Decrease
▼
Pads
ON—
When the air conditioner is off, it can be
set to automatically come on in 1/2–24 hours
(or 1/2–18 hours if setting with the remote
control) at its previous setting. Touch the
TIMER
Increase
▲
/Decrease
▼
pads to
set the timer in increments.
OFF—
When the air conditioner is on, it can
be set to automatically turn off in 1/2–24
hours. Touch the
TIMER
Increase
▲
/Decrease
▼
pads to set the timer in
increments.
To cancel the timer,
touch the
TIMER
Increase
▲
/ Decrease
▼
pads until the display does
not show a time.
SLEEP
Touch to set the air conditioner to run for
1/2 to 24 hours (or 1–7 hours if setting with
the remote control) before it automatically
shuts off. Touch the
TIMER
Increase
▲
/Decrease
▼
pads to set the timer in
increments.
After the sleep timer is set, the set
temperature will automatically increase in
intervals to provide a comfortable sleeping
temperature.
To cancel the sleep mode,
touch the
SLEEP
pad
a second time or touch the
TIMER
Increase
▲
/ Decrease
▼
pads until the display does not
show a time.
NOTE:
The sleep timer will be cancelled if the
air conditioner is turned off or the
TIMER ON
pad is touched on the remote control.
Display
Shows the selected mode, fan speed, set
temperature or time remaining on timer.
The display will also show
E4
and the unit
will signal when the water bucket is full.
The dehumidification (
DRY
or
COOL
mode)
process will stop but the fan motor will
continue to operate.
TIMER ON
Use on the remote control to turn the
TIMER
on. Then use the
TIME
Increase
▲
/Decrease
▼
pads to set the timer in increments. Touch
TIMER ON
again to send time setting to unit.
TIMER CANCEL
Use on the remote control to turn the
TIMER
off.
CLOCK
Use to set the time of day on the remote
control display. Touch
CLOCK
pad and then
the
TIMER
Increase
▲
/Decrease
▼
pads
to set. Touch
CLOCK
again to activate.
Air Conditioner Display and Controls
Remote Control
ON / OFF
MODE
FAN
SLEEP
TIMER
TEMPERATURE
ON
OFF
ON/OFF
TIME
TIME
CLOCK
SLEEP
cancel
on
FAN
MODE
TEMP
TIMER
ON OFF
AM PM
˚F
Cool mode
Sleep mode
Set temperature
Auto mode
Low, Mid or
High fan
Dry or Auto
mode
Set time
Timer on/off


