background image

8

Safety Instructions

Operating Instructions

Tr

oubleshooting T

ips

Consumer Support

Installation Instructions

Defrosting 

(on manual defrost models with freezer area)

Defrost whenever frost on the wall of the ice tray compartment becomes 
1/4

thick. 

Never use a sharp or metallic instrument to remove frost as 

it may damage the cooling coils.

(A punctured cooling coil will cause 

serious problems and void the warranty.) We recommend using a plastic scraper.
Do not use any electrical device in defrosting your refrigerator.

To defrost:

Remove foods and ice trays from the ice tray compartment.

Set the temperature control dial at 

OFF 

position.

On models without a drip tray, place a pan beneath the ice tray
compartment to collect water.

Defrosting usually takes a few hours. To defrost faster, keep the 
door open. Also, pouring warm (not hot) water on the frosted part
may speed defrosting. 

Do not use boiling water—

it may damage 

plastic parts. 

After defrosting:

Empty water from the drip tray or from the pan placed beneath
the ice tray compartment. Wash the tray or pan with warm water.

Wipe the ice tray compartment with a damp cloth.

Turn the temperature control to the desired setting and 
return food and ice trays to the refrigerator.

NOTE: 

If ice buildup is very thick, it may keep the ice tray compartment door

from opening or closing completely. Don’t try to force it open; after defrosting,
the door will open and close easily.

Care and cleaning of the refrigerator.

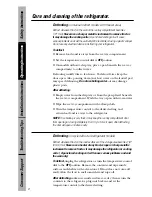
Defrost whenever frost on the inside surfaces of the storage area becomes 1/8

(3 mm) thick. 

Never use a heater of any kind, scraper or sharp metallic

instrument to remove frost as it may damage the refrigerator or cooling
coils. ( A punctured cooling coil will cause serious problems and void
the warranty.)

To defrost, 

unplug the refrigerator or turn the temperature control

dial to the 

OFF

position. Remove the contents and wipe inside

surfaces and shelves with a clean towel. If frost does not come off
easily, allow the frost to melt somewhat and wipe off. 

After defrosting, 

make sure inside surfaces are dry; then return the

contents to the refrigerator, plug unit back in and set the
temperature control to the desired setting.

Defrosting 

(on cycle defrost all-refrigerator models) 

Summary of Contents for 2 Cubic Foot Series

Page 1: ...Instructions Care and Cleaning 7 9 Control Settings 5 Refrigerator Features 6 Replacing the Light Bulb 7 Installation Instructions 10 12 Troubleshooting Tips 13 14 Consumer Support Consumer Support Back Cover Warranty 15 ATTENTION Defrosting Do not use sharp pointed objects to remove frost or ice from surfaces of the refrigerator and or freezer compartment Doing so could puncture the cooling coil ...

Page 2: ...s and cabinet are necessarily small Be careful closing doors when children are in the area Unplug the refrigerator before cleaning and making repairs GE does not support any servicing of the refrigerator Turning the temperature control dial to the OFF position stops cooling but does not shut off power to the refrigerator When using electrical appliances basic safety precautions should be followed ...

Page 3: ...let to minimize the possibility of electric shock hazard from this appliance Have the wall outlet and circuit checked by a qualified electrician to make sure the outlet is properly grounded If you have only a standard 2 prong wall outlet it is your personal responsibility and obligation to have it replaced with a properly grounded 3 prong wall outlet The refrigerator should always be plugged into ...

Page 4: ...rom the adapter always hold the adapter in place with one hand while pulling the power cord plug with the other hand If this is not done the adapter ground terminal is very likely to break with repeated use If the adapter ground terminal breaks DO NOT USE the refrigerator until a proper ground has been established Attaching the adapter ground terminal to a wall outlet cover screw does not ground t...

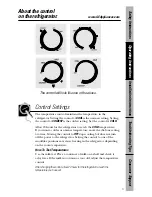
Page 5: ...e COLD temperature If you want a colder or warmer temperature move the dial one setting at a time Moving the control to OFF stops cooling but does not turn off the power to the refrigerator Setting the control to one of the snowflake positions may cause freezing in the refrigerator depending on the room temperature How To Test Temperatures Use the milk test Place a container of milk on a shelf and...

Page 6: ... features Key Ejecting Lock on some models The key for the spring loaded lock is automatically ejected key will not remain in lock in either the open or closed position Keep the key out of reach of children and away from the refrigerator If a replacement key is needed it can be ordered by visiting our Website www GEAppliances com or calling GE Parts and Accessories 800 626 2002 Refrigerator Storag...

Page 7: ...event odors leave an open box of baking soda in the refrigerator Unplug the refrigerator before cleaning If this is not practical wring excess moisture out of sponge or cloth when cleaning around the control Use warm water and baking soda solution about a tablespoon 15 ml of baking soda to a quart 1 liter of water This both cleans and neutralizes odors Rinse and wipe dry Other parts of the refrige...

Page 8: ... ice tray compartment Wash the tray or pan with warm water Wipe the ice tray compartment with a damp cloth Turn the temperature control to the desired setting and return food and ice trays to the refrigerator NOTE If ice buildup is very thick it may keep the ice tray compartment door from opening or closing completely Don t try to force it open after defrosting the door will open and close easily ...

Page 9: ...absences remove food and unplug the refrigerator Move the control to the OFF position and clean the interior with a baking soda solution of one tablespoon 15 ml of baking soda to one quart 1 liter of water Leave the door open Preparing to Move Secure all loose items such as shelves and ice trays by taping them securely in place to prevent damage Be sure the refrigerator stays in an upright positio...

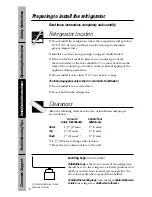
Page 10: ...ing of the appliance during normal use Do not install it closer than 5 13 cm next to a range The following applies only to the 2 3 and 4 Cubic Foot Models Do not install it in a recessed area Do not build in the refrigerator Clearances Allow the following clearances for ease of installation and proper air circulation 2 3 and 4 6 Cubic Foot Cubic Foot Models Model only Sides 1 2 13 mm 0 0 mm Top 2 ...

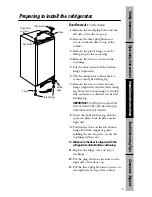
Page 11: ... back to remove the right leveling leg 7 Remove the screws on the bottom hinge right side and the left leveling leg Move the bottom hinge to the left side and secure it with the screws and leveling leg IMPORTANT The left leg has a spacer that must be moved to the right side leveling leg when the door swing is reversed 8 Screw the right leveling leg with the spacer in place back in place on the rig...

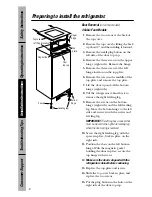
Page 12: ...eling leg Move the bottom hinge to the left side and secure it with the screws and leveling leg IMPORTANT The left leg has a spacer that must be moved to the right side leveling leg when the door swing is reversed 10 Screw the right leveling leg with the spacer in place back in place on the right side 11 Position the door on the left bottom hinge With the magnetic gasket holding the door in place ...

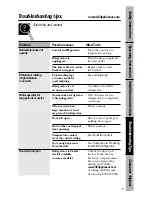
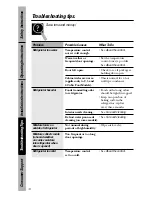
Page 13: ...n refrigerator to completely cool down Often occurs when This is normal large amounts of food are placed in refrigerator Door left open Check to see if package is holding door open Hot weather or frequent This is normal door openings Temperature control See About the control set at the coldest setting Not enough clearance See Clearances in Preparing from the wall to install the refrigerator Door w...

Page 14: ...lies only to 2 3 and wall type condenser 4 Cubic Foot Models Refrigerator has odor Foods transmitting odor Foods with strong odors to refrigerator should be tightly wrapped Keep an open box of baking soda in the refrigerator replace every three months Interior needs cleaning See Care and cleaning Defrost water pan needs See Care and cleaning cleaning on some models Moisture forms on Not unusual du...

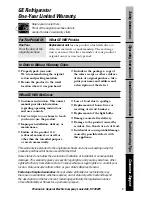
Page 15: ...er of your product s original one year warranty period Customer instruction This owner s manual provides information regarding operating instructions and user controls Service trips to your home to teach you how to use the product Improper installation delivery or maintenance Failure of the product if it is abused misused or used for other than the intended purpose or used commercially Loss of foo...

Page 16: ...versal Design applications including kitchen design ideas for people with disabilities check out our Website today For the hearing impaired please call 800 TDD GEAC 800 833 4322 Parts and Accessories www GEAppliances com Individuals qualified to service their own appliances can have parts or accessories sent directly to their homes VISA MasterCard and Discover cards are accepted Order on line toda...

Reviews: