OPM_GTU_TWR_1K0_3K0_XUS_V015
8
DE GT Series: User manual rev date 8-11- 04
Digital Energy
™
GT Series
g
2.4.3 Connecting the RS232/dry contact interface
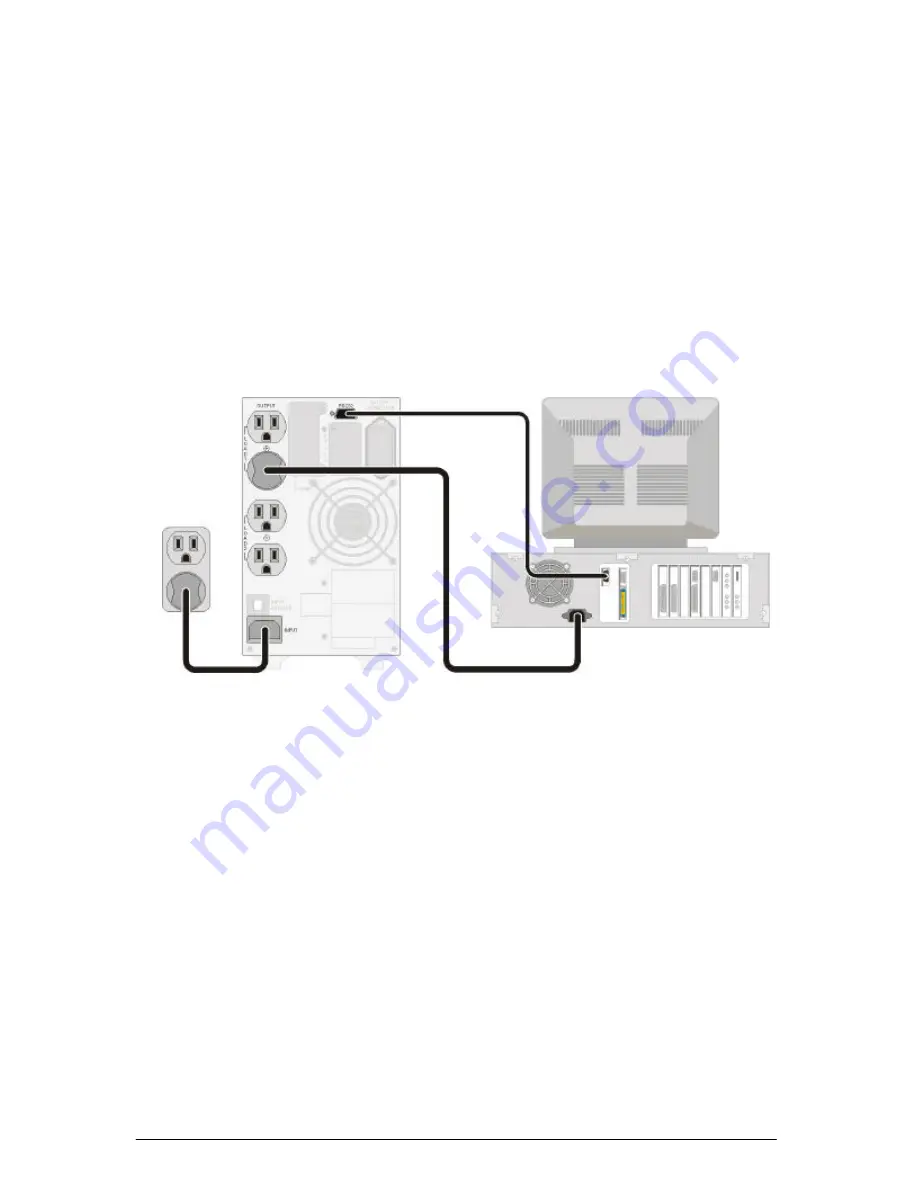
Connect the interface signal cable between the RS-232/dry contact port on the rear
panel of UPS and COM1 or COM2 of your computer if necessary. See fig. 2.4.
Refer to chapter 4 for more information.
2.4.4 Connecting the load
1. Calculate the total power consumption of your loads to ensure that the UPS is able
to supply the required power and overload condition will not happen.
2. Plug the power cord of the equipment into the output receptacles on the rear panel
of the UPS as shown in fig. 2.4. Spread the load ove r the output receptacles as
equally as possible.
CAUTION:
Do not connect a laser printer to the UPS.
2.4.5 Connecting to the utility power supply
1000VA:
Use a suitable power cord, and plug it into the input socket (see fig. 2.4)
1500/2000/3000VA:
The UPS is equipped with a fixed input power cord.
1. Plug the input power cord into a working three wire, grounded AC wall outlet. Do not
use extension cords.
2. Turn on the input breaker (if the breaker can be turned on) on the rear panel of UPS.
After that, the fan (in rear panel) will run and, as a front panel test, all LEDs will light
up for about 2-3 seconds. The UPS starts up in ‘STAND-BY’ mode and the battery
will be charged. See fig 2.5.
Fig. 2.4 Connecting the UPS to the utility supply and to the load
(figure shows 1000VA UPS model)


