JV-240UV User Manual
68
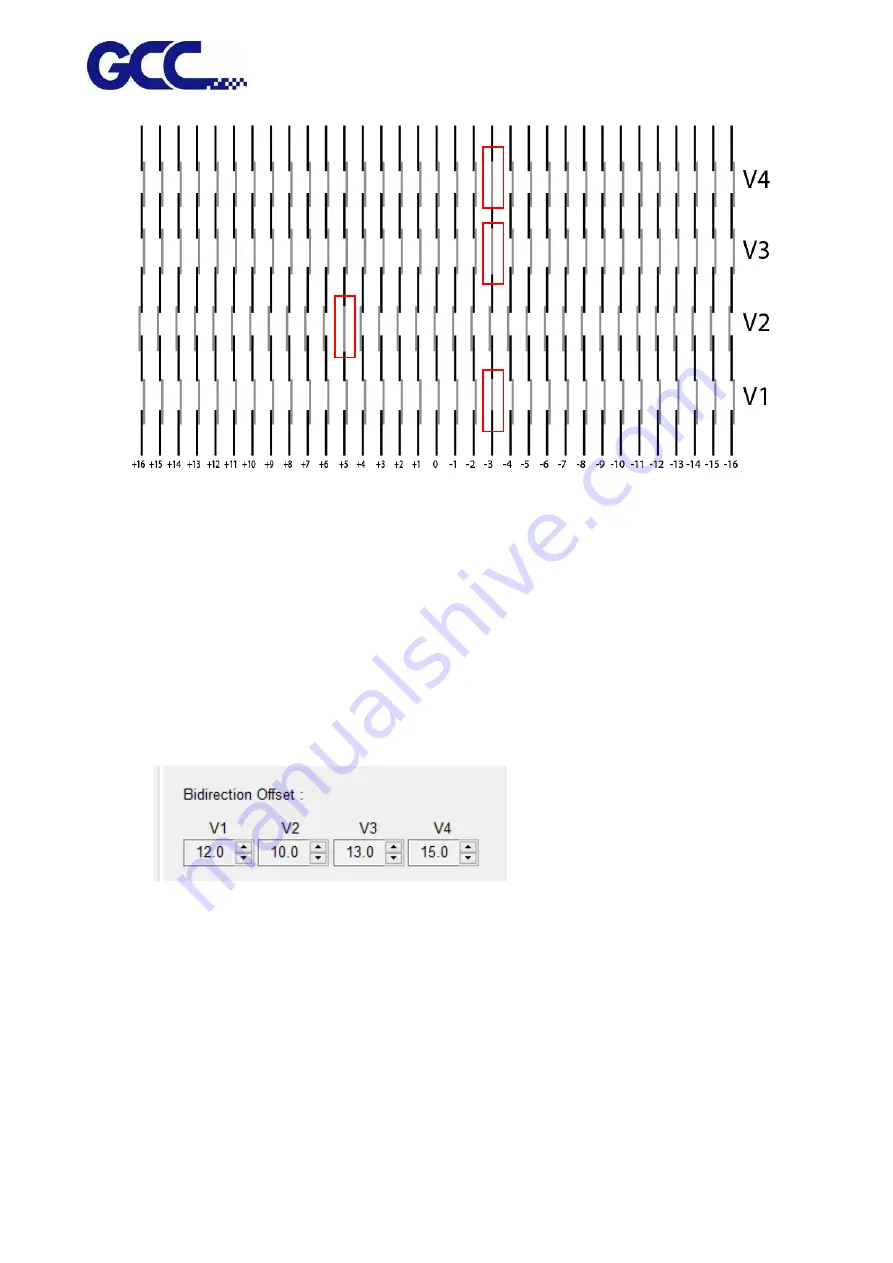
Step 1 Use a magnifying glass to observe that the V1 color and black lines are aligned to the "-3"
line. Please record this number.
Step 2 Use a magnifying glass to observe that the V2 color and black lines are aligned to the "+5"
line. Please record this number.
Step 3 Use a magnifying glass to observe that the V3 color and black lines are aligned to the "-3"
line. Please record this number.
Step 4 Use a magnifying glass to observe that the V4 color and black lines are aligned to the "-3"
line. Please record this number.
Step 5
After recording all the Numbers, please go to the Bidirectional Offset "V1, V2, V3, V4"
under the control interface of (VLCD) software to perform the horizontal fine tuning.
Example
:
V1=12-3=9 (VLCD) input 9
V2=10+5=15 (VLCD) input 15
V3=13-3=10 (VLCD) input 10
V4=15-3=12 (VLCD) input 12
Step 6 Enter all inkjet heads that need to be corrected and then store to update the settings.
Summary of Contents for JV-240UV
Page 1: ...JV 240UV User Manual http www GCCworld com GCC GCC Club V 2 2018 Sep ...
Page 20: ...JV 240UV User Manual 19 Step 5 Select OK complete the CCDMarkPlugin installation ...
Page 25: ...JV 240UV User Manual 24 Operating work flow ...
Page 27: ...JV 240UV User Manual 26 Operating work flow ...
Page 28: ...JV 240UV User Manual 27 Control panel flow O N FRONT REAR O N O N OFF OFF ...
Page 40: ...JV 240UV User Manual 39 B Set the PH Gap Auto Adjustment to be OFF on the control panel ...
Page 70: ...JV 240UV User Manual 69 ...


