Photo Mode
Press Menu/Mode button to switch to photo mode. There is a camera icon at the top left corner of
the LCD to signify you are on photo mode. To take a photo, press the Power/OK button. The screen
will flash and make a camera sound when a picture is taken. Holding down the Menu/Mode Button
for 2 seconds then releasing it, will open the settings in photo mode and will allow you to adjust the
photo resolution, image quality and other photo settings.
Video/Photo Playback
Press Menu/Mode button to switch to playback mode after photo mode. Using the arrow buttons, you
can choose between all your recorded videos or photos. The protected files have a lock icon
meaning they cannot be deleted until unlocked. Press the Power/OK button to select a file for
playback. Holding down the Menu/Mode Button for 2 seconds then releasing it, will give you the
option to delete the file or unlock the file. Simply press the Menu/Mode button to return to video
mode.
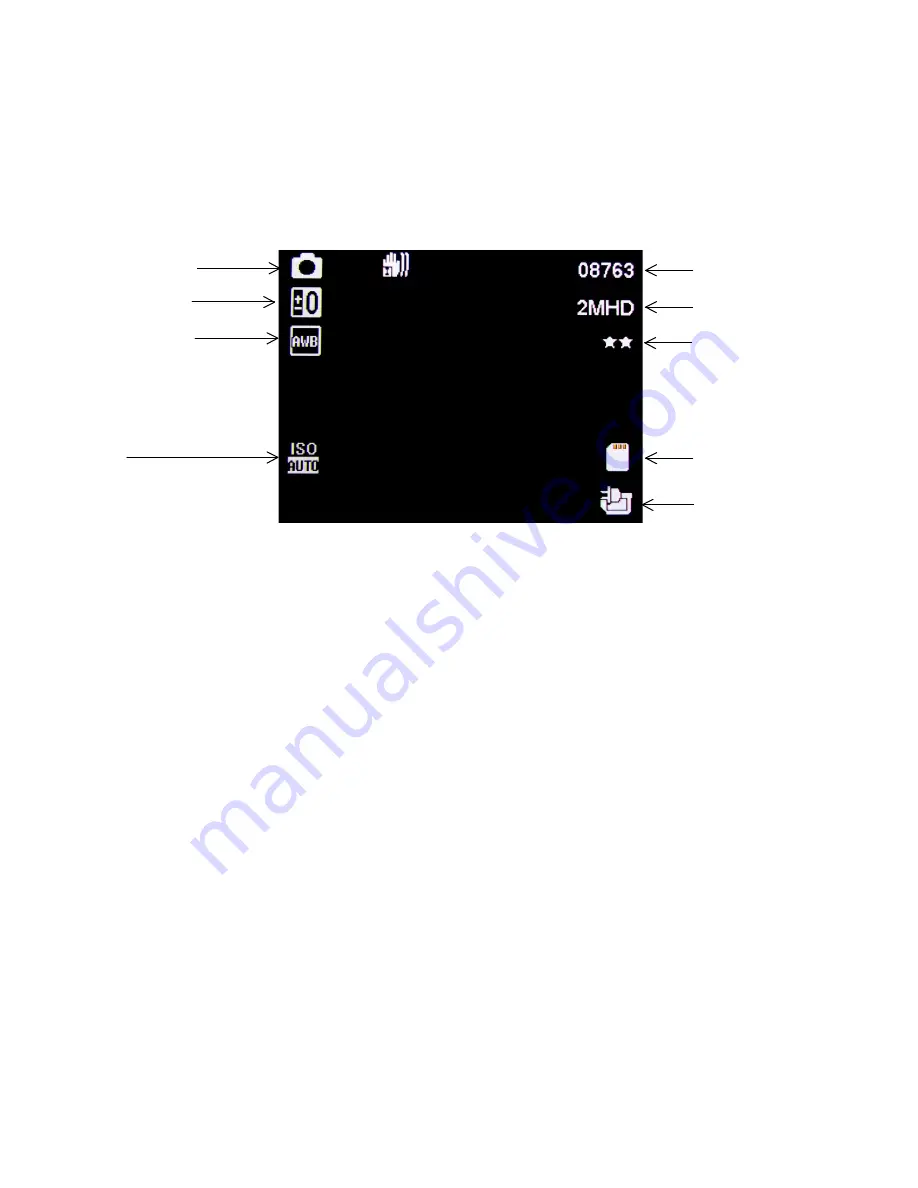
Image Resolution
Photos remaining
Camera Mode
White Balance
Exposure
Compensation
ISO
Battery
SD Card
Image Quality
Stabilisation
Summary of Contents for GDVR190
Page 1: ...USER GUIDE GDVR190...