: Upgrading Your Computer
52
3
Remove the processor fan by following the instructions
in
“Replacing the processor fan” on page 37
.
4
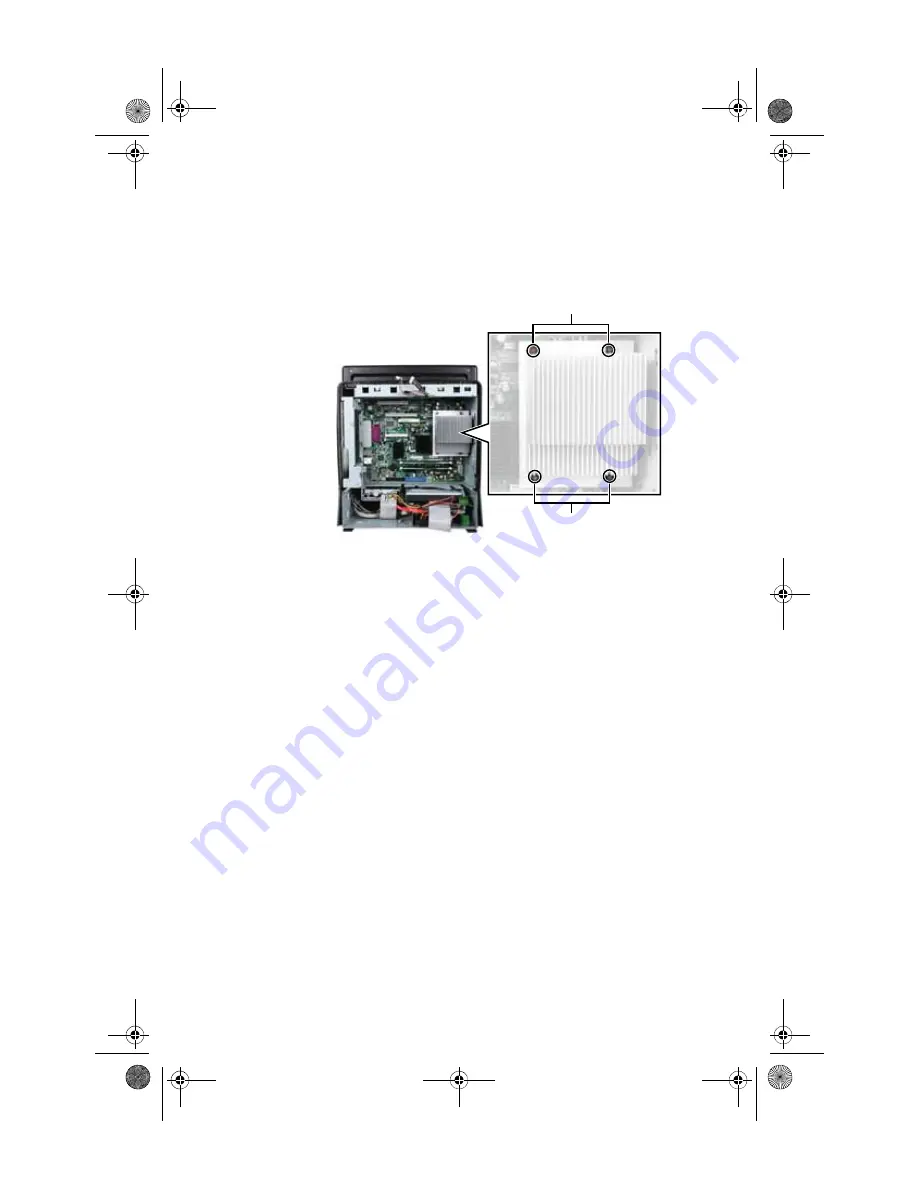
Loosen the four screws that secure the heat sink to the
processor, then remove the heat sink. The screws are
captive screws, so they will not fall out of the heat sink.
5
Disconnect the power and data cables from the system
board, noting their locations and orientation. (You will
reconnect the cables after you install the new board.)
You can also mark the cables with tape labels to simplify
reconnecting cables later.
Heat sink screws
Heat sink screws
8512032.book Page 52 Tuesday, January 9, 2007 1:47 PM
Summary of Contents for Profile 6
Page 1: ...REFERENCEGUIDE Gateway Profile 6 8512032 book Page a Tuesday January 9 2007 1 47 PM...
Page 2: ...8512032 book Page b Tuesday January 9 2007 1 47 PM...
Page 10: ...CHAPTER 1 About This Reference 4 8512032 book Page 4 Tuesday January 9 2007 1 47 PM...
Page 60: ...CHAPTER 4 Upgrading Your Computer 54 8512032 book Page 54 Tuesday January 9 2007 1 47 PM...
Page 76: ...CHAPTER 5 Maintaining Your Computer 70 8512032 book Page 70 Tuesday January 9 2007 1 47 PM...
Page 110: ...CHAPTER 6 Troubleshooting 104 8512032 book Page 104 Tuesday January 9 2007 1 47 PM...
Page 120: ...Appendix A Legal Notices 114 8512032 book Page 114 Tuesday January 9 2007 1 47 PM...
Page 128: ...122 Index 8512032 book Page 122 Tuesday January 9 2007 1 47 PM...
Page 129: ...8512032 book Page 123 Tuesday January 9 2007 1 47 PM...
Page 130: ...MAN PFL6 HW REF V R0 1 07 8512032 book Page 124 Tuesday January 9 2007 1 47 PM...


