User’s Guide 21
PCMCIA Cards
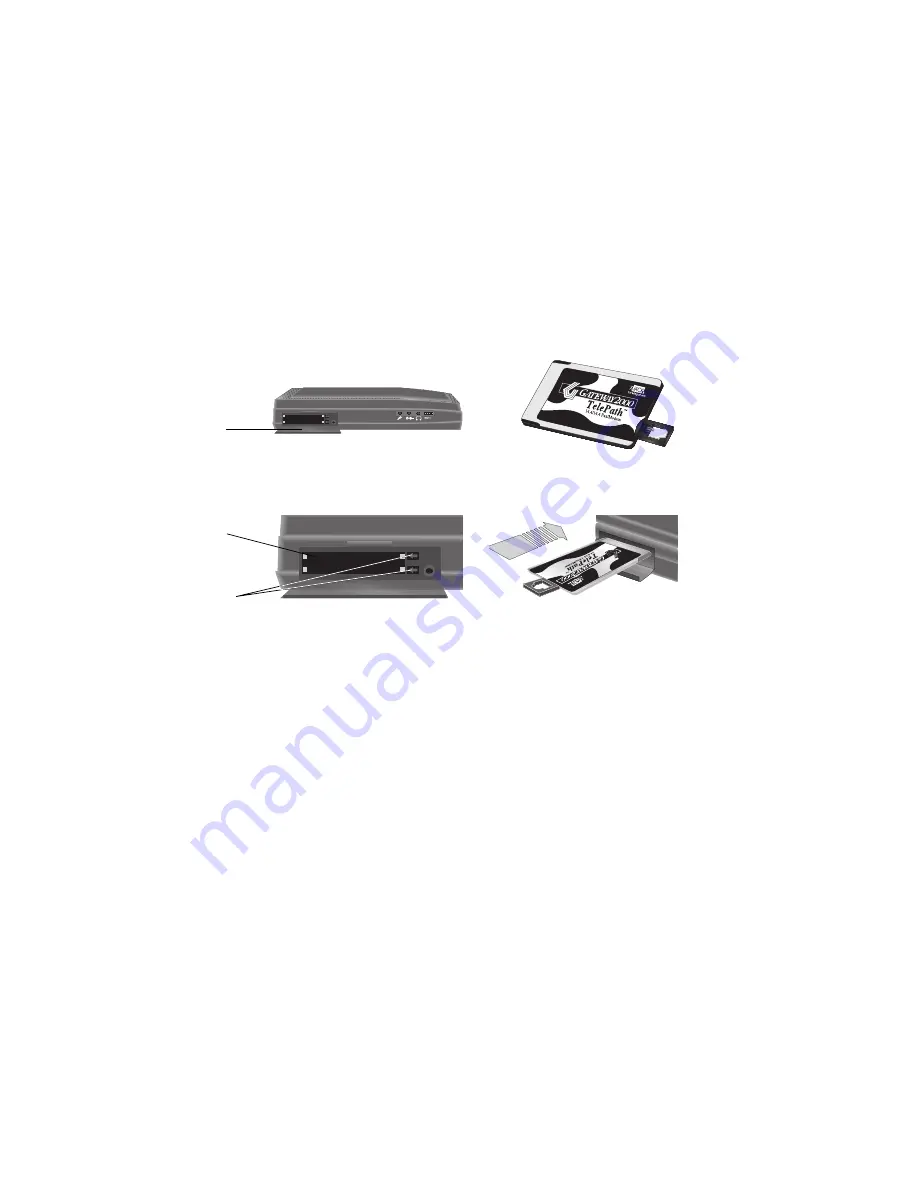
The system’s PCMCIA slots are located behind the PCMCIA door on the left side of
the unit. These slots may be used as two Type II slots or as one Type III slot. Since
these are flush slots, the door can be shut even when a PCMCIA card is installed. The
system is preconfigured to accept most PCMCIA cards automatically: simply plug a
card into the PCMCIA slot as shown below:
To remove a PCMCIA card, simply press the appropriate eject button located to the
right of the PCMCIA slot. Because the system supports “hot-swapping,” one card
can usually be exchanged for another by simple removal and replacement.
Step 1:
Step 1:
Step 1:
Step 1:
Step 1:
Flip open the PCMCIA door on
the left side of the unit.
Step 2:
Step 2:
Step 2:
Step 2:
Step 2:
Select a PCMCIA card to
install.
PCMCIA slot:
PCMCIA slot:
PCMCIA slot:
PCMCIA slot:
PCMCIA slot:
(2 shown).
Eject buttons:
Eject buttons:
Eject buttons:
Eject buttons:
Eject buttons:
Step 3:
Step 3:
Step 3:
Step 3:
Step 3:
Locate the PCMCIA slot in
which you wish to install the
card.
Step 4:
Step 4:
Step 4:
Step 4:
Step 4:
Slide the card into the slot and
use the device as instructed in its
manual.
PCMCIA door:
PCMCIA door:
PCMCIA door:
PCMCIA door:
PCMCIA door:
Summary of Contents for MULTIMEDIA NOTEBOOK SYSMAN017AAUS
Page 1: ...USER S GUIDE ...
Page 4: ...The Gateway 2000 SOLO Multimedia Notebook User s Guide ...
Page 37: ...SYSMAN017AAUS 8 95 ...


