Gates MC3001 Operating And Calibration Instructions Download Page 6

USER GUIDE - MC300

1

6

Working principle:

In the non-actuated state (such as shown in figure 1), the motor drives the pump which continuously supplies the
circuit with oil. The control valve (4) is in position middle (see figure 1).  The oil is in a closed circuit and returns to
the oil tank (8).

During crimping, the control valve (4) is in 

the RH position.

 The connection P to B on the control valve (4) is estab-

lished.  The crimping chamber is supplied with oil.  When pressure is equal or 

greater than the

 required 

pressure, 

excess oil is returned to the oil tank (8) via the pressure limiter (2).

Oil in the retraction chamber is evacuated to the oil tank (8) via the control valve (4) from A to T.

During die retraction, the control valve (4) is in 

the LH position

.  The connection P to A on the control valve is estab-

lished.  The die retraction chamber is supplied with oil.  A system in the bell housing allows 

the pre

ssure

 to reduce

during the return.  Oil in the crimping chamber is returned to the oil tank (8) via the connection B to T on the control
valve (4). The volume of oil in the crimping chamber being larger, oil is also evacuated via the pilot valve (3).

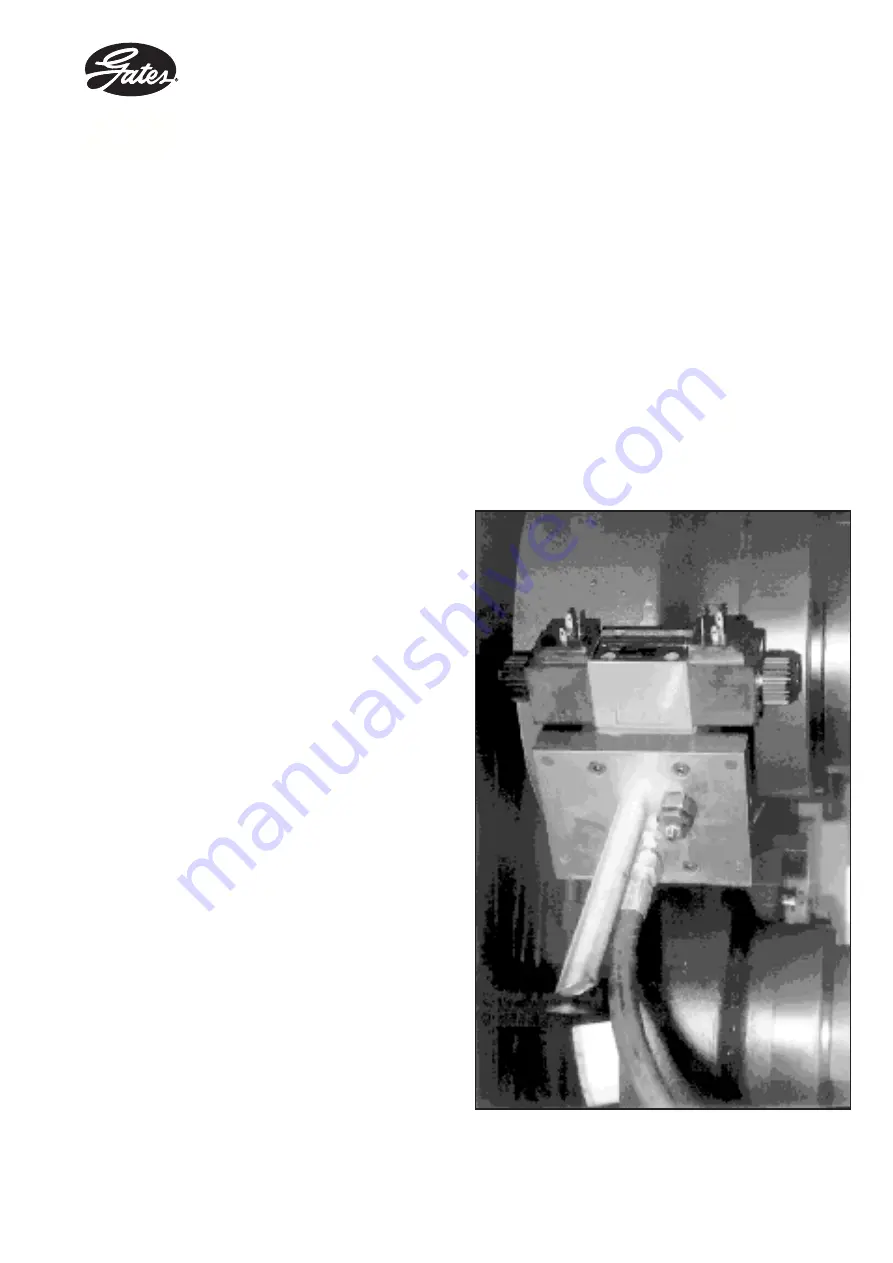
Figure 2 : View of drilled block.

Summary of Contents for MC3001

Page 1: ...MC3001 OPERATING AND CALIBRATION INSTRUCTIONS...

Page 2: ...ad 8 3 INSTRUCTIONS FOR USE 10 3 1 SAFETY 10 3 2 UNPACKING INSTALLATION 10 3 3 OPERATING INSTRUCTIONS 12 3 4 ADJUSTMENT CALIBRATION 13 3 5 DIE POSITIONING AND INSTALLATION 13 4 MAINTENANCE 14 4 1 MAIN...

Page 3: ...undersigned GATES hereby declares that the new equipment described below MC3001 serial number complies with the machinery directive and the specifications given by GATES and with the regula tions rega...

Page 4: ...V 1 phase Dimensions H 650 x W 390 x L 640 mm Weight 180 kg with oil Capacity braided hose from 3 16 to 1 1 4 multiple plied metal reinforced hose from 1 4 to 1 1 4 not skived Noise levels 71 dB Oil...

Page 5: ...crimp adjustment and the electrical system 2 3 1 HYDRAULIC SYSTEM This supplies the energy necessary to move the dies Composition The hydraulic circuit is comprised of see figures 1 and 2 a drilled b...

Page 6: ...than the required pressure excess oil is returned to the oil tank 8 via the pressure limiter 2 Oil in the retraction chamber is evacuated to the oil tank 8 via the control valve 4 from A to T During d...

Page 7: ...For supply section an electric motor 1 a thermal breaker 2 a general disconnecting switch 0 1 3 a motor contactor 14 For control section 2 fuses 0 25 A am 4 and 4A gi 5 a micro switch 6 two push butt...

Page 8: ......

Page 9: ...that they will withstand high stresses and to reduce wear through contact or friction Guidance in movement is ensured via two composite rings made from bronze charged teflon Sealing is obtained throug...

Page 10: ...lanks from the oil tank filling cap Wait for 20 minutes and check the oil level using the dip stick attached to filling cap The machine should only be connected to a safe electrical circuit in accorda...

Page 11: ...6 5 4 1 2 1 Crimper flange face 5 Disengage die button 2 Gauge setting mechanism 6 On button 3 Finished crimp indicator light 7 Emergency stop button 4 Engage die button 8 Mains on off switch Fig 4 a...

Page 12: ...mped assembly 16 Check the crimp diameter of the ferrule with a vernier or micrometer The measured crimp diameter must be 4 Press engage die button 4 until machine automatically stops within the toler...

Page 13: ...iffers from the required 26 0mm calibration diameter 3 Unscrew the two socket head screws that hold the gauge setting mechanism in place with a 3mm Allen key and remove the unit 4 Calibration adjustme...

Page 14: ...duct is supplied with the machine and can be obtained from GATES Part No 7482 19227 Lubricate every 100 crimping operations as follows Shake the aerosol can held upside down for 1 minute this amount o...

Page 15: ...tle the face flange and the die carriers about every three months This is necessary to ensure that metallic other particles are removed before causing damage to machine parts Dismantle as follows Put...

Page 16: ...1 fig 11 MC3001 11409 Master die 8000 10091 1 Pos 13 fig 11 MC3000 59 Head 7482 19731 1 Pos 5 fig 3 MC3000 762 Fuse 4A gi 7482 19732 1 Pos 4 fig 3 MC5000 766 Fuse 0 50 A am 7482 19037 1 MC3000 82 Pilo...

Page 17: ......

Page 18: ...ce of dies Use the dies as specified by the crimp ing information provided with the ma chine Inadequate hydraulic pressure Calibration of high pressure to 320 bars during crimping set in factory Unloc...

Page 19: ...replaces all other warranties including implicit warranties Every effort has been made to ensure the accuracy and comprehensiveness of the informations included in this guide However Gates cannot be h...

Reviews: