background image

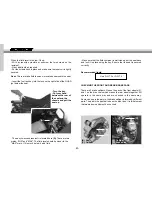
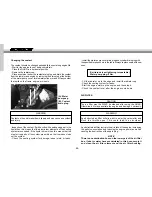
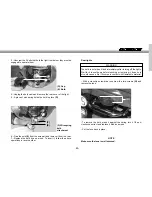
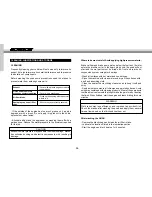
- Make sure that the fluid container is well closed, put the seat back
and lock it in place using the key. Ensure that the seat is secured
correctly.

Recommended liquid

Use D.O.T 3 or D.O.T 4

CHECKING THE FRONT AND REAR BRAKE PADS

There are 3 brake callipers: One on the each of the front wheels (2);
and 1 on the drive chain which brakes the rear wheels together. All
operate in the same way and are checked in the same way.

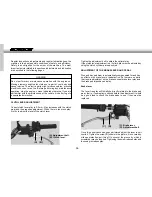
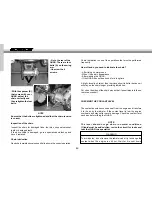
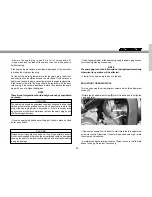
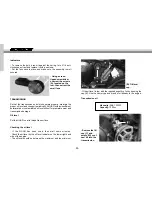
As we can see in the picture, the brake calliper is formed by different
parts. The pad is the part that rubs on the disk, thus, it is this element
that wears down and must be checked.

(A) (C)

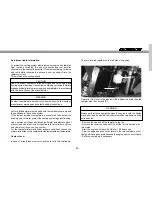
When the fluid level is too low, fill up:
- With a cross-tip screwdriver, unscrew the two screws on the
recipient.
- Next, add liquid as required.
- Put the screws back in place and make sure the reservoir is tightly
secured.

Rear: 

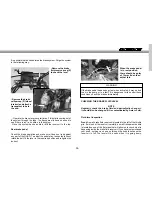
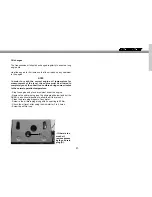
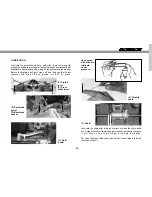
The rear brake fluid reservoir is located underneath the seat.

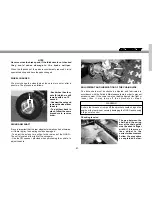
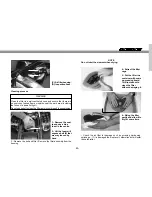
- Insert the fuel tank key into the lock on the right side of the QUAD
just below the seat.

- The easy-to-access reservoir is located here 

(A)

. There are two

marks: “MIN” and “MAX”. The fluid level should be closer to the
"MAX" mark. If it is much below it, add fluid.

-

40

-

- Turn the key.
- Put your hand
between the rear of
the seat and the
chassis and pull the
seat up.

(A)

(B)

(C)

(B). Pad
(C). Calliper

(D)

(C)

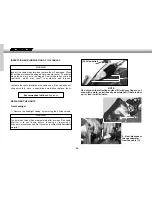
(C). Calliper
(D). Brake disk

Summary of Contents for QUAD WILD HP 300 RV - 2005

Page 1: ...MANUAL DEL USUARIO SERVICE MANUAL MANUEL D ENTRETIEN LIBRETTO D USO MANUAL DEL USUARIO SERVICE MANUAL MANUEL D ENTRETIEN LIBRETTO D USO...

Page 2: ......

Page 3: ...USER MANUAL USER MANUAL ENGLISH...

Page 4: ......

Page 5: ...ual Our WILD H P 300 RV is a sports quad designed by and for competition You will appreciate the high level of technical perfection and reliability as well as a meticulous design and high performance...

Page 6: ...al instructions or procedures that if not strictly observed could result in damage to or destruction of equipment NOTE This symbol indicates points of particular interest for more efficient and conven...

Page 7: ...our QUAD 29 Up hills 30 Down hills 30 Crossing slopes 30 Going across shallow water 31 Riding on rough terrain 31 Sliding and skidding 31 CONTENT Presentation 3 General warnings 4 Contents 5 Specifica...

Page 8: ...nd rear pads 40 Changing the wheels 41 Swing arm shaft 41 Adjusting and lubricating the chain guide 41 Checking the coolant level 42 The air filter 44 Spark plug maintenance 46 Adjusting the idle 47 I...

Page 9: ...m Keihin PWK 38 mm Ducati Energia Reverse System Hydraulic controlled multi disc 6 speed Primary by gears secondary by chain 50 6 HP at 7340 rpm 5 02 mkg at 6890 rpm Multi tube twin cradle frame made...

Page 10: ...and or cause injury to yourself Do not try to make the vehicle slide sideways if you don t master this technique this is a particularly dangerous manoeuvre Like in the cases described above do some te...

Page 11: ...ilated and free from any source of flame or sparks this includes any appliance with a pilot light The fuel might catch fire causing burns Avoid spilling fuel over the engine exhaust or silencer When t...

Page 12: ...not fitted in order to make transportation easier The dealer will make sure each element is correctly fitted and you will receive the QUAD ready for use Thus this paragraph is purely for your informat...

Page 13: ...mped on the ignition key C This number is used to order a new set of keys in case of loss HOMOLOGATION PLATE 11 QUALITY APPROVAL PLATE NOTE The vehicle s serial number is used to identify your machine...

Page 14: ...h lever 2 Light switch 3 Flash beam 4 High beam switch 5 Emergency stop 6 Ignition key 7 Parking brake 8 Front brake lever 9 Throttle control 10 Front guard 11 Brake pads 12 Fuel tank cap 13 Footrest...

Page 15: ...9 22 23 21 25 20 26 16 15 Headlight casing 16 Fuel cut off 17 Seat 18 Front shock absorber 19 Spark plug 20 Shift pedal 21 Swing arm 22 Exhaust pipe 23 Front brake fluid 24 Kick starter pedal 25 Brake...

Page 16: ...front part of the handlebars To turn the ignition ON turn the key clockwise to the ON position To turn the ignition OFF turn the key anti clockwise to the OFF position KICK STARTER The kick start peda...

Page 17: ...the throttle works smoothly I Make sure it spins smoothly back to idle when the grip is released The grip has a return spring that puts the engine to idle and slows the QUAD down when the control is...

Page 18: ...ed Ex The cable may be attached to trousers jacket to a wrist but always to a part where it is secure WARNING The use of this vehicle is prohibited without attaching the emergency stop system Disregar...

Page 19: ...rottle fully open The QUAD may be started in gear if the clutch is disengaged FUEL TANK CAP To open the fuel tank turn the key anti clockwise REVERSE GEAR BUTTON The WILD H P 300 RV is fitted with a r...

Page 20: ...the RESERVE must be used then fill the tank as soon as possible Following refuelling put the lever of the cut off back into the position A ON SEAT To remove the seat use the same key for the petrol t...

Page 21: ...tem for safe driving of the QUAD The quad has large wheels that could easily trap a leg causing serious injuries The QUAD has two footrests E one on the left and one on the right Both footrests have a...

Page 22: ...equire adjustment on the brakes except brake lever play and the brake pedal position and play Brake lever and pedal Ensure that there is no play in the front brake lever 1 If so check the condition of...

Page 23: ...ter the engine and damage it To open the fuel tank cap pull upwards on the tab and then insert one of the two red keys Rotate to the right and pull on the cap with the key still in place as shown in t...

Page 24: ...To mix the fuel first put in the oil then half of the petrol into a recipient and mix them after add the remainder of the petrol and mix it well NOTE At low temperatures the oil does not mix easily w...

Page 25: ...LIGHTS Check the headlight and the brake lights to make sure they are in perfect condition If necessary make any reparations required TYRES Always use the recommended tyres WARNING The use of inadequ...

Page 26: ...NING In cold weather make sure that all the cables work smoothly before using the QUAD If the cables are frozen or do not work smoothly you may lose control of your QUAD and suffer an accident 1 To ac...

Page 27: ...It is a sequential gearbox which means that in order to reach third gear from first gear we have to go through second gear that is the gears go up or down one by one To engage first gear from neutral...

Page 28: ...change into higher gears WARNING Excessive acceleration or sudden release the clutch lever too quickly may result in an accident and may cause the vehicle to slide and turn over Operate the throttle...

Page 29: ...INE The running in process is a very important element in the life of your QUAD and we recommend you to follow the instructions below carefully NOTE The running in period is a time usually the first 2...

Page 30: ...d while driving This is not designed to carry passengers Transporting a passenger on this QUAD considerably reduces the possibilities to balance and control the machine This could lead to an accident...

Page 31: ...At low speeds you will have no problem to turn with the handlebars On the other hand if speed increases the difficulty to turn will also increase The back wheels are rigidly mounted on the same axle a...

Page 32: ...ed compensate with the steering or lean even more to the inside It could also be necessary to reduce your speed gradually and to turn the steering to the outside of the corner to avoid tumbling over C...

Page 33: ...RIDING ON ROUGH TERRAIN Take precautions when riding on rough terrain Beware of any obstacle that may damage or destabilise the QUAD or even cause an accident Keep your feet firmly placed on the foot...

Page 34: ...y set to 7 clicks Turn the knob clockwise to reach the end then it is completely closed Turn the knob anti clockwise 7 clicks now it is at the standard setting At 0 clicks the rebound is hard opposite...

Page 35: ...To adjust rotate the knob on the upper part of the shock absorber 33 using a flat blade screwdriver Turning anti clockwise to the limit will close it completely There is a possible 56 Clicks adjustme...

Page 36: ...t in 1 2 turn steps If by turning the screw 1 to 2 5 times the desired result is not obtained change the minimum jet by one step C and then fine tune the adjustment using the air adjustment B A Main j...

Page 37: ...e carburettor that control the fuel flow and air flow adjustment screw ensure they are correctly adjusted 35 Standard settings Correction factors for altitude and temperature changes 1 Find your corre...

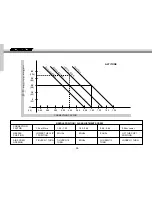
Page 38: ...600 ft T E M P E R A T U R E C F CORRECTION FACTOR ALTITUDE NEEDLE POSITION AIR ADJUSTMENT SCREW CORRECTION FACTOR NEEDLE POSITION AIR SCREW OPENING 1 06 or More LOWER THE CLIP 1 POSITION TIGHTEN 1 TU...

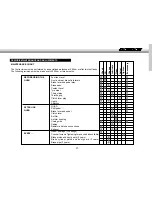
Page 39: ...uide Cables Radiator and tube connections Exhaust Wheel bearings 10 outings Check all screws Tightening torque chart check table Brake piston and dust guard 2 years Brake cylinder piston and dust guar...

Page 40: ...t try to adjust the level of the clutch lever Tighten the adjustment bolt to obtain the optimal play If the clutch lever adjustment is at its limit play must be adjusted by using the clutch cylinder p...

Page 41: ...e bubble because the reservoir is full the level will be seen when it is going down 39 It is possible that air has entered the brake system Purge the system in the following way Operate the brake leve...

Page 42: ...s it is this element that wears down and must be checked A C When the fluid level is too low fill up With a cross tip screwdriver unscrew the two screws on the recipient Next add liquid as required Pu...

Page 43: ...ADJUSTMENT AND LUBRICATION OF THE CHAIN GUIDE The drive chain must be checked adjusted and lubricated in accordance with the Periodic Maintenance table in order to prevent excessive wear If the chain...

Page 44: ...ill stay on the chain longer providing lubrication Put oil on the sides of the chain pins so that it penetrates into these remove excess oil CHECKING THE COOLANT LEVEL The coolant absorbs excessive he...

Page 45: ...or chemicals is not used over a period of time the radiator will rust This will block the cooling hoses CAUTION Use of incorrect coolant solutions will cause severe engine and cooling system damage Us...

Page 46: ...ation hose on the lower part of the air filter box If dust or water have accumulated in this hose empty it and clean the air filter element and the air filter housing 44 Changing the coolant The coola...

Page 47: ...am in the centre 2 Lift the foam will expose a bolt E that we may loosen by hand 3 Remove the bolt and filter Remove the filter assembly from the housing C E NOTE Do not twist the element when drying...

Page 48: ...l the parts back in the filter housing Grease all of the connections and bolts of the air filter and inlets Place the filter into the cage and cover the filter lip with a thick layer of grease to ensu...

Page 49: ...or other accumulations replace the spark plug by one of different specifications Once the spark plug has been verified put it back in place by hand as far as possible CAUTION Always screw the spark p...

Page 50: ...rkshop replace them Recommended lubricant Engine oil REPLACING THE LIGHTS Front headlight 1 Remove the headlight casing by removing the 4 Allen screws WARNING The bulb is hot when lit and immediately...

Page 51: ...ing turn it 1 4 anti clockwise extract and replace it with a new one Put the lens back in place NOTE Make sure the lens is well secured F E 6 Free the bulb E from the wire part and remove it from the...

Page 52: ...t the QUAD on a flat slope free surface Checking the oil level If the QUAD has been used then wait some minutes Check the oil level by the oil level indicator on the lower right hand side of the engin...

Page 53: ...hen heat it once more during some minutes to the normal operation temperature Stop the engine and place a recipient under the engine Remove the oil drain plug see the photograph below and put the QUAD...

Page 54: ...d brace Calliper mounting bolts Disc plate mounting screws Rear brake pedal bolt Subframe support bolt Rear shock absorber bolt Rear disc wheel drive bolt Rocker arm bolt Piston bolt Steering stem Fro...

Page 55: ...ss Chassis 10 Ass Rear brake pedal 1 Ass Front wheel 2 Ass Front suspension 3 Ass Engine 4 Ass Transmission 5 Ass Rear wheel 1 7 3 4 8 lTIGHTENING TORQUE SCHEMA The following is a diagram of the locat...

Page 56: ...rear hubs suspension system swing arm bearings Wash all surfaces with hot water and neutral soap Rinse the machine with clean water and dry all the surfaces with a soft and absorbing cloth Clean the...

Page 57: ...off any grease oil dirt or grime Lubricate the chain after driving on terrain or when the chain looks dry A high viscosity oil rather than low viscosity oil is better because it will stay on the chain...

Page 58: ...s Spray oil on all unpainted metal surfaces to prevent rusting Avoid getting oil on rubber parts or in the brakes Tie a plastic bag over the exhaust pipe to prevent moisture from entering Set the QUAD...

Page 59: ...Two stroke engines or DC 4 stroke engines The circuit is protected 00 00 Reset Mode The Mode button is used to change screens 0 Speed 00 00 Clock timer 0 0 Total distance 0000 Partial distance 57 THE...

Page 60: ...isable to drain the old fuel from the tank When the fuel tank is full of fresh fuel the engine should start immediately Take the spark plug out and replace it To unflood the engine put the throttle to...

Page 61: ...to cylinder Check the condition of the spark plug and clean adjust or replace it Check the condition of the spark plug hood if it is deteriorated change it Go to a specialist workshop Empty the fuel t...

Page 62: ...tch handle Clutch plate worn Clutch housing worn Clutch spring broken or weak Go to a specialist workshop Clean or change the air filter Go to a specialist workshop Change the main jet and verify Go t...

Page 63: ...the bolt preventing it from loosening in any case Replace the steering bearing Change the steering stem Go to a specialist workshop Rotate the control on the upper part of the front and rear shock ab...

Page 64: ...es Refill Release air from the wheels fit the rims correctly and inflate the tyres to the correct pressure Check tyre pressures and correct if necessary Check the wheels thoroughly and replace if nece...

Page 65: ...c installation FAULT CAUSE SOLUTION The lights blow The lighting system does not work Remove the seat and the fuel tank then check connections verify the voltage regulator and the fuses in the fuse bo...

Page 66: ...64 B black Br Brown G Green Gr Grey L Blue ELECTRICAL SCHEMAS O Orange R Red Sb Sky blue V Violet W White Y Yellow...

Page 67: ...s that become apparent within the period established in the Law decree 23 2003 on the 10th of July covering Warranties on Consumer Goods Sold from the time of delivery and in accordance with the Direc...

Page 68: ...at have not been expressly mentioned in the specifications set out in the User s Manual e The vehicle has been altered or modified in any way or fitted with components other than those expressly autho...

Page 69: ...e defect by an expert from GG Any additional obligations arising out of guarantees on parts replaced free of charge or any other service rendered free of charge are excluded from the effects of this p...

Page 70: ......

Page 71: ......

Page 72: ...a 17190 Salt Girona SPAIN Tel 34 902 47 62 54 Fax 34 902 47 61 60 E mail officegg gasgasmotos es partsgg gasgasmotos es FEBRERO FEBRUARY FEBRER 2005 RECOMIENDA EL USO DE ACEITE RECOMMENDS THE USE OF O...

Reviews: