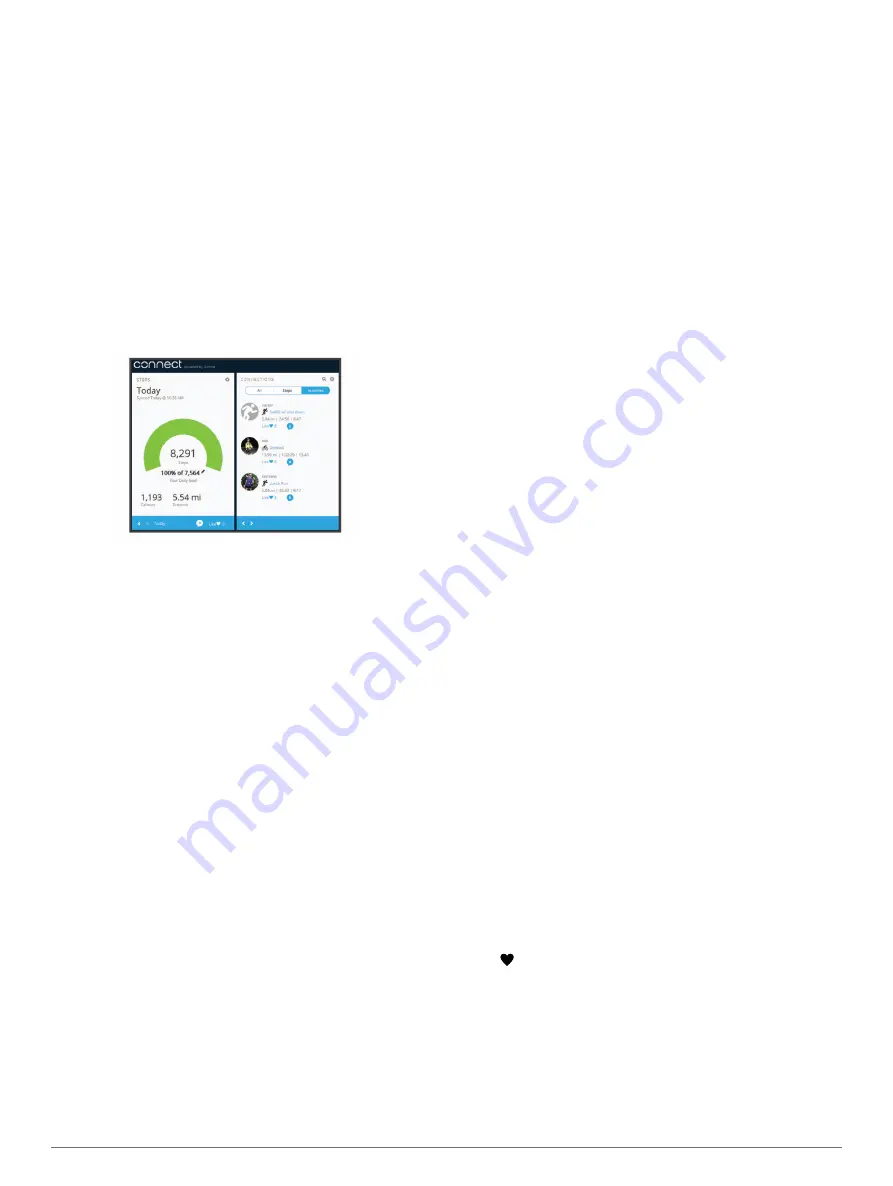
Garmin Connect
You can connect with your friends on your Garmin Connect
account. Garmin Connect gives you the tools to track, analyze,
share, and encourage each other. Record the events of your
active lifestyle including runs, walks, rides, swims, hikes,
triathlons, and more. To sign up for a free account, go to
Track your progress
: You can track your daily steps, join a
friendly competition with your connections, and meet your
goals.
Store your activities
: After you complete and save a timed
activity with your device, you can upload that activity to your
Garmin Connect account and keep it as long as you want.
Analyze your data
: You can view more detailed information
about your activity, including time, distance, heart rate,
calories burned, and customizable reports.
NOTE:
Some data requires an optional accessory such as a
heart rate monitor.
Share your activities
: You can connect with friends to follow
each other's activities or post links to your activities on your
favorite social networking sites.
Manage your settings
: You can customize your device and
user settings on your Garmin Connect account.
Customizing Your Device
Garmin Connect Settings
You can customize your device settings and user settings on
your Garmin Connect account.
• From the settings menu in the Garmin Connect Mobile app,
select
Garmin Devices
, and select your device.
• From the devices widget in the Garmin Connect application,
select
Device Settings
.
After customizing settings, sync your data to apply the changes
to your device (
Syncing Your Data with the Garmin Connect
,
Syncing Your Data with Your Computer
).
Device Settings
From your Garmin Connect account, select
Device Settings
.
Alarm
: Sets an alarm clock time and frequency for your device.
Move IQ
: Allows your device to automatically detect activity
patterns, such as biking or running, and display details on
your Garmin Connect account.
Move Alert
: Allows you to turn the move bar on and off.
Alert Tones
: Allows you to turn alert tones on and off. The
device beeps when alert tones are turned on.
Visible Screens
: Allows you to customize the data screens that
appear on your device during normal use, and during a timed
activity.
Home Screen
: Sets the default screen that appears after a
period of inactivity. You can also set the default screen that
appears during a timed activity.
Screen Mode
: Allows you to select split screen or full screen
mode. You can use the Split Screen option to view two data
screens at a time, including your home screen and your
selected visible screens.
Watch Face
: Allows you to customize the watch face.
NOTE:
Watch faces are available only in full screen mode.
Time Format
: Sets the device to display time in a 12-hour or 24-
hour format.
Units
: Sets the device to display the distance traveled in
kilometers or miles.
Auto-Sync
: Allows you to customize how frequently your device
automatically syncs data with your Garmin Connect account.
NOTE:
Syncing more frequently decreases battery life.
User Settings
From your Garmin Connect account, select
User Settings
.
Personal Information
: Allows you to enter your user profile
information, including gender, birth date, height, weight,
normal sleep hours, and activity class. The device uses this
information to improve activity tracking accuracy.
Daily Steps
: Allows you to enter your daily step goal. You can
use the Auto Goal option to allow your device to set your step
goal automatically.
Weekly Intensity Minutes
: Allows you to enter your weekly
intensity minutes goal.
Custom Step Length
: Allows your device to more accurately
calculate the distance traveled using your custom step
length. You can enter a known distance and the number of
steps it takes to cover the distance, and Garmin Connect can
calculate your step length.
Heart Rate Zones
: Allows you to estimate your maximum heart
rate and determine custom heart rate zones.
ANT+ Heart Rate Monitor
Your device can be used with wireless ANT+ sensors. For more
information about compatibility and purchasing optional sensors,
.
Pairing Your ANT+ Heart Rate Monitor
Before you can pair your heart rate monitor, you must enable
the heart rate data screen on your vívofit 3 device. For more
information about customizing the visible screens, see
.
Pairing is the connecting of ANT+ wireless sensors, like your
heart rate monitor, with a Garmin compatible product. After you
pair the first time, your Garmin product automatically recognizes
your heart rate monitor each time it is activated.
NOTE:
Using a heart rate monitor decreases battery life.
1
Put on the heart rate monitor.
2
Bring the device within 3 m (10 ft.) of the sensor.
NOTE:
Stay 10 m (33 ft.) away from other ANT+ sensors
while pairing.
3
Press the device key to scroll to the heart rate data screen.
The icon flashes at the top of the screen.
4
Wait while the device connects to your heart rate monitor.
When the sensor is paired with your device, your heart rate
and heart rate zone appear.
About Heart Rate Zones
Many athletes use heart rate zones to measure and increase
their cardiovascular strength and improve their level of fitness. A
heart rate zone is a set range of heartbeats per minute. The five
commonly accepted heart rate zones are numbered from 1 to 5
Customizing Your Device
3