


Device Information
System Settings
NOTICE
To prevent damage to the device in wet conditions, you must
disable the external microphone setting when the device is not
connected to a USB cable.
Hold
MENU
, and select
System
.
GPS
: Enables the device to receive GPS satellite signals.
NOTE:
The GPS setting must be set to On to enable Auto
Record.
NOTE:
Your device records GPS position data at all times
when GPS is on. This data is not collected by Garmin.
Orientation
: Sets the camera to capture correctly oriented video
and photos with the screen facing up or down (
).
Microphone
: Enables the internal or external microphone.
TIP:
If wind noise is an issue when recording video, you can
select Off to record video without audio.
Record Light
: Turns the recording light on or off.
Tones
: Turns audible tones on or off.
Time/Date
: Sets the time and date formats.
Units
: Sets the units of measure.
Language
: Sets the on-screen text language.
Format
: Sets the video standard (
).
Auto Off
: Turns off the device automatically when the device
has not been used for five minutes.
Reset Settings
: Restores the default device settings.
About
: Displays important software information and your unit ID.
Inverting the Camera Orientation
You can change the camera orientation of your device to easily
access the keys during an activity. Some mounting
configurations require you to change the camera orientation. For
example, if using a chest mount while cycling, you can mount
the camera upside down and tilt it upward to compensate for
forward lean.
1
Hold
MENU
.
2
Select
System
>
Orientation
.
3
Select an option:
• To automatically adjust the camera orientation, select
Auto
.
NOTE:
After recording starts, the camera orientation is set
and cannot be automatically adjusted.
• To manually adjust the camera orientation with the screen
facing upward, select
This Side Up
.
• To manually adjust the camera orientation with the screen
facing downward, select
This Side Dn
.
Time and Date Settings
Hold
MENU
, and select
System
>
Time/Date
.
Time Format
: Sets the device to show time in a 12-hour or a
24-hour format.
Date Format
: Sets the device to show dates in a MM/DD/YY or
a DD/MM/YY format.
Time
: Sets the time manually or automatically based on your
GPS position.
Time Zone
: Sets the time zone for the device. When you set the
time automatically, the time zone is set based on your GPS
position.
Day. Saving
: Indicates whether daylight saving time is observed
in your region. The Automatic option sets daylight saving
automatically based on your GPS position.
Erasing Your Memory Card
NOTICE
Erased data cannot be restored.
You can erase all photos, videos, and other data on the memory
card installed in your device.
1
Hold
MENU
.
2
Select
Card
>
Erase
.
Device Care
NOTICE
Avoid chemical cleaners, solvents, and insect repellents that can
damage plastic components and finishes.
Do not store the device where prolonged exposure to extreme
temperatures can occur, because it can cause permanent
damage.
Cleaning the Device
NOTICE
Do not use a dry cloth to clean the lens. Use of a dry cloth may
damage the fog-resistant coating on the lens.
1
Wipe the outer casing of the device with a soft, non-scratch
cloth dampened with water or alcohol.
2
Open the front cover, and wipe the lens and lens cover with a
soft, non-scratch cloth dampened with water or alcohol.
NOTE:
Do not damage or lose the O-ring gasket.
3
Wipe the device dry.
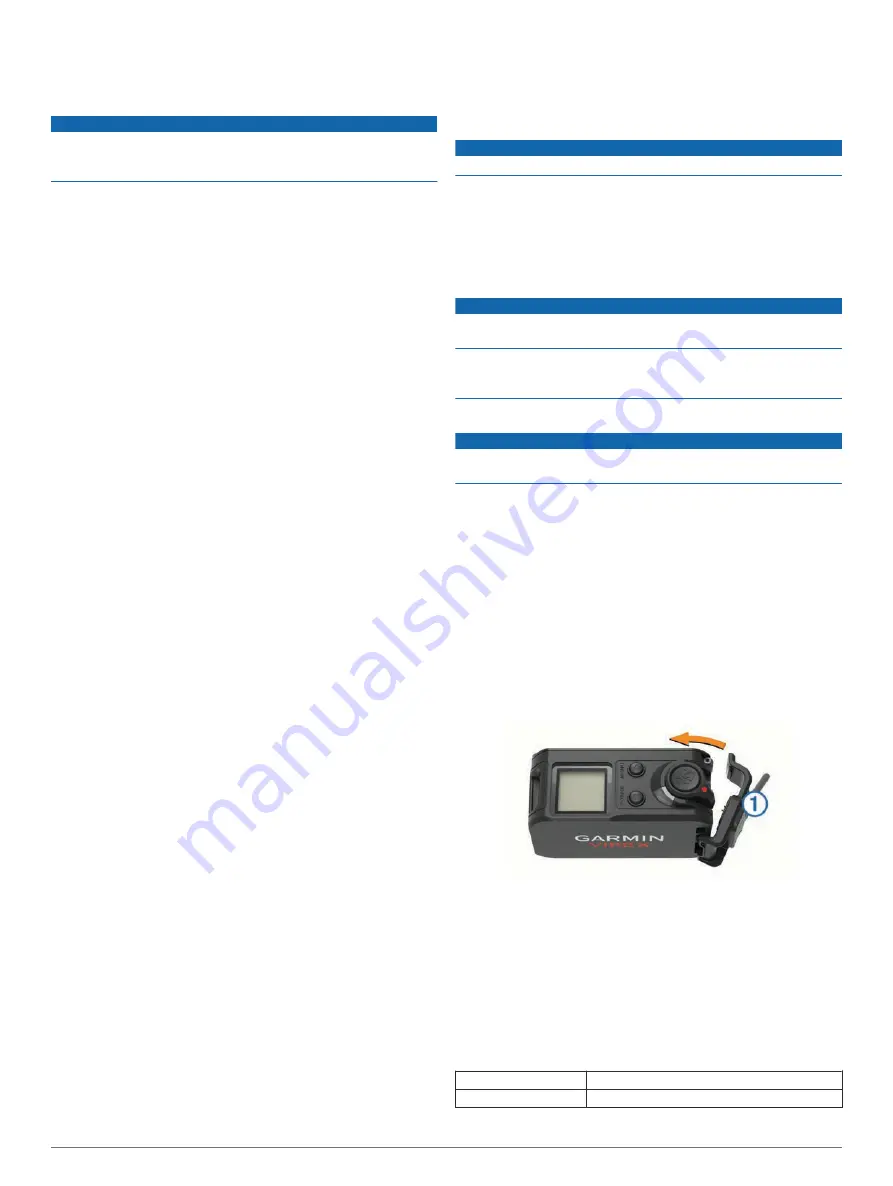
Connecting the Device to Your Computer
Before you can connect the device to your computer, you may
need to remove optional mount accessories.
1
Plug the USB cable into a USB port on your computer.
2
Align the charger posts with the contacts on the side of the
device, and press the charger
À
until it clicks.
Your device and memory card appear as removable drives in
My Computer on Windows computers and as mounted
volumes on Mac computers.
File Types
The device supports these file types.
• .jpeg photo files.
• .mp4 video files.
• .fit files.
Specifications
Battery type
Rechargeable lithium-ion battery
Battery life
Up to 2 hr.
8
Device Information
Summary of Contents for VIRB
Page 1: ...VIRB X XE Owner s Manual June 2015 Printed in Taiwan 190 01870 00_0B...
Page 4: ......
Page 15: ......


