background image

28

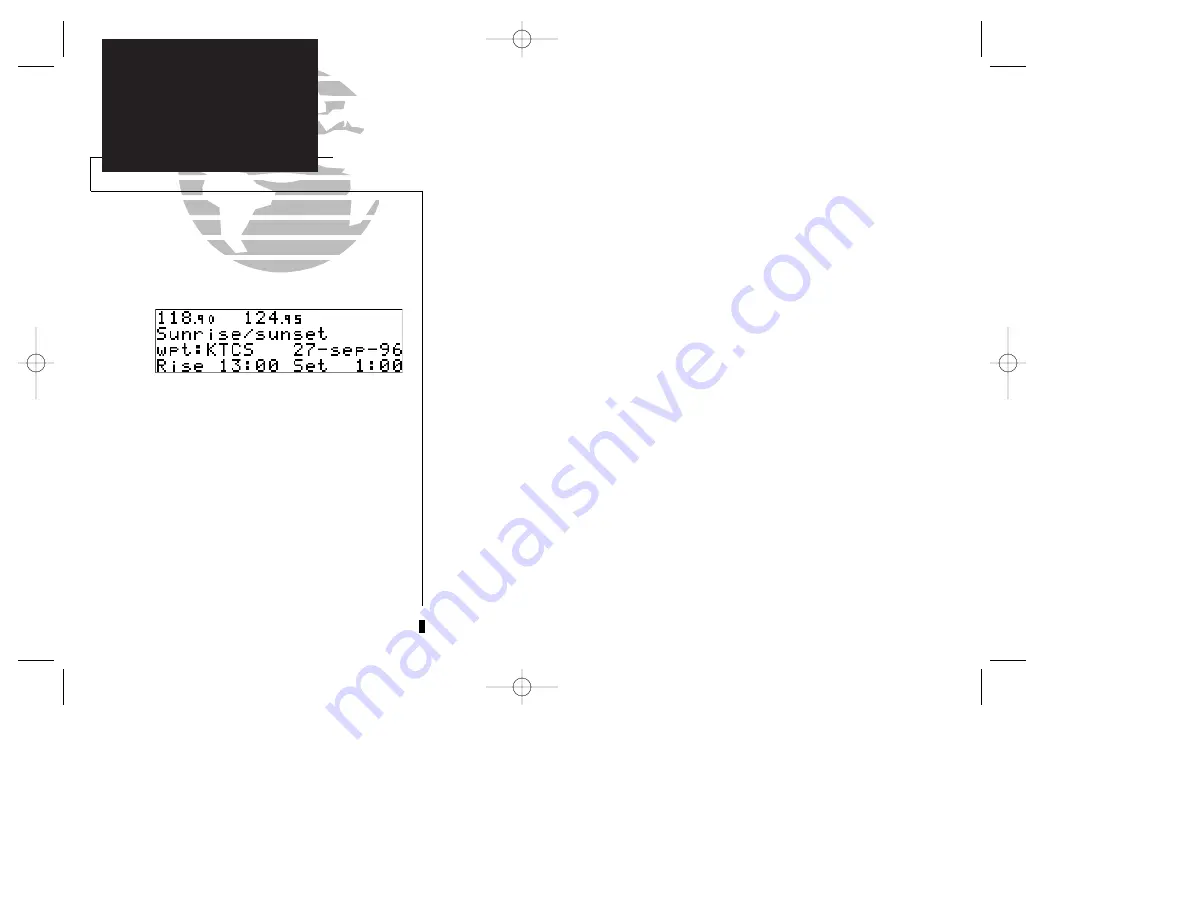
Sunrise/Sunset Planning Page

SECTION

1

NAV KEY

Sunrise/Sunset

Calculations

The GNC 250’s 

sunrise/sunset planning function

allows you to calculate the time of

sunrise or sunset at any waypoint or your present position for a specified date.

To calculate sunrise and sunset times at a waypoint or at your present location:

1. Press 

N

and rotate 

O

until NAV Menu 2 is displayed. 

2. Press 

C

twice and rotate 

O

to highlight ‘Sunrise?’.  Press 

E

.

3. Use 

K

and 

O

to enter the waypoint identifier, or leave blank to use current position. 

Press 

E

.

4. Press 

E

to accept the waypoint information.

5. Use 

K

and 

O

to enter the date desired.

6. Press 

E

and the sunrise and sunset times will be calculated and displayed.

250 real  7/14/98 9:32 AM  Page 28

Summary of Contents for Nuvi 250

Page 1: ...GNC 250 TM Pilot s Guide OWNER S MANUAL REFERENCE ACTV STBY GNC 250 NAV WPT RTE NRST SQ MSG CLR ENT CRSR 250 real 7 14 98 9 31 AM Page i...

Page 2: ...250 real 7 14 98 9 31 AM Page ii...

Page 3: ...1 8DU All rights reserved No part of this manual may be reproduced or transmitted in any form or by any means electronic or mechanical including photocopying and record ing for any purpose without the...

Page 4: ...ery 28 days A database information packet is included in your GNC 250 package Pilots using an out of date database do so entirely at their own risk ii INTRODUCTION Cautions NOTE This device complies w...

Page 5: ...lowing items If any parts are missing or damaged please see your GARMIN dealer immediately Standard Package GNC 250 unit NavData Card Installation Rack Connectors Pilot s Guide Quick Reference Guide D...

Page 6: ...ce any components which fail in normal use Such repairs or replacement will be made at no charge to the customer for parts or labor The customer is how ever responsible for any transportation costs Th...

Page 7: ...municating with the GNC 250 29 Using the GNC 250 s radio Section 3 Waypoint and Database Information W key 33 Finding and using database and waypoint information Section 4 Nearest Waypoints T key 53 F...

Page 8: ...and Messages 86 Appendix E Specifications 94 Appendix F Map Datums 95 Appendix G Index 97 GARMIN is fully committed to your satisfaction as a customer If you have any questions regarding the GNC 250 p...

Page 9: ...t and closest point of approach are also performed using the route key See Section 5 for more information on routes W The waypoint key is used to view information such as runways frequen cies position...

Page 10: ...m window and enable the pilot to change frequencies Pressing C again will activate the cursor in the GPS window indicated by flashing characters in a GPS window field It is used to highlight fields fo...

Page 11: ...any of the factory default settings position format units of measure selectable fields etc the pictures used may not match your configuration Prior to using your GNC 250 for the first time we recommen...

Page 12: ...be prompted to enter the altitude with a Need alt Press NAV message If this message occurs press the N key and use the K and O knobs to enter the altitude shown on your altimeter Press E when finished...

Page 13: ...es To select the active frequency you must first enter the frequency in the standby field and use the key to move it to the active field To change the standby communication frequency 1 Press C once to...

Page 14: ...ings are Altitude Your present GPS altitude Present Position Latitude and longitude displayed in degrees minutes Reference Waypoint The bearing and distance to the nearest airport The position page is...

Page 15: ...B intersection or user waypoint as long as it is in the database or stored in memory as a user waypoint 3 Rotate the O knob to the right to move the cursor to the next character position 4 Repeat step...

Page 16: ...th If you do not have an active departure airport the navigation communications page will display the frequencies for the airport nearest your present position To view the NAVCOM page from the CDI pag...

Page 17: ...ent position The nearest feature can also be used to quickly find the contact frequency of the near est airport and enter it in the standby field To view the nine nearest airports 1 Press the T key Th...

Page 18: ...e for the selected waypoint will appear 2 Press E to confirm Congratulations You ve now gone through the basic operation of the GNC 250 We encourage you to experiment with your new GPSCOM to get to kn...

Page 19: ...instructions will appear and the indicator will flash If you leave the NAV page sequence for another set of pages the last NAV page dis played will appear when you return to the nav sequence 9 REFEREN...

Page 20: ...down arrow The default setting of the CDI scale is 5 0 nm If you are not navigating to a destination the CDI field will display a no actv wpt message and only speed and track data will be available Th...

Page 21: ...ring the direction from your present position to the waypoint cts Course to steer to reduce cross track error and re intercept course dtk Desired track the course between the active from and to waypoi...

Page 22: ...ction of the arrow prompts at the bot tom left of the page The frequencies displayed for the departure and arrival airports are listed in the order you are most likely to use them see left with the av...

Page 23: ...N Some frequencies in the NAVCOM page have tags which designate their usage tx transmit only rx receive only pt part time frequency To make any of the frequencies on the NAVCOM page the standby freque...

Page 24: ...ntained in the database and gen erally include mountains buildings and other permanent features see left To change the altitude field 1 Press C twice to obtain a flashing cursor in the GPS window 2 Ro...

Page 25: ...ange and bearing to be displayed 4 Press C to remove the cursor or If you have selected wpt 5 Rotate O to advance the cursor to highlight the identifier field 6 Use the K and O knobs to enter the iden...

Page 26: ...tions may be displayed in the DOP EPE field dop Dilution of Precision a measure of the satellite geometry quality and relative accuracy of your position with 1 meaning good geometry and 10 meaning poo...

Page 27: ...lude an altitude serializer you must enter the altitude manually see page 2 3D Nav The GNC 250 is in 3D navigation mode and will compute altitude Simulator The GNC 250 is in simulator mode which shoul...

Page 28: ...to highlight the satellite number you wish to view and press E This will display the satellite data page showing the selected satellite s number elevation angle rise or fall indication User Range Acc...

Page 29: ...u late several possible ETEs To use the trip planning function 1 Press N and rotate O until NAV Menu 1 is displayed 2 Press C twice then E to access trip planning 3 Rotate K to select waypoint mode or...

Page 30: ...s and press E 7 Use K and O to enter the total air temperature 8 Press E and the density altitude and true airspeed will be calculated and displayed 9 Press C to remove the cursor If your installation...

Page 31: ...leg 2 Fuel required to complete leg 4 is leg 1 leg 2 leg 3 leg 4 6 Rotate O to advance the cursor to fob or gs depending on which is displayed 7 Use K and O to enter the fuel on board or the ground s...

Page 32: ...speed requirements to reach a desired altitude before or after a specified distance from a waypoint This is helpful when you d like to descend to a cer tain altitude near an airport or climb to an alt...

Page 33: ...ind you of repetitive tasks that can be called up at any time for review The checklist feature is useful for creating pre flight checklists landing checklists emergency proce dures etc Each name or fu...

Page 34: ...ding Approach timer Clock Date and time Trip Timer RAIM Prediction Scheduler Sunrise and sunset calculations The approach timer acts as either a count up or a count down timer that can be set or reset...

Page 35: ...Use K to select either UTC or local time to be displayed in the time fields Press E 4 Use K and O to set the local date Press E 5 Use K and O to set the local time Press E 6 Press C to complete The GN...

Page 36: ...change 4 Use K and O to enter the waypoint name or leave it blank to use your current position Press E to accept 5 Use K and O to enter the ETA in hours and minutes in local or UTC time whichever you...

Page 37: ...highlight the message you would like to edit To delete press then E 5 Use K and O to enter the message Press E 6 Use K and O to set the elapsed time until the message is displayed in hours and minute...

Page 38: ...e and sunset times at a waypoint or at your present location 1 Press N and rotate O until NAV Menu 2 is displayed 2 Press C twice and rotate O to highlight Sunrise Press E 3 Use K and O to enter the w...

Page 39: ...by accessed directly Whenever the cursor is active in the comm window the standby frequency will by highlighted e g 121 50 To access the standby frequency press C This allows you to change the megahe...

Page 40: ...come splatted or blocked out Once the standby frequency has been entered you may return to data entry by pressing the CRSR key The flashing cursor will return you to the active GPS field at the point...

Page 41: ...wered up the automatic squelch will be in the on position allowing only transmissions which are powerful enough for clear broadcast to be received Manual squelch control is not available To override t...

Page 42: ...y The emergency channel select is available whenever the unit is on regard less of GPS or cursor status or loss of the display To automatically tune for emergency transmission 1 Press and hold the key...

Page 43: ...nd rotating the outer knob until the desired page is displayed or by pressing the WPT key repeatedly 33 REFERENCE Airport Communication Please note that your GNC 250 uses ICAO identifiers for all airp...

Page 44: ...position lat lon frequency and weather broadcast indication Intersections Identifier country position lat lon nearest VOR User Identifier name position lat lon reference waypoint To view the waypoint...

Page 45: ...and rotate O to display the waypoint menu page 2 Press C twice and rotate O to highlight the desired waypoint category 3 Press E to accept the waypoint category 4 Rotate O to highlight the middle fiel...

Page 46: ...oint menu page airports VORs NDBs intersections and user waypoints Airport Information To scroll through the airport pages 1 Make sure the cursor is not flashing If it is press C 2 Rotate O in either...

Page 47: ...nations length surface and lighting information displays ILS localizer and or pilot controlled lighting frequencies airport comments allows entry of desired airport by identifier displays user comment...

Page 48: ...fuel is available av jet Both av gas and jet fuel are available Position In degrees minutes or degrees minutes seconds of latitude and longitude Approach Information displays the airport approaches av...

Page 49: ...rmation service ATIS ptx Pre taxi clr Clearance delivery gnd Ground twr Tower uni Unicom mul Multicom atf Aerodrome traffic frequency ctf Common traffic advisory frequency CTAF mf Mandatory frequency...

Page 50: ...f a localizer and ILS are used on the same runway rotating K will display both sets of information The following descriptions and abbreviations are used on the airport runway page Runway surfaces hard...

Page 51: ...ntifier city or facility name see page 35 on any VOR waypoint page The VOR identification and comments pages are identical in form and function to their airport page counterparts To scroll through the...

Page 52: ...cursor is not flashing If it is press C 2 Rotate O in either direction to scroll through the available pages The NDB position page see above displays the selected facility s identifier fre quency and...

Page 53: ...tate O to toggle between the available pages The intersection position page displays the selected facility s identifier region and or country latitude and longitude and the identifier distance and bea...

Page 54: ...created or modified using the W key After select ing the waypoint identifier as shown on page 35 you will be prompted to enter infor mation if the waypoint is new There are three ways to create a use...

Page 55: ...e latitude You may select either north or south and enter a latitude up to but not including 90 2 Press E 3 Use K and O to enter the longitude You may select either east or west and enter a longitude...

Page 56: ...ou will enter the bearing and distance at which you would like the new waypoint to be located To create a user waypoint offset from your present position 1 Use K and O to enter the bearing from your p...

Page 57: ...ill help you differentiate AutoStore waypoints from other user waypoints To change the name or the route of an AutoStore waypoint 1 Rotate O to select the name or route number field 2 Use K and O to e...

Page 58: ...d their regions overlap you will be informed with the message Proximity overlap This message will be displayed each time you turn on the GNC 250 for as long as the overlap remains Warning If you enter...

Page 59: ...point part of an active or stored route or a proximity waypoint To edit rename or delete waypoints the cursor must highlight the desired waypoint To highlight a waypoint 1 Press C twice and use O to h...

Page 60: ...omment 5 Press E to accept and repeat steps 4 and 5 if necessary to enter information on another line 6 Press C to remove the cursor To view the waypoints with comments list 1 Press W and use O to dis...

Page 61: ...to choose the desired waypoint The waypoint identifier and number of duplicates will be shown at the top of the page with the waypoint type and region of each duplicate indicated below The way points...

Page 62: ...scan through airports VORs NDBs and intersections in the database by identifier facility name or city Waypoint scanning may be used from any blank identifier field in the GPS window To enter a waypoi...

Page 63: ...nearest airport page You may also place the displayed frequency into the standby field by pressing E from the nearest airport page To view more comm runway information 1 Press C twice and rotate O to...

Page 64: ...arby airspace Once you have met one of the described conditions the message annunciator will flash alert ing you of an SUA message To view an SUA message 1 Press the M key 2 Press M again to return to...

Page 65: ...re projected to enter the airspace The second line of the SUA alert page displays the name or controlling agency of the SUA along with the SUA type to which you are being alerted To toggle between the...

Page 66: ...loor altitudes for the SUA alert Controlling agency frequencies may be viewed by highlighting the controlling airport identifier with the cursor and pressing E The following are examples of what can a...

Page 67: ...ssages Any applicable SUA alert pages will still be available from the NRST key The GNC 250 also features an altitude buffer which may be set to provide a greater level of protection from penetrating...

Page 68: ...matic leg sequencing and turn anticipation features will automatically select the next waypoint as the active to waypoint and provide smooth steering guidance around the turn If you are not currently...

Page 69: ...d by E twice A direct to may also be quickly activated from many pages that display a single waypoint identifier e g the nearest airport page by simply pressing D and E For pages that display a list o...

Page 70: ...ge the ok prompt The GNC 250 will now use the selected course for your CDI and DTK steering guidance To reset the course to a GPS calculated course from your present position simply press D followed b...

Page 71: ...ore it is cancelled overwritten or erased The GNC 250 s route catalog page is used to create edit delete or copy routes and serves as the main page for a host of functions These include route activati...

Page 72: ...during your flight To create or edit a route from the route catalog page 1 Use K to display the route number you would like to edit 2 Press C twice 3 Use K to select edit Press E The route review pag...

Page 73: ...d route into route 0 and overwrites the existing active route To activate a route 1 Press R and use O to display the route catalog page 2 Rotate K to display the route you would like to activate 3 Pre...

Page 74: ...o display the route you would like to use for the CPA function The route must con sist of at least two waypoints and the reference facility must fall between the waypoints of a route leg 2 Press C twi...

Page 75: ...or L Press E 6 Rotate O to highlight the initial offset and use K and O to enter the initial offset value and R or L 7 Press E three times to accept the operation values and begin navigation After act...

Page 76: ...e leg 5 Press E to accept It is important to note that offset navigation is only available on route navigation not direct to navigation When offset navigation is activated an Offset nav in effect mess...

Page 77: ...otating O left continuously It will also appear whenever a route is activated To scroll through the active route waypoints 1 Rotate K with the flashing cursor inactive or O with the cursor active The...

Page 78: ...estination waypoint without modifying the active route If you are editing the active route and want to save it in its original form copy it to an open storage route before editing To add waypoints to...

Page 79: ...e selected waypoint and resume navigating the remainder of the route in sequence once you arrive at the next destina tion waypoint The waypoint sequencing field located at the bottom left of the direc...

Page 80: ...the curved transition segment and the to from indicator on the CDI will flip momentarily During the transition the CDI display will be referenced to the dotted line illustrated at the left of this pa...

Page 81: ...view the settings submenu press and hold M for more than 2 seconds Once the settings submenu has been accessed the following setup pages are available by rotating O with the flashing cursor inactive...

Page 82: ...ity Monitoring RAIM to cross check its position The RAIM protection limits listed below follow the selected CDI scale changing automatically with the Auto setting CDI Scale RAIM Protection 5 0 nm or A...

Page 83: ...tings allow you to define the runway length and surface type used in determining the nine nearest airports displayed A minimum runway distance and surface may be entered to prevent airports with small...

Page 84: ...o finish The GNC 250 features automatic brightness control to adjust the display for opti mum viewing in any condition This is done using a photocell at the top left corner of the display bezel It is...

Page 85: ...K and O 7 Press E to accept and press C to complete The GNC 250 can be configured to display data in standard or metric units of mea sure These apply to distance position speed altitude fuel pressure...

Page 86: ...units nautical miles and knots nm kt statute miles and miles per hour mi and mh kilometers and kilometers per hour km and kh fuel gallons gl imperial gallons ig kilograms kg pounds lb liters lt press...

Page 87: ...are within a certain range of an SUA For example if the buffer is set at 500 feet and you are 500 feet above or below an SUA you will not be notified with an alert message if you are less than 500 fee...

Page 88: ...tum to one listed in Appendix F 1 Press and hold M and use O to highlight the map datum page 2 Press C twice 3 Use O to highlight the current map datum 4 Use K to change the datum 5 Press C to complet...

Page 89: ...GNC 250 installation manual The input option for channel 2 is intended for future interfacing capabilities and is not a selectable option at this time To change the output settings for I O channel 2 1...

Page 90: ...80 250 real 7 14 98 9 33 AM Page 80...

Page 91: ...reinitialize You may also reinitialize the unit manually by pressing ENT An optional user data card can be used to make a backup of user waypoints routes etc and transfer information to another GNC 2...

Page 92: ...ata from the card Updating the data will not delete unrelated material but will only change what is necessary to use the data received from the user data card 5 Rotate O to select either Replace or Up...

Page 93: ...the rack 83 The GNC 250 is built to exacting standards and does not require user maintenance If the faceplate and lens require cleaning use a soft cloth and non abrasive cleaner The user data is maint...

Page 94: ...hing cursor over the operating mode field Normal 3 Rotate K to select Simulator and press the E key The cursor will advance to the ok prompt 4 Press E to confirm Once the GNC 250 has been placed in si...

Page 95: ...from the direct to confirmation page Altitude may only be entered by using the VNAV function available from the NAV menu 1 page see page 22 To enter a ground speed from the CDI page 1 Press N and rot...

Page 96: ...active from waypoint The GNC 250 will not allow the modifications Cannot nav lockd rte An attempt has been made to activate a route containing a locked waypoint The GNC 250 cannot perform navigation i...

Page 97: ...st not be used for actual navigation EEPROM write fail The GNC 250 has detected a failure while programming its installation configuration memory The unit is not usable and should be taken to an autho...

Page 98: ...tected excessive drift in its internal crystal oscillator which may result in longer acquisition time The unit should be taken to an authorized service center immediately Poor GPS coverage The GNC 250...

Page 99: ...position Receiver failed The GNC 250 has detected a failure in the receiver hardware If the message persists the GNC 250 is unusable and should be taken to an authorized GARMIN service center Remote...

Page 100: ...xt 10 minutes SUA near ahead Your position is within two nautical miles of an SUA and your current course will take you inside Timer expired The approach timer has expired User data RX started Data re...

Page 101: ...on Traffic Advisory Frequency CTS Course To Steer CUM Cumulative DALT Density Altitude DEG Degrees DEP Departure DIS Distance To Waypoint DME Distance Measuring Equipment DOP Dilution of Precision DTK...

Page 102: ...N Minimum MIN Minutes MOA Military Operations Area MPM Meters Per Minute MPS Meters Per Second MSA Minimum Safe Altitude MT Meters MUL Multicom NDB NDB Waypoint NM Nautical Miles NP Non Precision NR N...

Page 103: ...P Temperature TMA ICAO Terminal Control Area TRK Track Angle TRN Turn Angle TRSA Terminal Radar Service Area TWR Tower TX Transmit Only U UTC Time UNI Unicom URA User Range Accuracy USER User Waypoint...

Page 104: ...watt minimum transmit power Receiver MultiTrac 8 Acquisition Time 2 2 5 minutes typical 15 seconds warm start with ephemeris Update Rate 1 per second continuously Accuracy 15 meters 49ft RMS Dynamics...

Page 105: ...EGO ALEGRE Brazil DANISH GI 1934 Denmark DJAKARTA BATAVIA Sumatra Island Indonesia DOS 1968 Gizo Island New Georgia Islands EASTER ISLAND 1967 Easter Island EUROPEAN 1950 Austria Belgium Denmark Finla...

Page 106: ...IAN MAUI Maui OLD HAWAIIAN MEAN Mean Value OLD HAWAIIAN OAHU Oahu OMAN Oman ORD SRV GRT BRITAIN England Isle of Man Scotland Shetland Islands Wales PICO DE LAS NIEVES Canary Islands PITCAIRN ASTRO 196...

Page 107: ...attery Pack 94 Battery saver 74 C Cautions ii CDI 4 6 70 CDI page 4 6 9 12 70 CDI sensitivity setting 72 Channel 2 I O 79 Checking GPS coverage 16 17 26 Checklists 23 24 Clear key viii Clock function...

Page 108: ...viii L Leg time field 68 Locked waypoints 52 M Magnetic variation 72 73 Maintenance of the GNC 250 83 Map datums 78 95 96 Measurement units 76 Messages 71 86 90 MSG key viii N NAVCOM page 6 12 13 NavD...

Page 109: ...ta 81 SUA alert page 54 SUA altitude fields 55 SUA messages 56 SUA settings page 57 77 Sunrise sunset planning 28 Squelch vii 30 T Table of contents v vi Time 25 Transfer key viii Trip planning 19 Tri...

Page 110: ...100 APPENDIX G Index Waypoint scanning 52 Waypoint sequencing 69 70 Waypoints with comments 50 Winds aloft 22 SECTION G INDEX 250 real 7 14 98 9 33 AM Page 100...

Page 111: ...250 real 7 14 98 9 33 AM Page 101...

Page 112: ...1995 GARMIN International 9875 Widmer Lenexa KS 66215 USA GARMIN Europe LTD Robert House Station Approach Romsey Hampshire SO51 8DU UK Part No 190 00067 50 Rev A 250 real 7 14 98 9 33 AM Page 102...

Reviews: