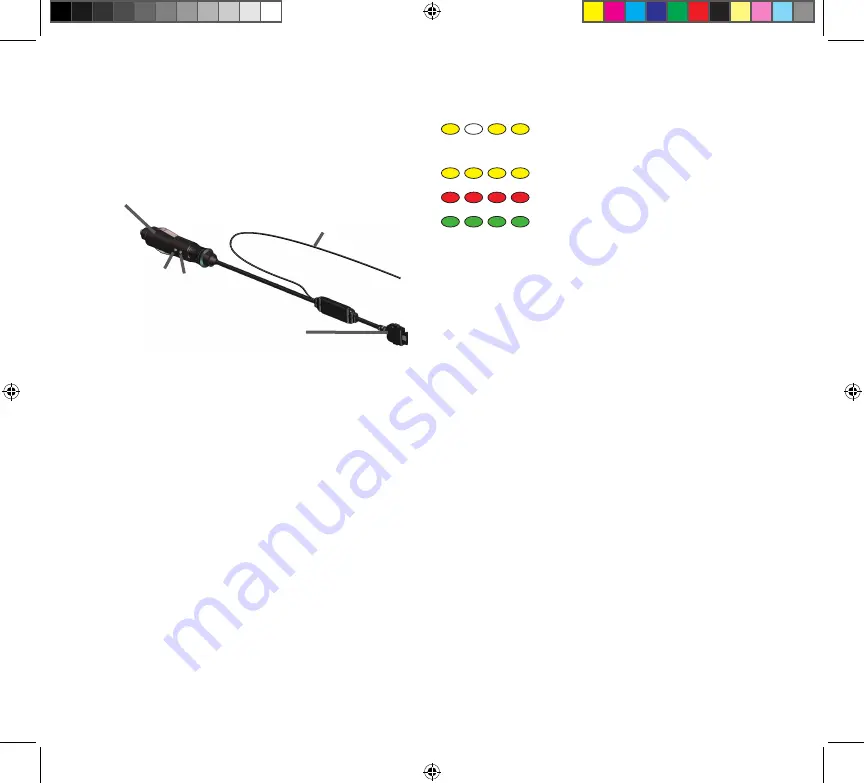
Connecting Your GTM 21
1. Remove the power cable from your Garmin GPS
2. Connect the cable on the GTM 21 to the power
connector on your Garmin GPS.
Route on windscreen using the
suction cups.
To power connector
on Garmin GPS
To 12-Volt receptacle
in vehicle
Power
LED
Status
LED
Antenna
3. Plug the other end into a 12-Volt receptacle.
4. Use the suction cups to route the antenna
horizontally or vertically on the windscreen. For
best signal reception, route it vertically.
5. Route the cable so that it does not interfere with
vehicle operating controls.
Testing the GTM 21
Observe the LED on the GTM 21:
When the GTM 21 is
connected to power, the Power LED is on. The GTM 21
may take up to fi ve minutes to acquire data.
The Status LED indicates the status of the GTM 21:
Yellow dot-dash fl ashes: determining
which country you are currently in.
Yellow solid light: searching for signal.
Red solid light: momentary sync loss.
Green solid light: normal traffi c data.
Check the Map:
Check the map on the GPS device for
traffi c incidents. Refer to the owner’s manual.
Verify Signal Strength:
If you are inside a garage where
radio signals cannot be received, you may need to take the
vehicle outside.
Verify that you are in a service area:
Check for service
from the pay service or free services.
Using Traffi c Data with Your Garmin
GPS Device
The GTM 21 works with your Garmin GPS device to
show traffi c fl ow and incident information and enable
routing around traffi c incidents. Although each GPS
device operates differently, they all provide similar traffi c
information.
190-00659-91_0A.indd 2
5/1/2006 3:43:20 PM


