Introduction
WARNING
See the
Important Safety and Product Information
guide in the
product box for product warnings and other important
information.
All route and navigation lines displayed on the chartplotter are
only intended to provide general route guidance or to identify
proper channels, and are not intended to be precisely followed.
Always defer to the navaids and conditions on the water when
navigating to avoid groundings or hazards that could result in
vessel damage, personal injury, or death.
NOTE:
Not all features are available on all models.
The Garmin
®
website at
information about your product. The support pages will provide
answers to frequently asked support questions, and you can
download software and chart updates. There is also contact
information to Garmin support should you have any questions.
Protective Cover
NOTICE
Before moving the vessel, remove the sun cover. Leaving the
sun cover in place while the boat is moving could result in the
sun cover becoming detached and possibly becoming lost or
falling into the water.
Some protective covers contain magnets. Under certain
circumstances, magnets may cause damage to some electronic
devices, including hard drives in laptop computers. Use caution
when the sun cover is near electronic devices.
The protective cover protects the screen when the device is not
in use.
To remove the cover, hold the edge, and pull forward.
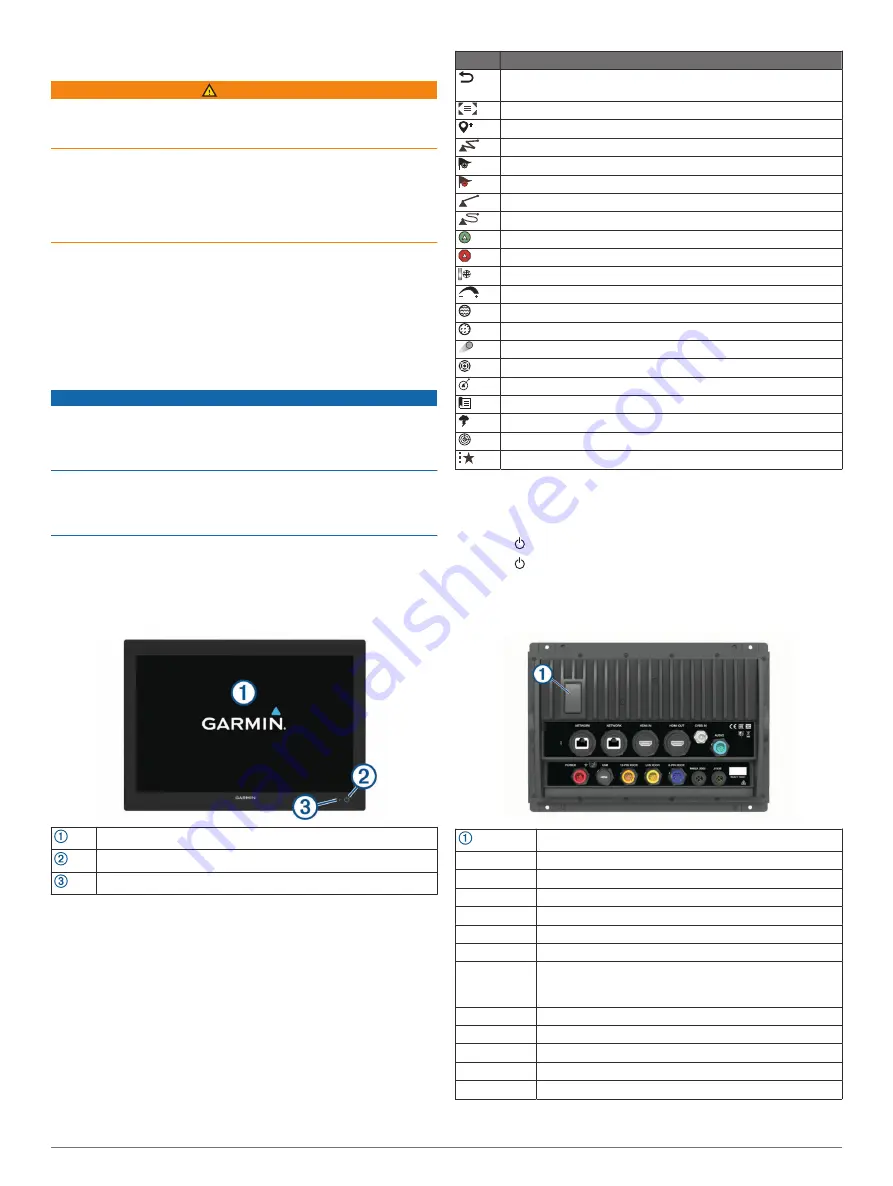
Device Overview
Touchscreen
Power key
Automatic backlight sensor
Using the Touchscreen
• Tap the screen to select an item.
• Drag or swipe your finger across the screen to pan or scroll.
• Pinch two fingers together to zoom out.
• Spread two fingers apart to zoom in.
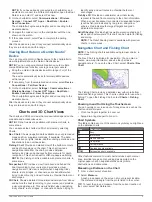
On-Screen Buttons
These on-screen buttons may be displayed on some screens
and functions. Some buttons are accessible only in a
combination page or SmartMode
™
layout or when accessories,
such as a radar, are connected.
Button Function
Clears the on-screen icons and re-centers the screen on the
boat
Opens a full-screen view of the item
Creates a new waypoint
Creates a route, with turns, to the destination
Adds a turn to the route at the selected location
Removes the last added turn from the route
Creates a direct route, without turns, to the destination
Creates an Auto Guidance route to the destination
Begins navigation
Ends navigation
Stops and starts radar transmission
Opens the radar gain adjustment menu
Opens the radar sea clutter adjustment menu
Opens the radar rain clutter adjustment menu
Turns on and off the radar echo trails
Acquires a radar target and begins tracking it
Shows and sets the VRM/EBL line
Opens the menu for the page or function
Opens the Weather menu for the page or function
Opens the Radar menu for the page or function
Opens the Presets menu for the page or function
Locking and Unlocking the Touchscreen
You can lock the touchscreen to prevent inadvertent screen
touches.
1
Select >
Lock Touchscreen
to lock the screen.
2
Select to unlock the screen.
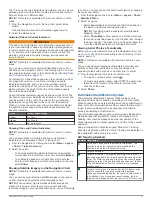
Connector View (8x10, 8x12, and 8x16 models)
The connectors and locations vary based upon the model. A
GPSMAP 8612xsv model is shown below.
2 microSD
®
memory card slots, 32 GB max.
NETWORK
Garmin Marine Network
HDMI IN
HDMI
®
in
HDMI OUT
HDMI out
CVBS IN
Composite video in
AUDIO
NMEA
®
0183 and audio out
POWER
Power
USB
Micro-USB to connect a compatible Garmin card reader,
or to connect and control a computer using the chart-
plotter touchscreen
12-PIN XDCR 12-pin transducer
LVS XDCR
LiveScope
™
single-array transducer
8-PIN XDCR 8-pin transducer
NMEA 2000
NMEA 2000
®
network
J1939
J1939 network
Introduction
1


