background image

4.


Select the Serial Port to which the GPS 10x is connected. Select 

Auto

 to have the program 

automatically determine the Baud Rate, or select 

Manual

 to manually select the Baud Rate of the GPS 

10x. Click 

OK

 when done.   

Click the Connect icon 

, or select 

Comm

 > 

Connect

 to connect to 

the GPS 10x.   

5.


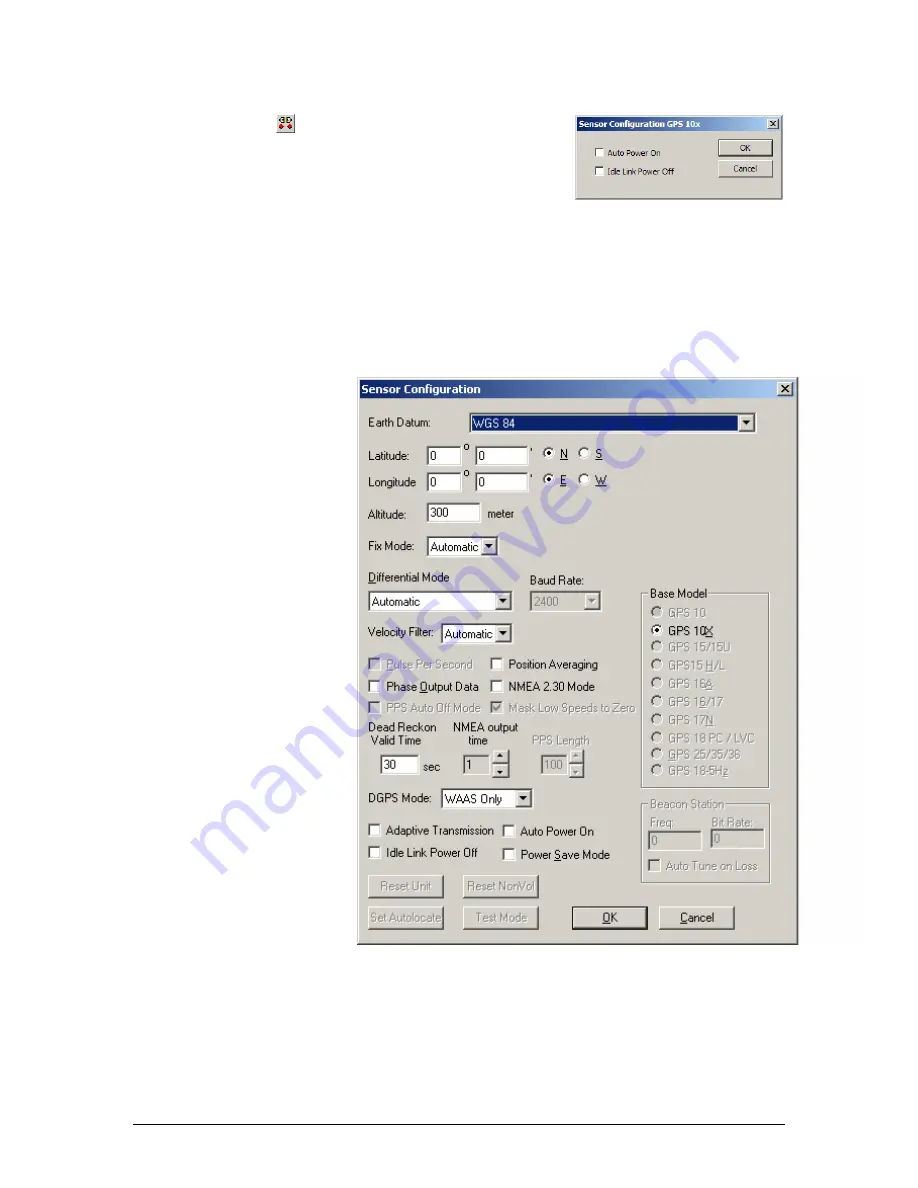
Place a check mark in the box next to “Binary Output Data” to 
change the GPS 10x to Garmin Mode. The unit will keep this 
change in the programming until you change it again in the 
software.   

Note

: Selecting 

Config

 > 

Switch to Garmin Mode (

or pressing the F11 key) only changes the unit to 

work in Garmin Mode until power is cycled through the unit again. For a more permanent change, 
refer to step 8 above.    

6.


Click OK when completed enabling “Binary Output Data.”   

7.


You may disconnect and close the software when finished. The software configuration can also be 
saved for future reference.   

Refer to  

Appendix C: Sensor 
Configuration Software for 
complete information about 
downloading the Sensor 
Configuration Software 
application. 


190-00769-00 

GPS 10x Technical Specifications  

Rev. A 

Page 18 

Summary of Contents for GPS 10x

Page 1: ...GPS 10x TECHNICAL SPECIFICATIONS Garmin International Inc 1200 E 151st Street Olathe KS 66062 USA 190 00769 00 Revision A December 2006...

Page 2: ...in the complete text of this copyright notice and provided further that any unauthorized commercial distribution of this manual or any revision hereto is strictly prohibited Information in this docume...

Page 3: ...4 1 Receiver 5 1 5 4 2 Acquisition Times 5 1 5 4 3 Update Rate 5 1 5 4 4 Accuracy 5 1 5 5 Interfaces 6 1 5 5 1 GPS 10x Electrical Characteristics 6 1 5 5 2 Garmin Interface 6 1 5 5 3 GPS 10x Protocol...

Page 4: ...r Configuration Software 19 Downloading the Sensor Configuration Software 19 Selecting a Model 19 Connecting to the Sensor 19 File Menu 20 Comm Menu 20 Config Menu 20 View Menu 20 Help Menu 20 Appendi...

Page 5: ...in a particular installation If this equipment does cause harmful interference to radio or television reception which can be determined by turning the equipment off and on the user is encouraged to tr...

Page 6: ...o obtain warranty service contact your local Garmin authorized dealer or call Garmin Product Support at one of the numbers listed below for shipping instructions and an RMA tracking number The unit sh...

Page 7: ...ical data such as satellite orbital parameters last known position date and time End user interfaces such as keyboards and displays are the responsibility of the application designer 1 4 FEATURES Inte...

Page 8: ...pter with Mini B USB Connector 010 10563 00 DC Charging Adapter Belt Clip 145 00956 70 Optional 110 115 V AC Charging Adapter with Mini B USB connector 010 10723 00 Belt Clip Optional Charging Adapter...

Page 9: ...60 C Powered from external supply 10 C to 60 C Powered by removable rechargeable battery 1 5 3 2 Battery Charging Temperature Range 5 C to 45 C Input 10 to 30 V AC Output 4 9 to 5 25 V DC 1 0 A 1 5 3...

Page 10: ...tocol NMEA 0183 Version 2 0 or NMEA 0183 Version 2 30 Version 2 0 is factory default programmable by data field 1 of the PGRMC1 sentence described in Section 3 1 1 Additional Sensor Configuration Info...

Page 11: ...ange 4 5 to 5 5 VDC 500 mA Figure 1 GPS 10x Operational Characteristics Bluetooth LED Rapid Flashing Blue Power On Bluetooth On Slow Flashing Blue Bluetooth link established Power Status LED Flashing...

Page 12: ...be terminated with CR LF the ASCII characters for carriage return 0D hexadecimal and line feed 0A hexadecimal The checksum hh is used for parity checking data and is not required but is recommended fo...

Page 13: ...ll have no effect 4 PGRMO G will cause the COM port to change to Garmin Data Transfer format for the duration of the power cycle The Garmin mode is required for GPS 10 series product software updates...

Page 14: ...1 3651 N 09447 9382 W 000 0 221 9 081103 003 3 E 67 GPRMC 000001 A 3851 3651 N 09447 9382 W 000 0 221 9 081103 003 3 E 66 If a negative leap second should be required one second will be deleted at the...

Page 15: ...os will be transmitted 2 Magnetic course over ground 000 to 359 degrees leading zeros will be transmitted 3 Speed over ground 000 0 to 999 9 knots leading zeros will be transmitted 4 Speed over ground...

Page 16: ...g zeros will be transmitted 7 Signal to noise ratio C No 00 to 99 dB null when not tracking leading zeros will be transmitted NOTE Items 4 5 6 and 7 repeat for each satellite in view to a maximum of f...

Page 17: ...abled Records sent over RS232 begin with a delimiter byte 10 hex The second byte identifies the record type 33 hex for a position record and 72 hex for a satellite data record The third byte indicates...

Page 18: ...e specified satellite 1 The unit has a differential correction for the specified satellite 2 The unit is using this satellite in the solution This pattern is repeated for all 12 channels for a total o...

Page 19: ...x double gps_tow double lat double lon float lon_vel float lat_vel float alt_vel float msl_hght int leap_sec long grmn_days cpo_pvt_data alt Ellipsoid altitude meters epe Est pos error meters eph Pos...

Page 20: ...r data define DLE_BYTE 0x10 define ETX_BYTE 0x03 if rx_state DAT if data DLE_BYTE rx_state DLE else in_que in_que_ptr data else if rx_state DLE if data ETX_BYTE rx_state ETX else rx_state DAT in_que i...

Page 21: ...ing pop up window and click on the Device Manager button 4 Right click on Serial BallPoint Mouse and choose the option to Disable NOT uninstall this device Solution 2 Do not plug the DB9 connector int...

Page 22: ...g until you change it again in the software Note Selecting Config Switch to Garmin Mode or pressing the F11 key only changes the unit to work in Garmin Mode until power is cycled through the unit agai...

Page 23: ...update download Selecting a Model After opening the program snsrcfg exe the following screen appears Select the radio button next to the type of Garmin sensor you are configuring Connecting to the Sen...

Page 24: ...ect to disconnect from the sensor Config Menu The Config Configuration Menu allows you configure the sensor as it is connected NMEA Sentence Selections F7 Displays the NMEA Sentence S elections Window...

Page 25: ...not require a PIN Code in order to recognize the GPS 10x The default PIN code for GPS 10x is 1234 When you initially make this connection or the connection is terminated unexpectedly Just type 1234 an...

Page 26: ...armin com Copyright 2006 Garmin Ltd or its subsidiaries Garmin International Inc 1200 East 151st Street Olathe Kansas 66062 U S A Garmin Europe Ltd Unit 5 The Quadrangle Abbey Park Industrial Estate R...

Reviews: