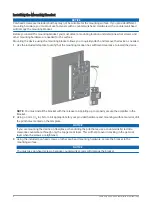
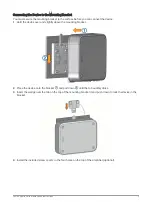

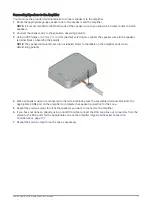


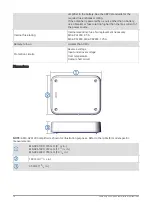


Mounting the Device Directly to the Surface
If you are installing the device in a location with limited space, or you do not want to use the bracket, you can
mount the device directly to the surface.
NOTE: Countersunk screws are provided to mount the device directly to the surface. If you choose to use your
own hardware to mount the device directly to the surface, countersunk heads are recommended.
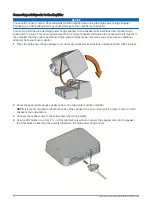
1 Using the provided template, mark the pilot hole locations for the four mounting holes on the device,
observing these considerations:
• Because you are not using the bracket, you do not need to observe the upper clearance line on the
template.
• You must observe the lower clearance line on the template so that you have the space needed to make
the cable connections.
2 Using a 3 mm (
1
/
8
in.) bit or a bit appropriate for your provided hardware and mounting-surface material, drill
the pilot holes.
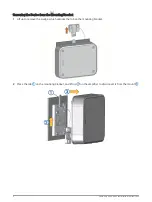
NOTICE
If you are mounting the device on fiberglass, when drilling the pilot holes, use a countersink bit to drill a
clearance counterbore through only the top gel-coat layer. This will help to avoid cracking in the gel-coat
layer when the screws are tightened.
3 Using the provided countersunk screws, secure the device to the mounting surface.
4 Install the included screw covers in the four holes on the top of the amplifier (optional).
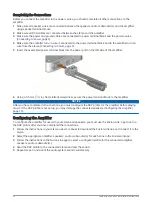
Connection Considerations
NOTICE
You should turn off the audio system before making any connections to the amplifier. Failure to turn off the
audio system may result in damage to the audio system.
All terminals and connections must be protected from contact with the vessel chassis and with each other.
Improper terminal or wire contact may result in damage to the audio system.
NOTE: You must connect the amplifier to the AMPLIFIER ON wire from the stereo for the amplifier to turn on
and off with the stereo.
Fusion Apollo Series Installation Instructions
7