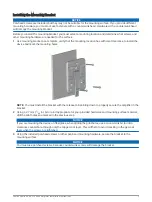


Attaching the Device to the Mounting Bracket
You must secure the mounting bracket to the surface before you can attach the device.
1 Hold the device over and slightly above the mounting bracket .
2 Place the device onto the bracket and pull down until the tab audibly clicks.
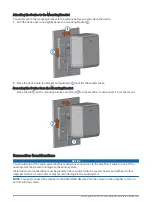
Removing the Device from the Mounting Bracket
Press the tab on the mounting bracket, and lift up on the amplifier to disconnect it from the mount.
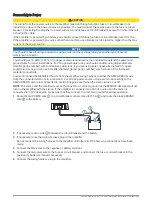
Connection Considerations
NOTICE
You should turn off the audio system before making any connections to the amplifier. Failure to turn off the
audio system may result in damage to the audio system.
All terminals and connections must be protected from contact with the vessel chassis and with each other.
Improper terminal or wire contact may result in damage to the audio system.
NOTE: You must connect the amplifier to the AMPLIFIER ON wire from the stereo for the amplifier to turn on
and off with the stereo.
4
Fusion Apollo AP-DA214 Zone Amplifier Installation Instructions


