background image

46

Appendix E

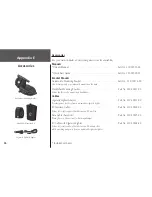
Accessories

Accessories

See your Garmin dealer or visit 

www.garmin.com

 for availability.

Manuals

*Owner’s Manual ............................................................................... Part No. 190-00396-00

*Quick Start Guide ........................................................................... Part No. 190-00396-01

Bracket Mounts

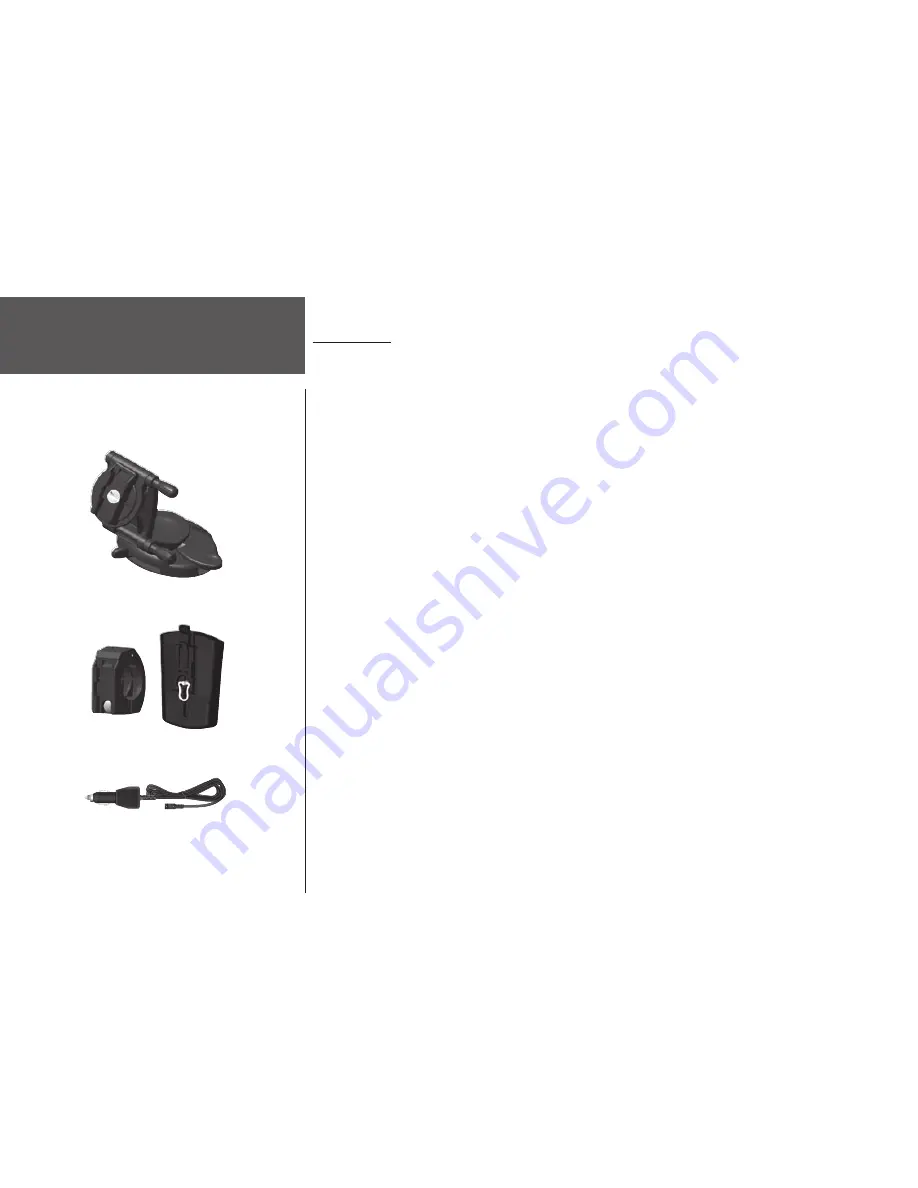
Automotive Mounting Bracket ............................................................Part No.  010-10274-00

Can be temporarily or permanently mounted on the dash.

Handlebar Mounting Bracket .............................................................. Part No. 010-10267-00

Allows the eTrex to be mounted on handle bars.

Cables

Cigarette Lighter Adapter ................................................................... Part No. 010-10203-00

Provides power for eTrex from a automobile cigarette lighter.


PC Interface Cable .............................................................................. Part No. 010-10206-00

Allows for serial transfer of data between a PC an eTrex

.

Data Cable (bare wires) ...................................................................... Part No. 010-10205-00

Wiring harness. Connections for data input/output.

PC Cable with Cigarette Lighter ......................................................... Part No. 010-10268-00

Allows for serial transfer of data between a PC and an eTrex  
while providing unit power from an automobile cigarette lighter.

* Included with unit

Automotive Mounting Bracket

Handlebar Mounting Kit

Cigarette Lighter Adapter

Summary of Contents for eTrex Camo - Hiking GPS Receiver

Page 1: ...owner s manual eTrex eTrex Camo personal navigator...

Page 2: ...ument is subject to change without notice Garmin reserves the right to change or improve its products and to make changes in the content without obligation to notify any person or organization of such...

Page 3: ...d since you ll always know the way back home you can concentrate on what you set out to do enjoy the great outdoors Product Registration Help us better support you by completing your online registrati...

Page 4: ...10 REFERENCE 11 41 SKYVIEW PAGE 11 Options 11 ADVANCED SKYVIEW PAGE 12 Options 12 MAP PAGE 13 Options 13 POINTER PAGE 14 Options 14 15 TRIP COMPUTER PAGE 16 Options 16 Trip Computer Data Fields 17 ME...

Page 5: ...re is no guarantee that interference will not occur in a particular installation If this equipment does cause harmful interference to radio or televi sion reception which can be determined by turning...

Page 6: ...NTENDED TO BE USED ONLY AS A NAVIGATIONAL AID AND MUST NOT BE USED FOR ANY PURPOSE REQUIRING PRECISE MEASUREMENT OF DIRECTION DISTANCE LOCATION OR TOPOGRAPHY THIS PRODUCT SHOULD NOT BE USED AS AN AID...

Page 7: ...he eTrex in a place where the driver or passengers are likely to impact it in an accident or collision The mounting hardware provided by Garmin is not warranted against collision damage or the consequ...

Page 8: ...dental or consequential damages so the above limitations may not apply to you Garmin retains the exclusive right to repair or replace the unit or software or offer a full refund of the purchase price...

Page 9: ...ge that the Software is the property of Garmin and is protected under the United States of America copyright laws and international copyright treaties You further acknowledge that the structure organi...

Page 10: ...where prolonged exposure to temperature extremes may occur such as in the trunk of a car as permanent damage may result User information such as waypoints routes etc will be retained in the unit s me...

Page 11: ...stance to your destination and more Other features include WAAS Enabled WAAS enabled for accuracy less than 3 meters 95 typical Waypoints 500 with name and graphic symbol Tracks Automatic Track Log 10...

Page 12: ...uction DOWN Button UP Button ENTER MARK Button Internal GPS Antenna LCD Display with backlight POWER Button PAGE Button External Power and Data Connector Battery Compartment Waterproof Case eTrex Desc...

Page 13: ...mputer data on Pointer Page The ENTER button Con rms data entry or menu selections Displays Options on main pages Press and hold the ENTER button to activate the Mark Waypoint Page The PAGE button Swi...

Page 14: ...attery cover by turning the D ring at the back of the unit 1 4 turn counter clockwise Insert the batteries observing proper polarity Attach the battery cover by turning the D ring 1 4 turn clockwise T...

Page 15: ...hree strong satellite signals to nd your location The SkyView Page shows you a graphic representation of the satellites being tracked and the strength of the satellite signals A status message is disp...

Page 16: ...tion The shorter the signal strength bar the weaker the signal At the top of the page the unit displays the status of the receiver The eTrex displays the message Ready to Navigate when the receiver ha...

Page 17: ...set to automatically rotate the map as you move so that waypoints that are ahead of you are always displayed in front of the animated gure In the upper left corner of the screen the Map Orientation is...

Page 18: ...straight ahead NOTE The eTrex is not a magnetic compass You must be moving in order for the unit to determine your heading By pressing the UP or DOWN buttons you can cycle through the trip information...

Page 19: ...m your maximum speed Max Speed your average moving speed Moving Avg the time you spent moving Time Moving and the time you spent stopped Time Stop You can customize these ve elds to display informatio...

Page 20: ...e To change the time zone 1 Press the PAGE button to switch to the MENU Page Press the UP or DOWN button to highlight SETUP then press ENTER The SETUP Page appears 2 Press the UP or DOWN button to hig...

Page 21: ...ENTER button to activate the MARK WAYPOINT Page The waypoint is assigned a numeric name at the time it is created You could press ENTER and save the waypoint now but for this exercise you will make so...

Page 22: ...ess the UP or DOWN button to highlight the OK eld then press ENTER The MARK WAYPOINT Page appears 4 Press the UP or DOWN button to highlight the OK eld then press ENTER Your loca tion named HOME is no...

Page 23: ...you started using the Pointer Page The arrow shows the direction of the destination waypoint Walk in the direction the arrow is pointing until it points at the Moving Direction Line at the top of the...

Page 24: ...for TracBack navigation on pages 28 30 in the Reference Section To clear the Track Log 1 Press the PAGE button to switch to the MENU Page 2 Press the UP or DOWN button to highlight TRACKS Press ENTER...

Page 25: ...the Contrast Slider then press ENTER to activate the slider 2 Press the UP button to darken the contrast or the DOWN button to lighten the contrast 3 When nished press ENTER to save the setting To se...

Page 26: ...e postion is oriented with North at the top of the display When ORIENT SKY AHEAD is active ORIENT SKY NORTHWARD is displayed on the options menu and vice versa To select Orient Sky Northward or Ahead...

Page 27: ...ages 9 10 use this option to show a Course Line or Bearing Line to your destination A Course Line is xed from your starting location while a Bearing Line changes based on your current location Stop Na...

Page 28: ...have a GOTO or route activated this option is not available To select a Pointer Page option 1 Press the ENTER button on the POINTER Page 2 The Options Menu appears Press the UP or DOWN button highligh...

Page 29: ...on you are currently travelling Bearing the compass direction between your current location and your destination Elevation the measurement of height above mean sea level Location shows your current la...

Page 30: ...NTER 3 Press the UP or DOWN button to highlight one the four elds to change Press ENTER to display the data eld options 4 Press the UP or DOWN button to highlight an option Press ENTER to accept that...

Page 31: ...the distance between second by second position readings Off Course the distance you are off a desired course in either direction left or right Over l Spd Overall Speed the averaged speed since your l...

Page 32: ...RK WAYPOINT Page appears To change the symbol 1 From the MARK WAYPOINT page press the UP or DOWN button and highlight the way point symbol above the waypoint name and press ENTER 2 Press the UP or DOW...

Page 33: ...page press the UP or DOWN button to highlight the LAT LON eld then press ENTER The EDIT LOCATION Page appears 2 Press the UP or DOWN button to highlight the desired letter or digit then press ENTER A...

Page 34: ...highlight NEAREST Press ENTER The NEAREST WAYPOINTS Page appears showing a list of the nine closest way points including their names and distances from your location 2 You can select a waypoint from t...

Page 35: ...n press ENTER The EDIT WAYPOINT NAME Page appears 2 Press the UP or DOWN button to highlight the desired letter then press ENTER A letter selection window appears Press the UP or DOWN button to select...

Page 36: ...eally want to delete the waypoint If you do press the UP or DOWN button to highlight YES then press ENTER 2 If you change your mind and do not want to delete the waypoint press the UP or DOWN button t...

Page 37: ...age option is located at the bottom of the Hunt Fish Page To view the Sun Moon Page 1 On the Hunt Fish Page press the UP or DOWN button and highlight SUN MOON Press the ENTER button to display the Sun...

Page 38: ...P or DOWN button to select the correct number then press ENTER When all numbers are entered correctly highlight OK and press ENTER 6 With the PROJECT WAYPOINT page displayed press the DOWN button to h...

Page 39: ...feature you have to stop and select the next waypoint before you start moving When creating a route you select waypoints from the waypoint list and place them into a route in the sequence that you wa...

Page 40: ...r route You can also plan a route using Garmin MapSource on a PC and upload the route to the eTrex See your Garmin dealer for more information on using MapSource MapSource is an optional accessory and...

Page 41: ...ht ROUTES Press ENTER The ROUTES Page appears Press the UP or DOWN button to select a route then press ENTER 2 Press the UP or DOWN button to highlight the waypoint you want to remove then press ENTER...

Page 42: ...n the display shows 99 the most recent track points will start overwriting the beginning track points in order to avoid losing any track points you should save the Track Log before it reaches 99 of me...

Page 43: ...ed highlight TRACKS and press ENTER The TRACK LOG Page appears 2 Place the highlight on the desired saved Track Log and press ENTER The saved track is displayed on a map At the top of the map is a def...

Page 44: ...ENTER 2 Press the UP or DOWN button to highlight DELETE Press ENTER A con rmation window appears asking DO YOU REALLY WANT TO DELETE THIS TRACK If you do press the UP or DOWN button to highlight YES...

Page 45: ...for recording track points Wrap When Full if you select YES the eTrex will overwrite the beginning track points when the Track Log is full If you select NO the eTrex will stop recording new track poi...

Page 46: ...mat the clock functions like a standard clock with 12 hour AM and 12 hour PM cycles The 24 hour option displays a 24 hour cycle Military Time To change the time format 1 Press the PAGE button and swit...

Page 47: ...or No to remain on standard time To change the daylight savings eld 1 Press the PAGE button and switch to the MENU Page Press the UP or DOWN button to highlight SETUP Press ENTER The SETUP Page appear...

Page 48: ...N button to highlight DISPLAY then press ENTER Press the UP or DOWN button to highlight the CONTRAST icon then press ENTER 3 Press the UP or DOWN button to adjust the contrast then press ENTER Press P...

Page 49: ...ape Every map uses a map datum The map datum is usually listed in the title block of the map If you are comparing GPS coordinates to a paper map or other reference the map datum in the eTrex should ma...

Page 50: ...tton to select the UNITS eld Press ENTER 4 Press the UP or DOWN button to select the desired unit Press ENTER Press PAGE to select the page of your choice North Reference Reference refers to the orien...

Page 51: ...NORTH REF eld Press ENTER 4 Press the UP or DOWN Button to select the desired reference TRUE MAG GRID or USER Press ENTER The desired North Reference is selected 5 Press PAGE to return to the page of...

Page 52: ...nits Page to the factory default settings by highlighting the DEFAULTS eld and pressing ENTER Interface Page The Interface Page allows you to connect and use devices such as computers and differen tia...

Page 53: ...m the Beacon pop up list to manually tune the receiver you can also scan if you don t know what the nearby station is but the unit could continue scanning if reception is temporarily lost To select an...

Page 54: ...esigned to demonstrate the features and functions of the eTrex inside a closed building where satellite reception is not possible There is no navigation possible in DEMO mode but you can simulate many...

Page 55: ...ld Press ENTER 4 Press the UP or DOWN button to highlight the desired selection Press ENTER Software Version The Software Page shows the eTrex s current software version To update the eTrex s software...

Page 56: ...PC interface Antenna Built In Power Input Two 1 5 volt AA batteries4 Battery Life Up to 16 hours of typical use Speci cations subject to change without notice 1 Subject to accuracy degradation to 100...

Page 57: ...iver to indicate which satellite s we are receiving Ephemeris data contains important information such as satellite status healthy or unhealthy and the current date and time The almanac data tells the...

Page 58: ...her when viewing the sky view on your eTrex Initial recep tion of the WAAS signal may take up to 15 20 minutes then 1 2 minutes afterwards When WAAS differential correction has been received for GPS s...

Page 59: ...have been funded by U S taxpayers dollars Reception of GPS satellite signals is free to everyone Does the eTrex work anywhere in the world and in any weather Yes How accurate is a Garmin GPS The eTre...

Page 60: ...ndle bars Cables Cigarette Lighter Adapter Part No 010 10203 00 Provides power for eTrex from a automobile cigarette lighter PC Interface Cable Part No 010 10206 00 Allows for serial transfer of data...

Page 61: ...0 MapSource Map Data CD ROMs An excellent tool for creating waypoints and routes on your PC using a background map and downloading them to your eTrex Included with unit NOTE The Cigarette Lighter Adap...

Page 62: ...IB beacon receiver control DGPS Differential GPS corrections are accepted in RTCM SC 104 version 2 0 format through the Data In line The Garmin GBR 21 is the recommended beacon receiver for use with t...

Page 63: ...ton to highlight NO Press ENTER 3 eTrex asks IS TODAY dd mmm yy If you answer YES the date matches the current date the unit will continue tracking satellites and switch to the Satellite Page 4 If you...

Page 64: ...Computer 17 Daylight Savings Time 33 Defaults 16 38 41 Delete Waypoint 20 21 22 Deleting a Route 27 Deleting a Saved Track 30 Demo Mode 40 Destination Final 17 Next 17 Disable Enable WAAS 44 Display...

Page 65: ...nce 36 37 O Odometer 5 15 17 Trip 17 Off Course 17 Orient Map 13 Orient Sky 12 Overall Speed 17 P Pointer Page 4 9 14 15 Position Format 35 Product Registration i Projecting a Waypoint 24 R Reception...

Page 66: ...k Log 3 10 28 Track Page Options 30 Track Setup 31 Trip Computer 5 16 17 ix Trip Time 15 17 True North 36 Turn 17 U Units 36 Units Page 34 35 36 38 User De ned Grid 37 UTC Offset 33 V Variance 37 Vert...

Page 67: ......
Page 68: ...armin com Copyright 2004 Garmin Ltd or its subsidiaries Garmin International Inc 1200 East 151st Street Olathe Kansas 66062 U S A Garmin Europe Ltd Unit 5 The Quadrangle Abbey Park Industrial Estate R...

Reviews: