


Dog Device Battery Replacement Instructions
T5 Components
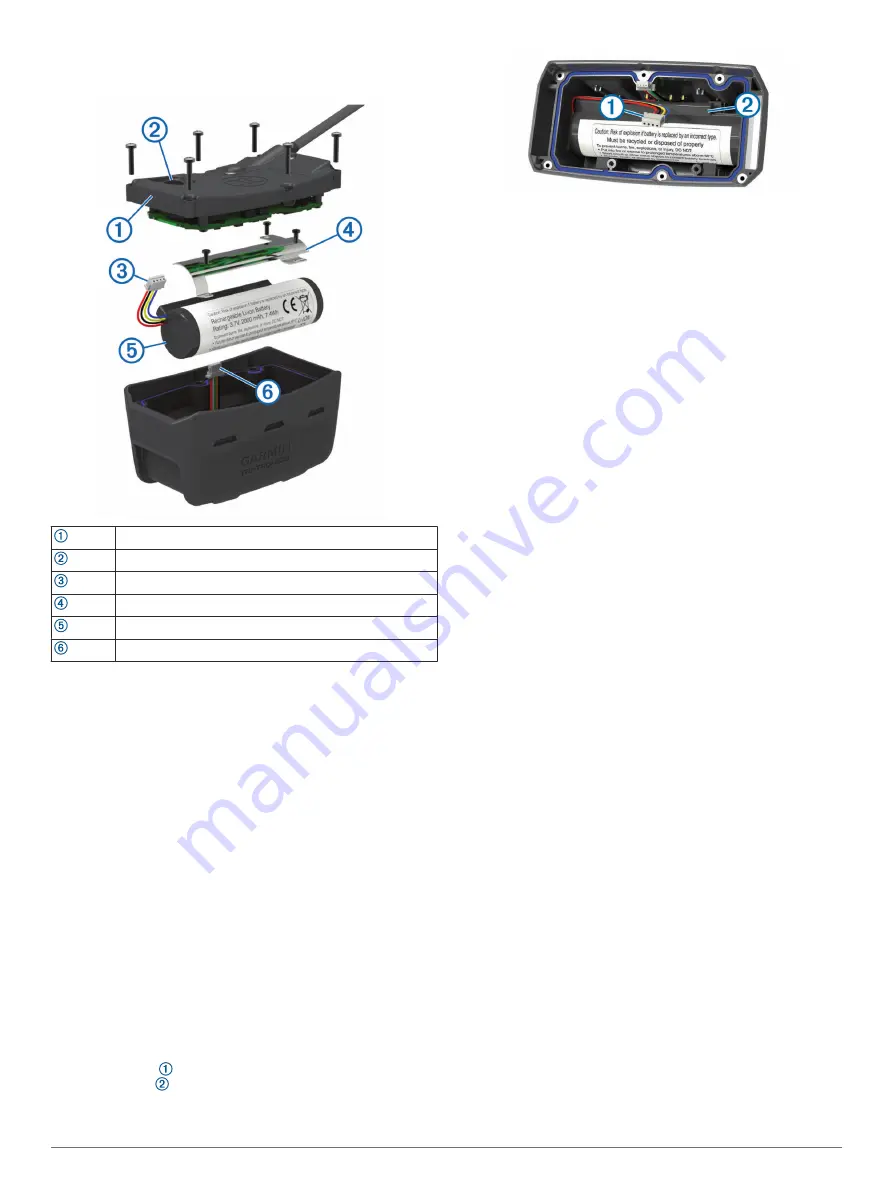
Back plate
Power key
Battery connector
Battery cover
Battery
Power connector
Removing the Old Battery
Before you replace the battery, you must remove all dirt, water,
and debris from the device. You must also have a small Phillips
screwdriver.
1
Remove the six screws from the outer edges of the back
plate.
NOTE:
You should leave the two inner screws in place.
2
Pry off the back plate.
3
Disconnect the battery connector and power connector.
4
Remove the screws that secure the battery cover.
5
Remove the battery cover and the battery.
Remember the orientation of the battery. You must install the
new battery the same way.
After you remove the old battery, contact your local waste
disposal department to properly recycle the battery.
Installing the New Battery
Before you replace the battery, you must remove the old battery
(
). You also must have a
small Phillips screwdriver. You may need a small flat
screwdriver.
1
Install the new battery using the same orientation as the old
battery.
The connector should face the end nearest the power key,
and the bump where the wires connect to the battery
should face toward the side with the charging clip contacts.
2
Replace the battery cover.
3
Replace the screws to secure the battery cover.
4
Connect the battery connector and power connector.
You may need to use a flat screwdriver to help secure the
connectors.
5
Select the power key to test the connections.
When properly connected, a tone is emitted and the status
LED blinks green.
6
Turn off the device.
7
Verify the gasket located inside the bottom cover is fully
seated.
8
Replace the back plate.
9
Replace the six screws to secure the back plate.
After you install the new battery, charge the collar completely.
Replacing the T5 mini Dog Collar Device Battery
Before you can replace the battery, you must remove all dirt,
water, and debris from the device. You also need a small
Phillips screwdriver and the security screwdriver included in the
battery replacement kit.
1
Remove the screws from the L-shaped cover over the VHF
antenna.
2
Pry off the L-shaped cover.
3
Remove the screws from the outer edges of the back plate.
4
Pry off the back plate.
5
Grip the battery connector wires close to the connector, and
pull the connector perpendicular to the circuit board to
disconnect the battery connector from the device.
6
Grip the power connector wires close to the connector, and
pull the connector parallel to the circuit board to disconnect
the power connecter from the device.
7
Remove the screws from the battery plate.
8
Remove the battery plate.
9
Remove the battery.
The battery fits tightly. It may be necessary to pry the battery
out of the back plate using a non-sharp, non-metal object.
10
Install the new battery into the front enclosure with the label
side of the battery facing up, and the leading edge of the
battery placed under the charging contact ledge of the
device.
11
Replace the battery plate, and replace and tighten the two
screws.
14
Appendix


